Unleashing the Power of the Sun: An Innovative Solar Panel Tracker Project
5 comments
Now I'm sharing my project which I have done at a technical festival of my college and got the second position in the event of my college,
My project was a Solar Panel Tracker and an LED String Lamp both project I have done in November and at this time I am sharing them on the Stemgeeks platform,
No, I will tell a brief description of both projects,

Solar Panel Tracker
It was a high-intensity sensitive light project because its tracks the maximum intensity of light and moves the solar panel towards it.
That is the only reason the name of this project is solar panel tracker sun is the biggest energy source in whole the world nothing exists till now the maximum energy source compared with the sun so Max of the energy is wasted in the form of heat and the form of light of the sun so the main motto of this project to consume maximum energy of sunlight and convert into electricity.
In previous times solar panels are placed in a fixed position that is the rear panel cannot convert maximum energy during the day in the form of electricity.
About this Project
This project is working off a sensor which is LDR it's senses the maximum light option and moved towards the sun the whole day on the face of solar panels so it can get the maximum intensity of light and it can convert maximum energy into the form of electrical energy
Components Used in this Project
- Servo Motor
- LDR (Light Dependent Resistor)
- Resistor
- Arduino Uno Board
- Jumping Wire
- Bread Board
- PCB (Printed Circuit Board)
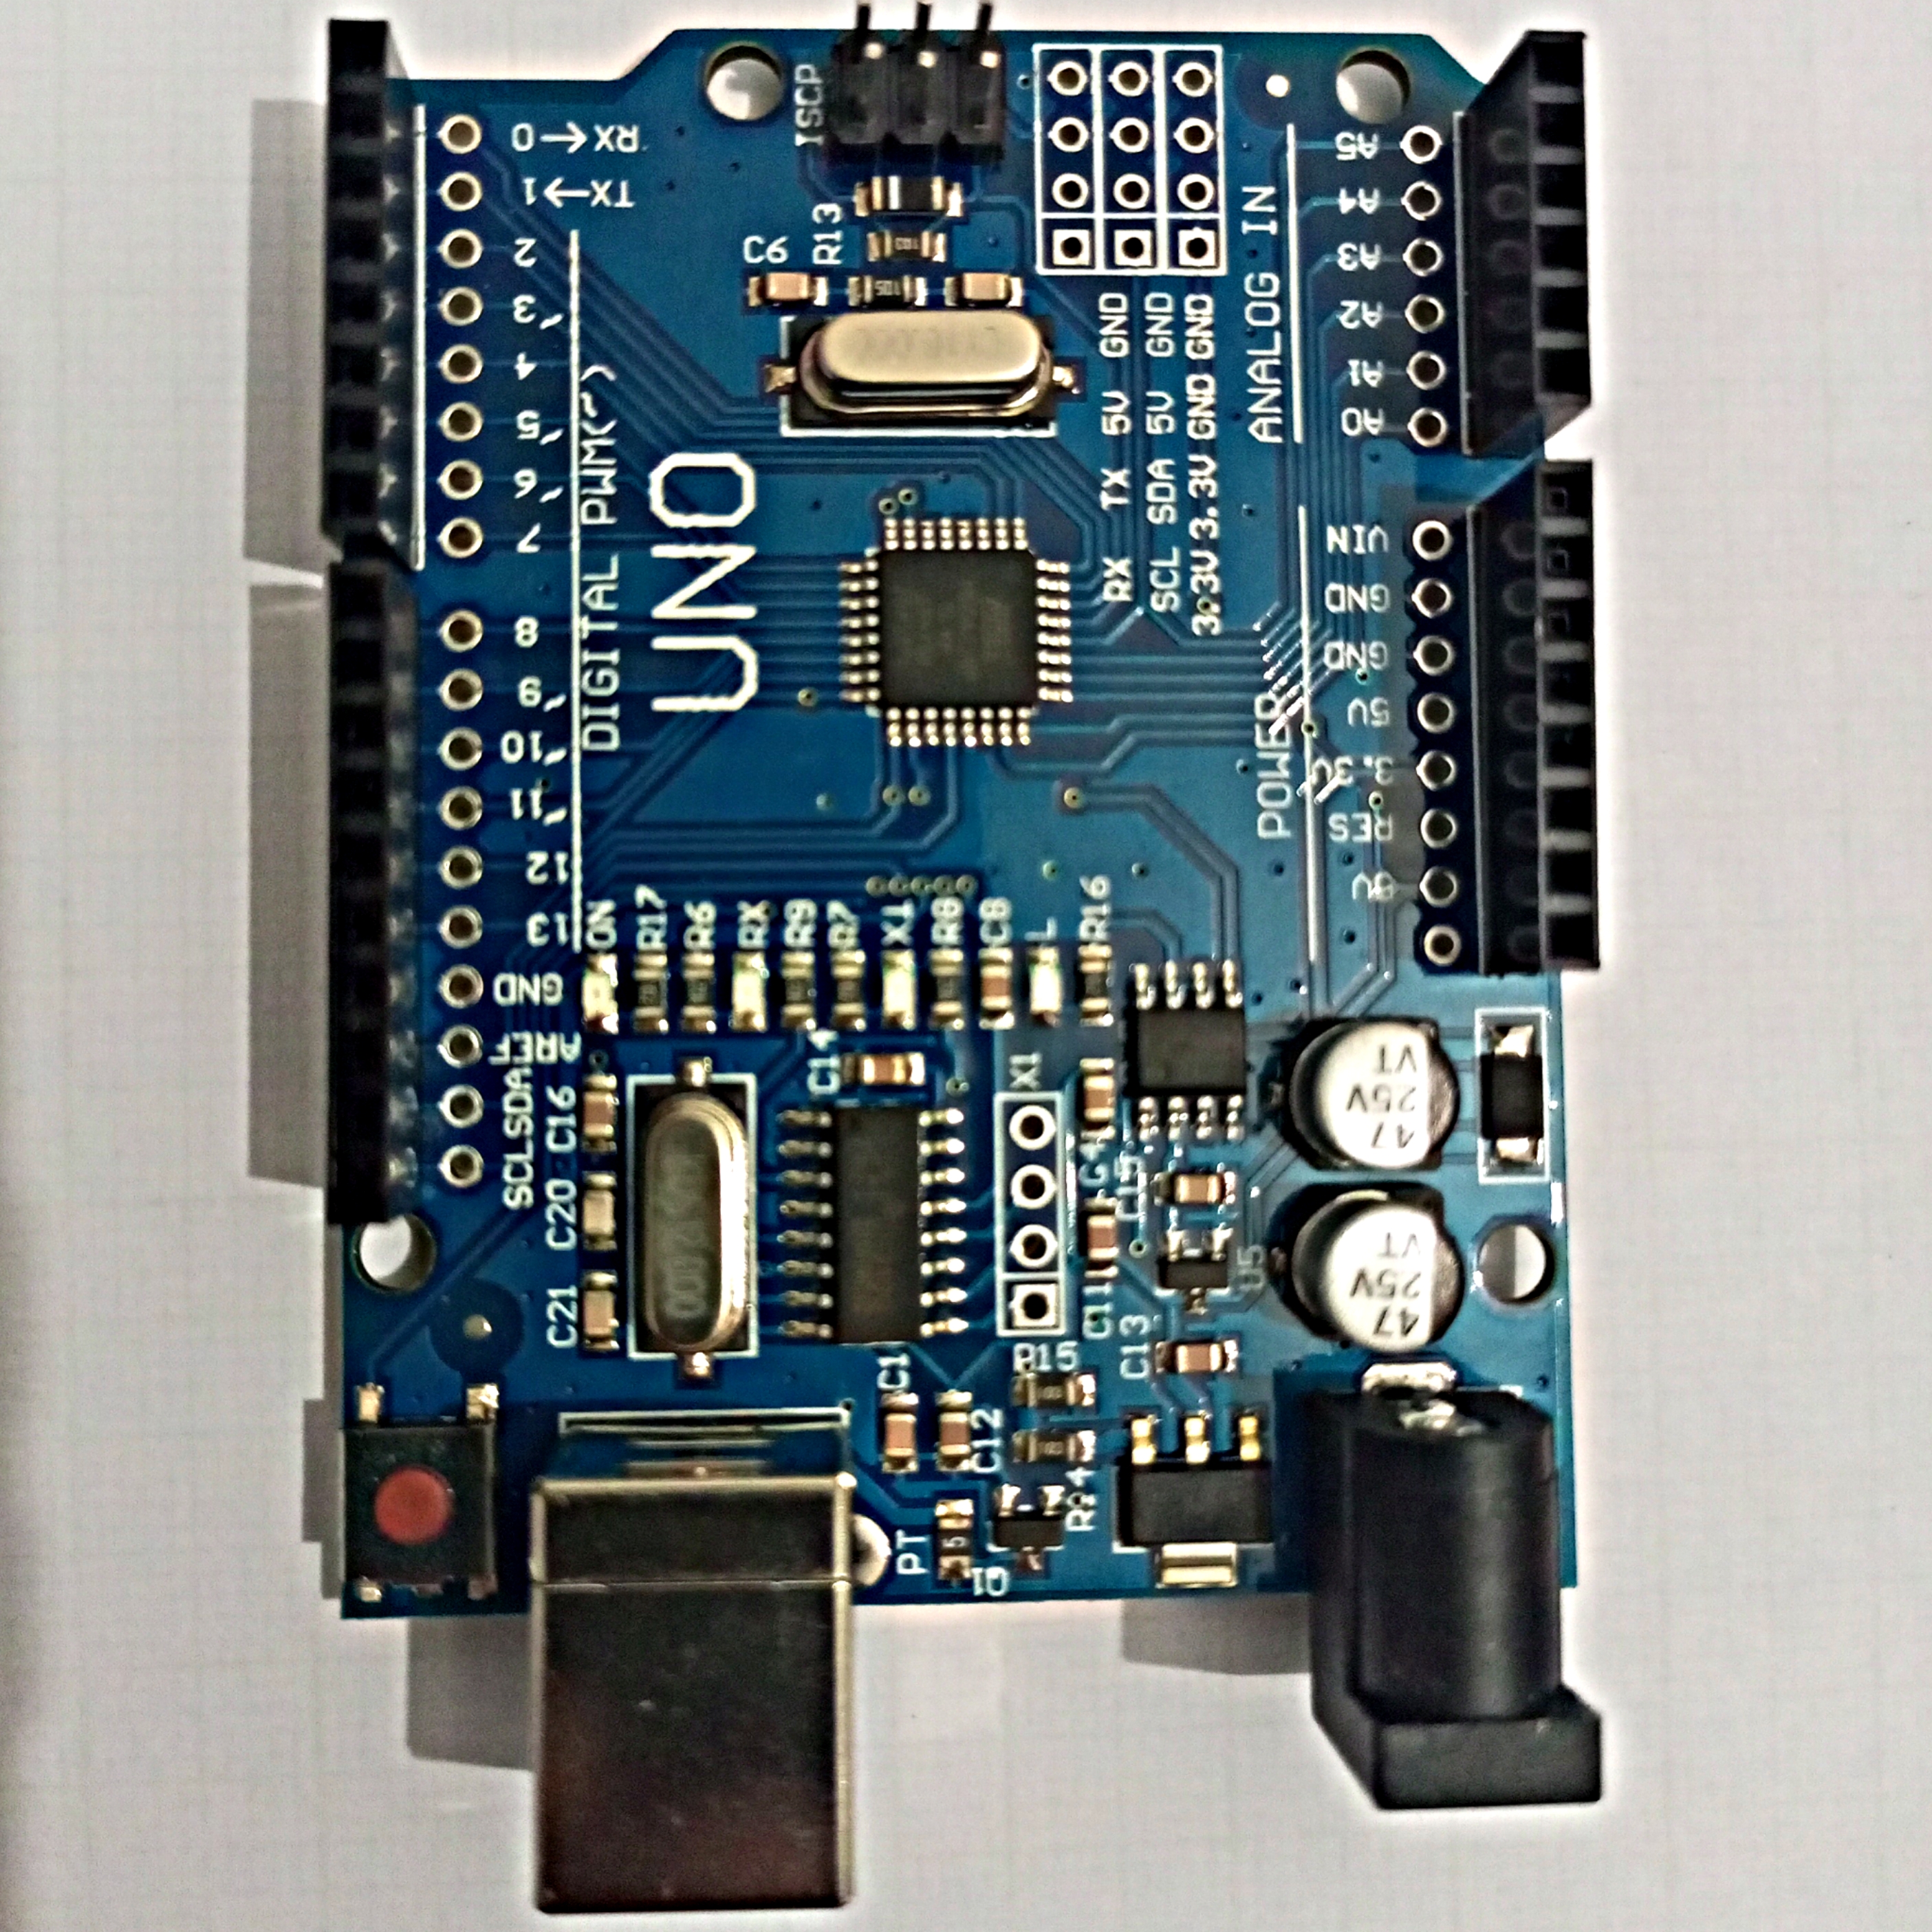
Arduino Uno Board
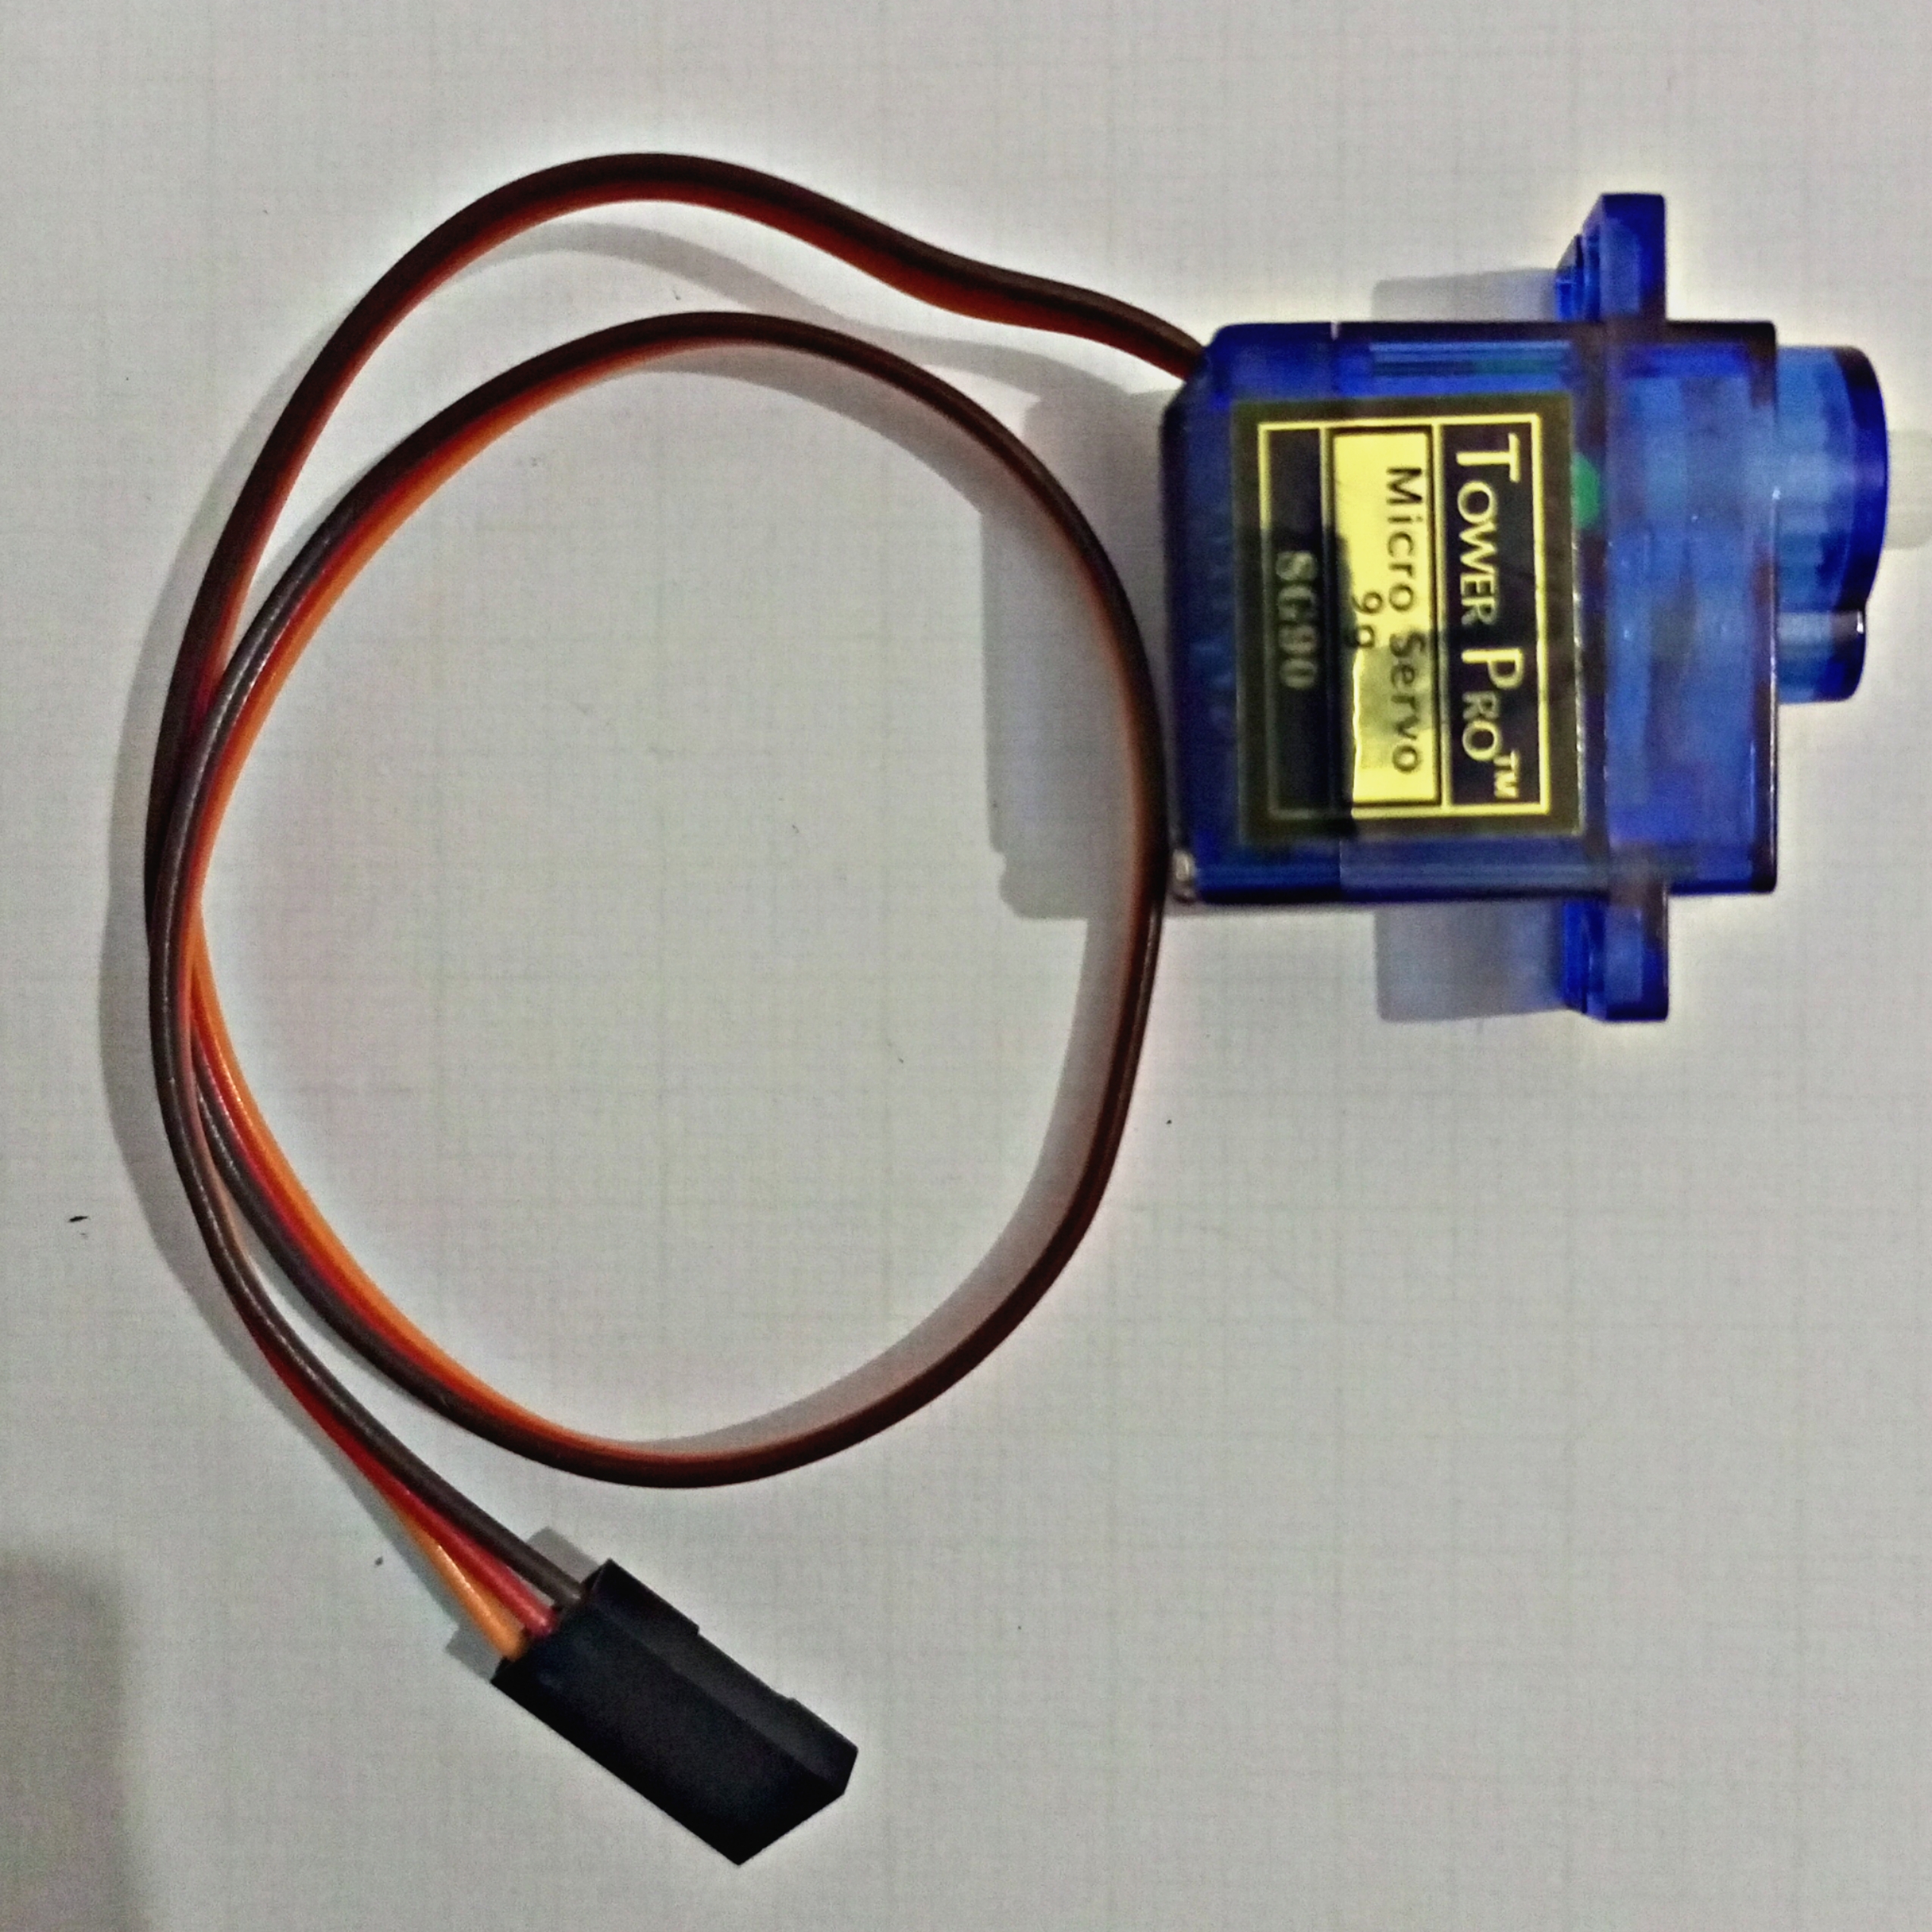
Servo Motor
LDR (Light Dependent Resistor)

Software Used in this Project

Other Components
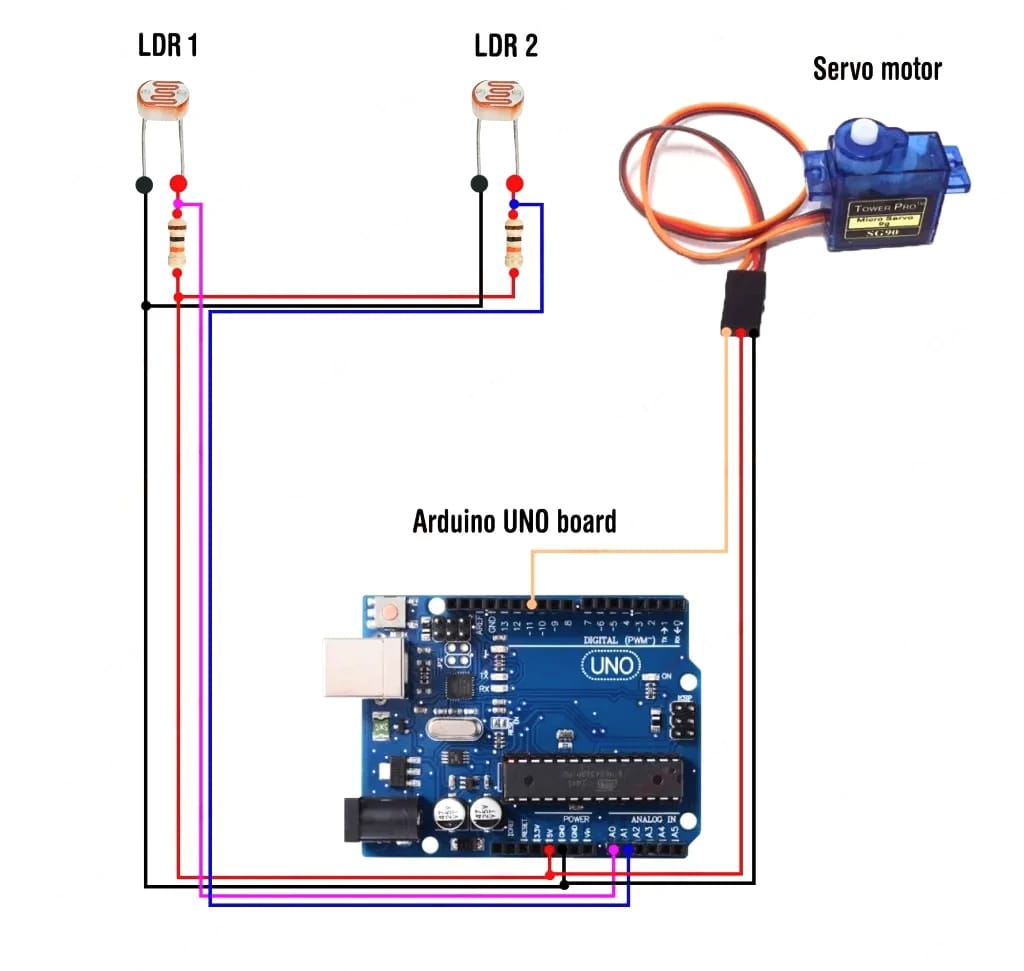
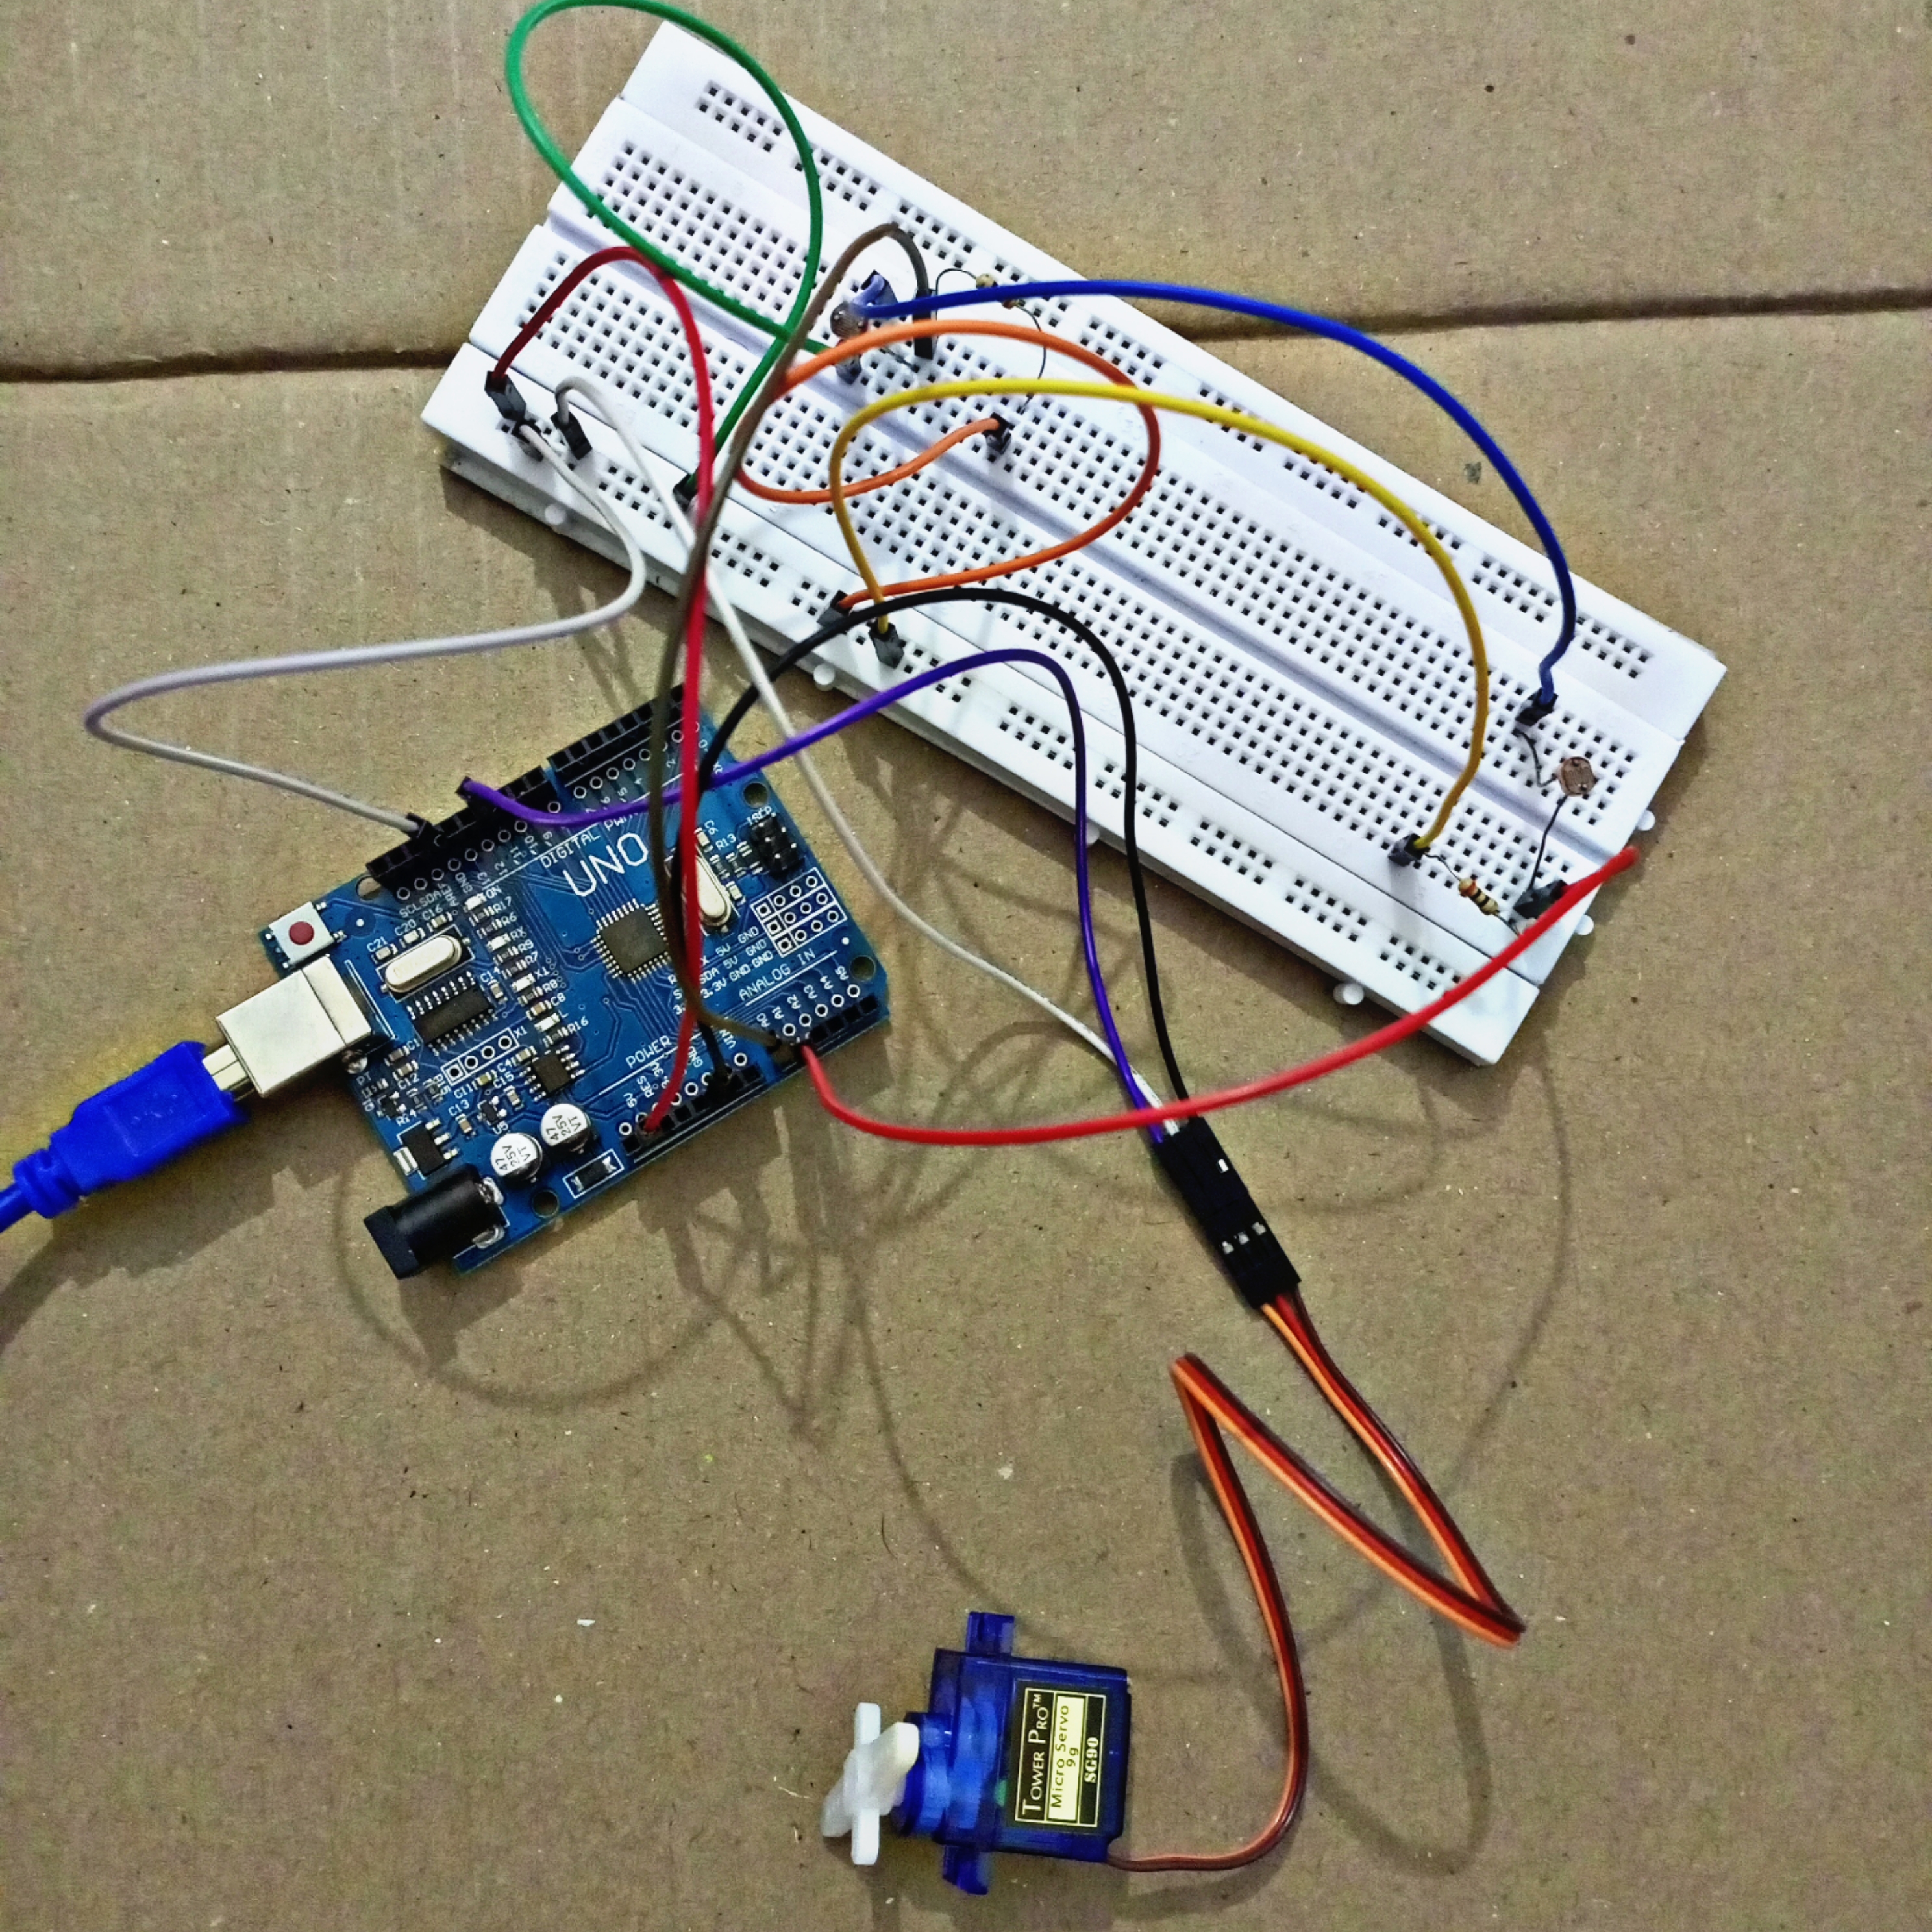
And we are using a jumper wire to connect the circuit servo Motor and Arduino and to plot everything on a board we are using a printed circuit board which is also called PCB and to control the current where using some registered across the LDR to understand and making a rough circuit we are using a breadboard.
Circuit Diagram
Program of this Project.
//Include the servo motor library
#include <Servo.h>
//Define the LDR sensor pins
#define LDR1 A0
#define LDR2 A1
//Define the error value. You can change it as you like
#define error 10
//Starting point of the servo motor
int Spoint =  90;
//Create an object for the servo motor
Servo servo;

void setup() {
//Include servo motor PWM pin
  servo.attach(11);
//Set the starting point of the servo
  servo.write(Spoint);
  delay(1000);
}

void loop() {
//Get the LDR sensor value
  int ldr1 = analogRead(LDR1);
//Get the LDR sensor value
  int ldr2 = analogRead(LDR2);

//Get the difference of these values
  int value1 = abs(ldr1 - ldr2);
  int value2 = abs(ldr2 - ldr1);

//Check these values using a IF condition
  if ((value1 <= error) || (value2 <= error)) {

  } else {
    if (ldr1 > ldr2) {
      Spoint = --Spoint;
    }
    if (ldr1 < ldr2) {
      Spoint = ++Spoint;
    }
  }
//Write values on the servo motor
  servo.write(Spoint);
  delay(80);
}
Conclusion
At first, we have lots of difficulties making it because I I don't know how to do this project but by searching on Google and reading lots of articles and we are successful to make it and finally, we got a second ranking in the event of our college to organize every year technical event which students are participating and learning a lot it was also my first time to learn this type of thing we are working on this project about a week and got it to build some project like this we did two projects but I am posting only one project another one I will post in my upcoming article.
Thanking all of you.
Posted with STEMGeeks

Comments