DETAILED EXPLANATION OF HOW TO MAKE AN AUTOMATED WIRELESS SMART SOAP / LIQUID DISPENSER USING ARDUINO | IR PROXIMITY SENSOR | SERVO MOTOR
2 comments
The need for smart devices is growing rapidly as they make life easier and smarter for their users. I'm @techlhab and today I would be sharing with us how to make is DIY Automated Smart Soap or Liquid Dispenser using Arduino Uno microcontroller, IR Proximity Sensor, and Servo Motor as the major hardware components which don't require to be touched before it dispenses the liquid or soap put in it. Its kinds were highly utilized during the pandemic to prevent the spread of the virus. While the software components are; the Arduino IDE, Embedded C/C++ programming language, and fritzing for circuit design and simulation.

- Arduino Uno
- Servo Motor
- IR Proximity Sensor
- Arduino IDE (Integrated Development Environment)
- Embedded C/C++
- Fritzing
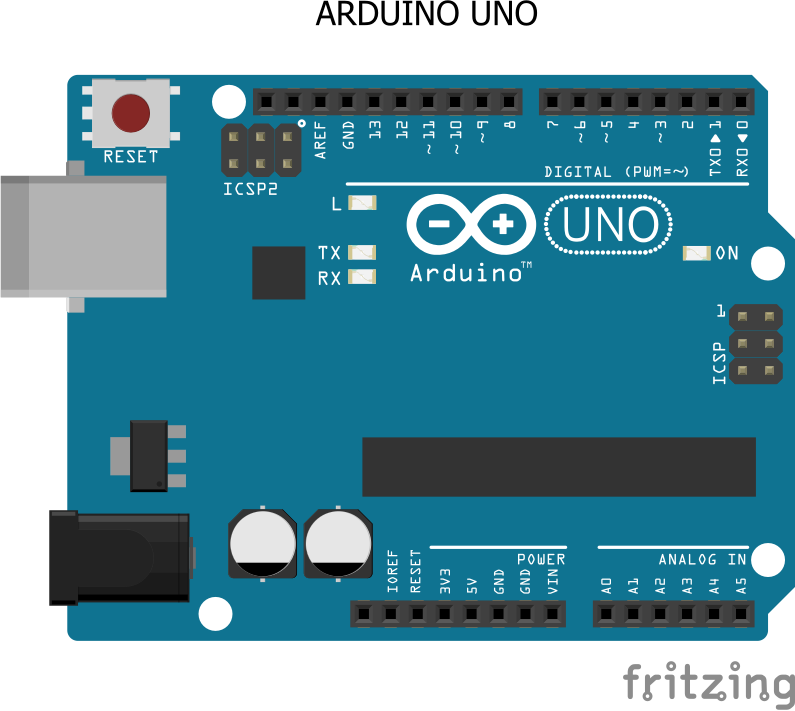
The Arduino Uno is a popular open-source microcontroller that uses the ATMEGA328P PIC (Programmable Integrated Circuit) chip developed by Arduino.cc. It has 14 digital I/O (Input / Output) pins and 6 analog I/O pins.
In this project, that is the stopwatch, the Arduino Uno microcontroller serves as the brain of the device, with which other components connected to it sends and receives instructions to and from respectively based on the code or instructions programmed to the microcontroller.
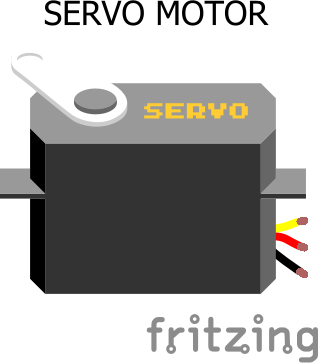
It is a micro motor that converts electrical signals to produce rotary effects, with which the speed, angular or linear position, velocity and acceleration can be controlled precisely with a microcontroller like the arduino uno.
In this project or tutorial, the servo motor is used in opening and closing the top lid of the liquid or soap dispenser.
It has 3 pins which are:
- Vcc
- Gnd
- Signal
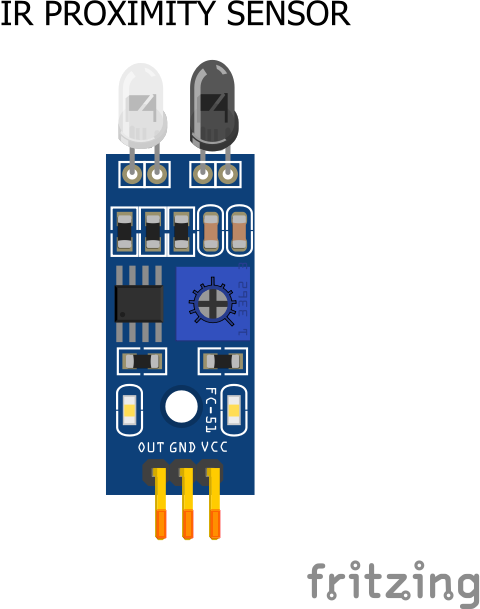
The IR (Infrared) Proximity Sensor as an IR transmitter and a IR receiver on it which it uses to detect objects and obstructions in front of it as the IR transmitter keeps on transmitting infrared light and any object obstructs the transmitted light it reflects the light to the IR receiver which is how the sensor is been able to detect or monitor objects and obstacles.
So when the sensor detects objects or obstacles it sends the information to the Arduino Uno which then instructs the servo motor to dispense the liquid or soap in the dispenser.
It also has 3 pins which are:
- Vcc
- Gnd
- Out
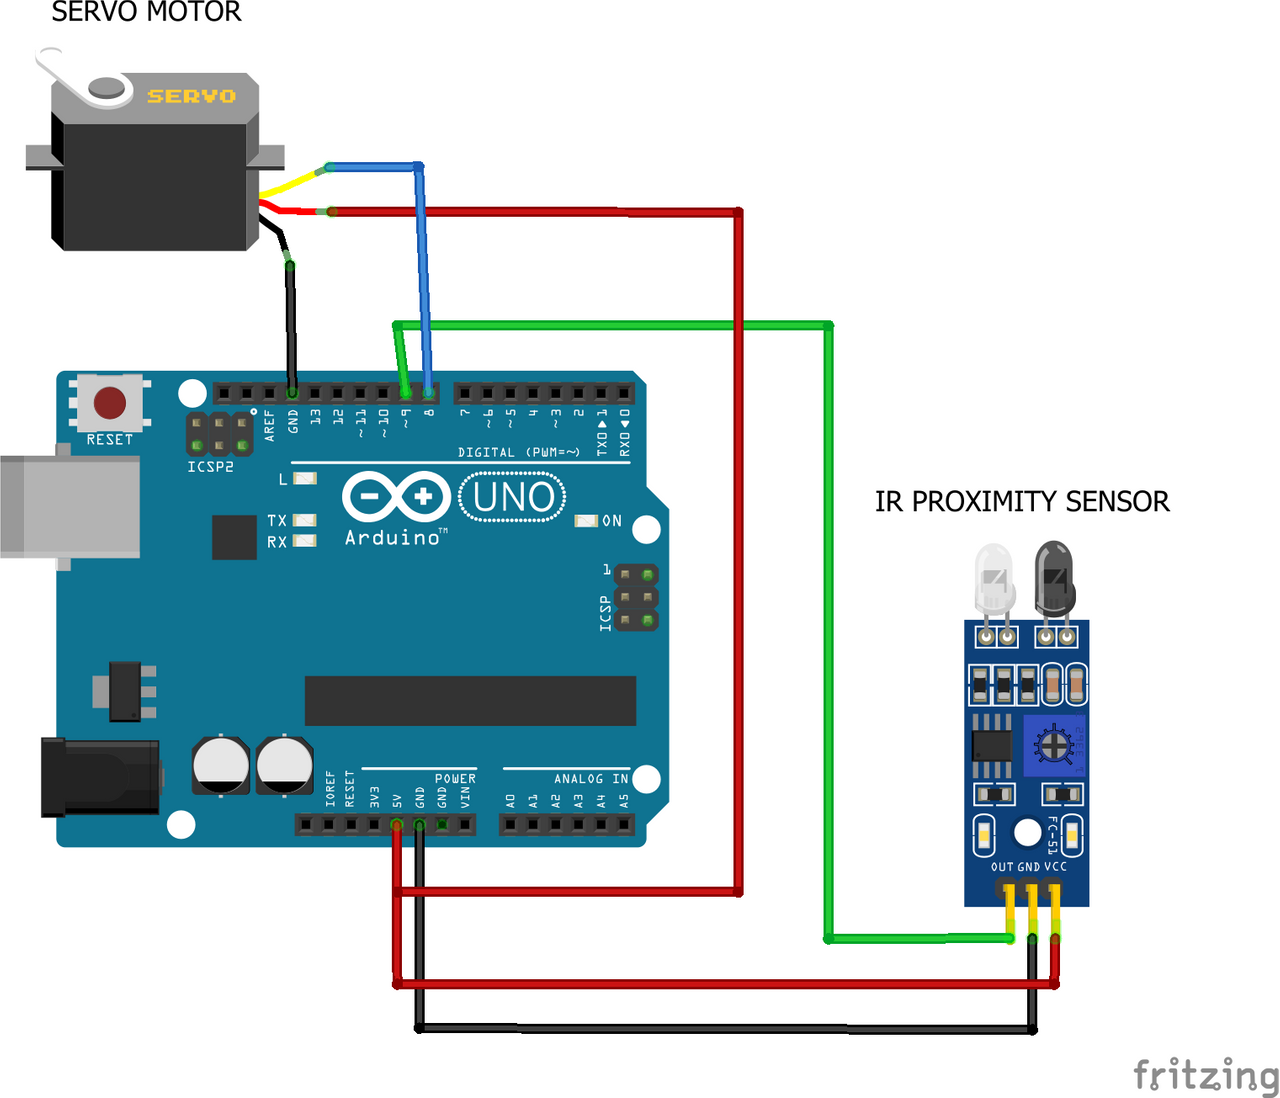
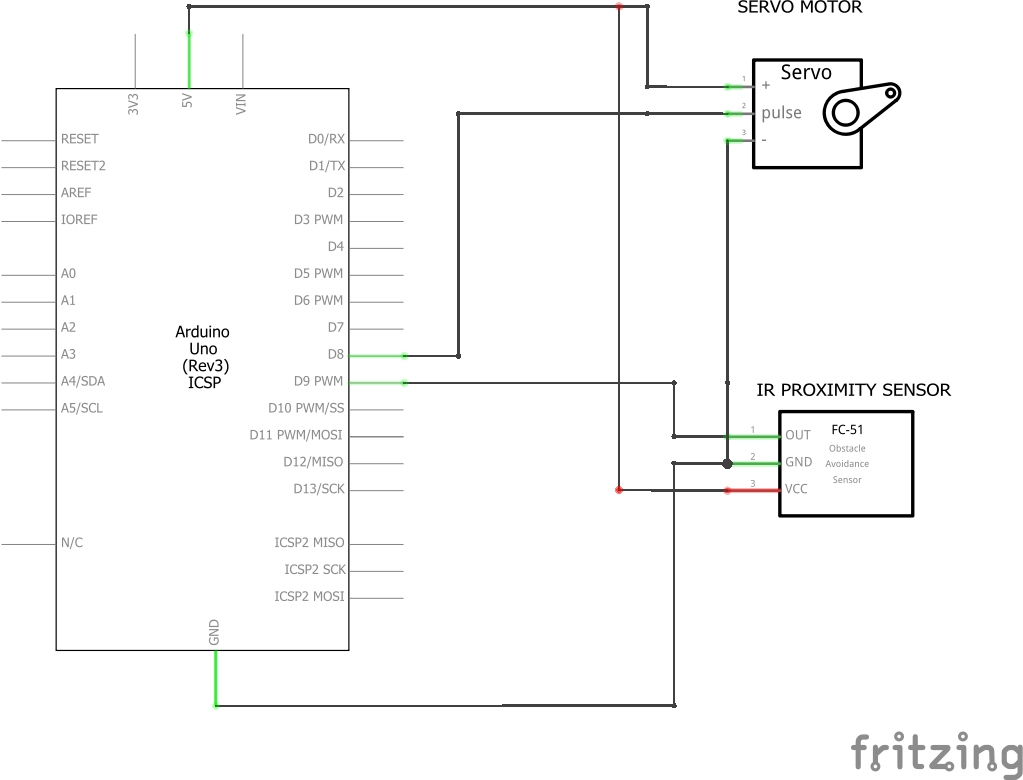
- Conneting the IR Proximity Sensor to the Arduino Uno
| Arduino Uno | IR Proximity Sensor | |
|---|---|---|
| 1 | 5v | Vcc |
| 2 | Gnd | Gnd |
| 3 | D9 | Output |
- Connecting the Servo Motor to the Arduino Uno
| Arduino Uno | Servo Motor | |
|---|---|---|
| 1 | 5v | Vcc |
| 2 | Gnd | Gnd |
| 3 | D8 | Signal |
#include <Servo.h>
Servo myservo;
int pos;
int Signal = 8;
void setup()
{
  pinMode(Signal, INPUT);
  myservo.attach(9);
}
void loop() {
  int buttonState = digitalRead(Signal);
  delay(1);
if (buttonState == 0)
    {
  for ( ;pos >= 40; pos -= 1)
   {
    myservo.write(pos);
    delay(15);
   }
    }
else
    {
  for ( ;pos <= 80; pos += 1)
  {
    myservo.write(pos);
    delay(5);
   }
    }
}
Thanks for reading and visiting my blog 🤝. Kindly support this post by reblogging, upvoting, and commenting, it would be highly appreciated.
Images used in this post were all designed by me using frizting, a circuit design and simulation software, and canva.
Posted with STEMGeeks

Comments