Tutorial remove screen samsung a11 / Tutorial quitar pantalla samsung a11
7 comments
content sources
.deepl translation
gift:
facebook logo
instagram logo
logo beehive
logo zone of the week
English
Hello friends of hive and friends of geek zone, how are you? I hope you are all well, everyone is enjoying every day of your best days because everything is going great.
I want to tell you something that happened to me in the workshop. Here came a phone that came because the customer wanted to simply change the screen, it was a Samsung Galaxy a11 So I was excited because I wanted to earn that money, I said yes, of course yes And also I know how to change it And of course I did that job, I recorded all the work for you to see it and I took pictures so you could see yes.

However, much later I ran into something, when I have removed the screen from the phone I realize that it is a very new model and here in my country Venezuela the 3/4 for that phone has not arrived, only for older phones So unfortunately I could not complete the job. So I disassembled and assembled the screen, however, I want to bring to each of you the step by step of how I changed the screen of this device.
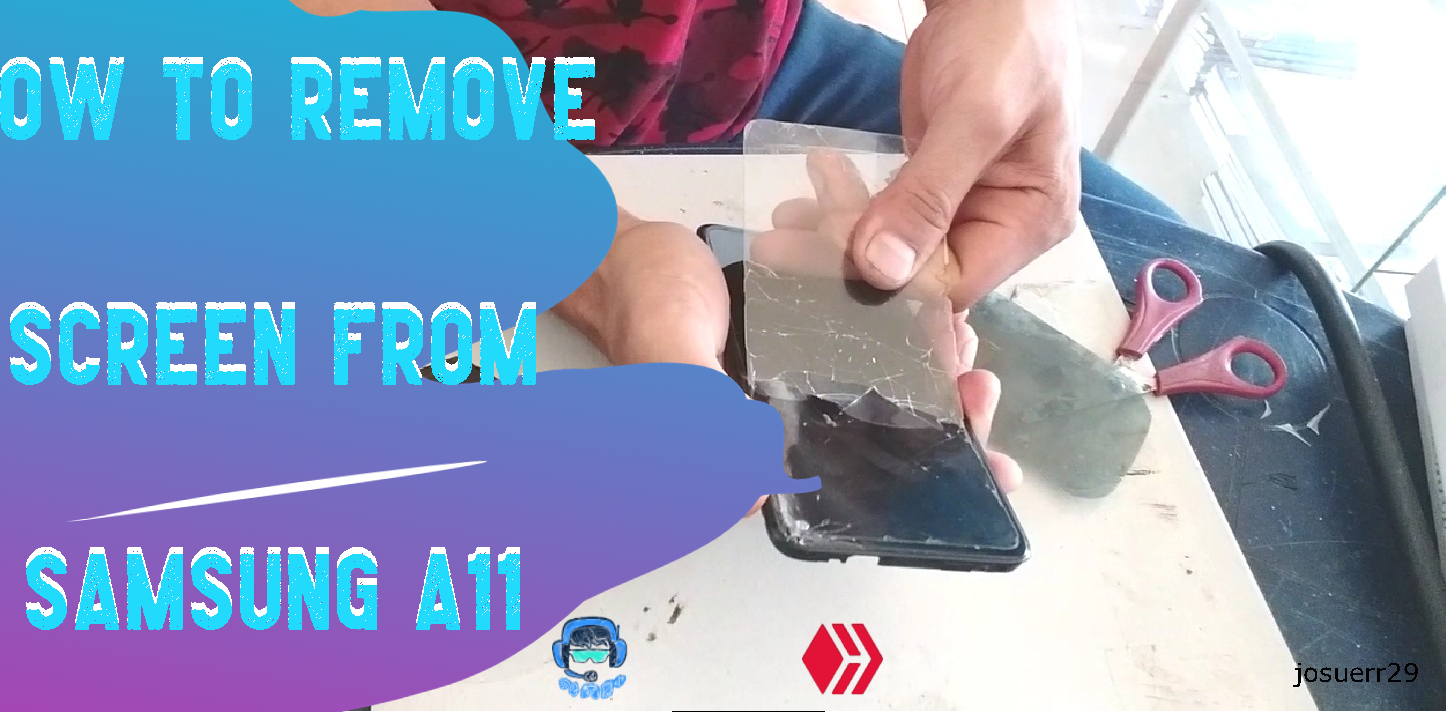
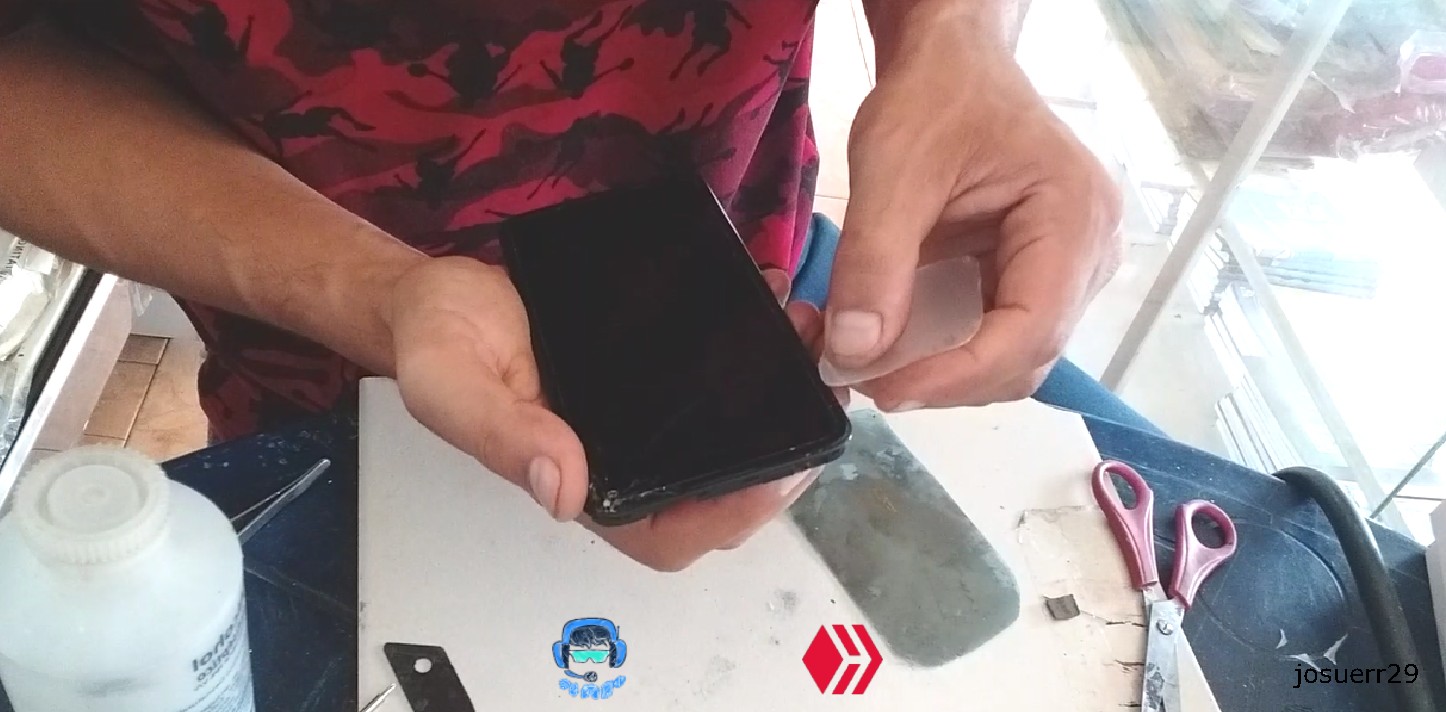
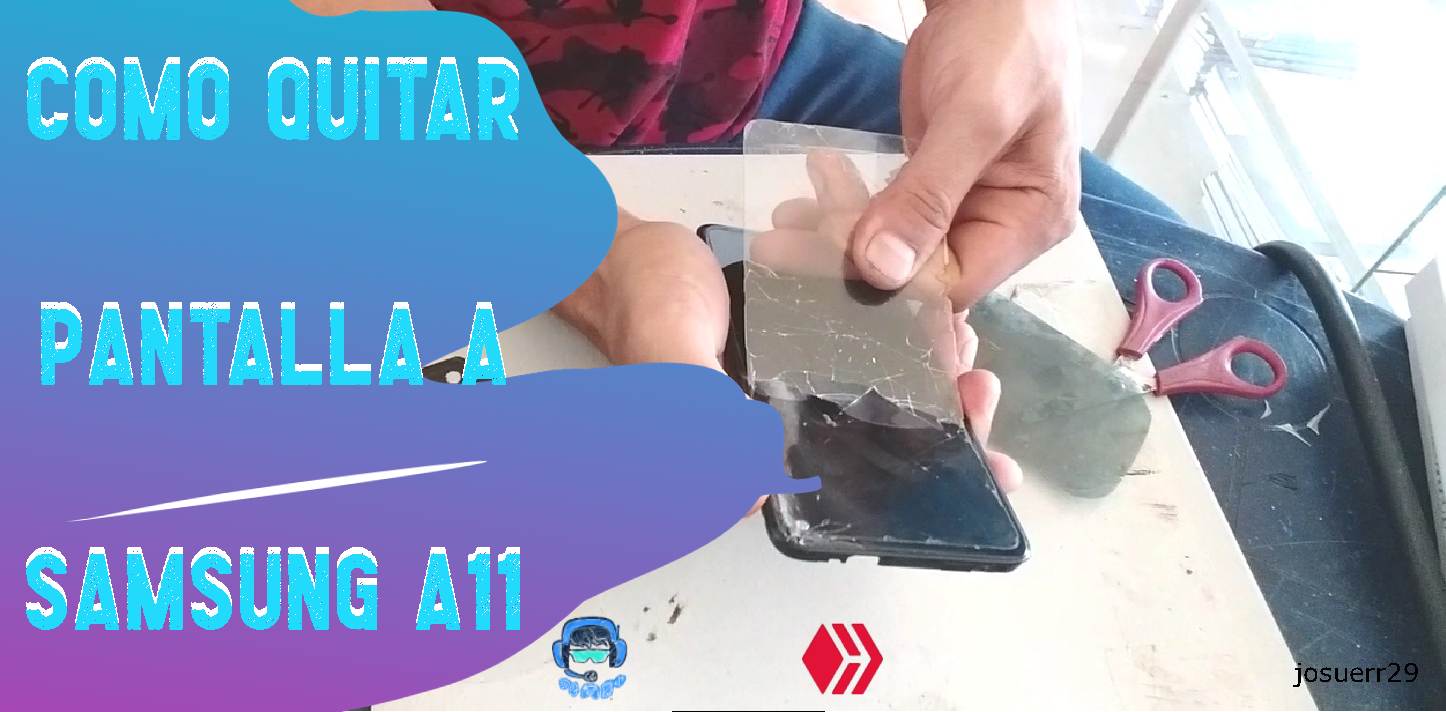
To begin with I had to remove the tempered glass of the device, as this tempered glass could obstruct the heat that I had to put on the screen and thus prevent me from removing it more easily. So with an x-ray plate spatula I started to pass it between the tempered glass and the phone in order to separate the tempered glass from the device.
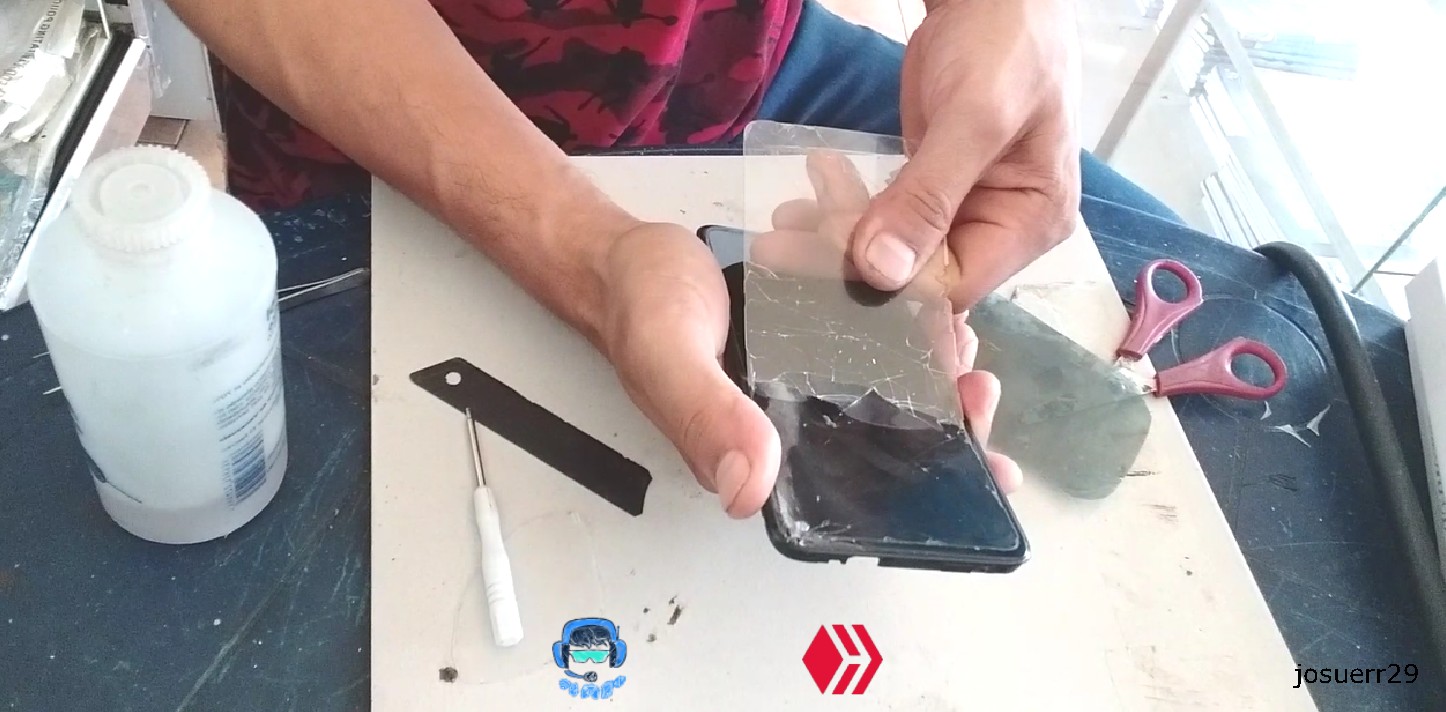
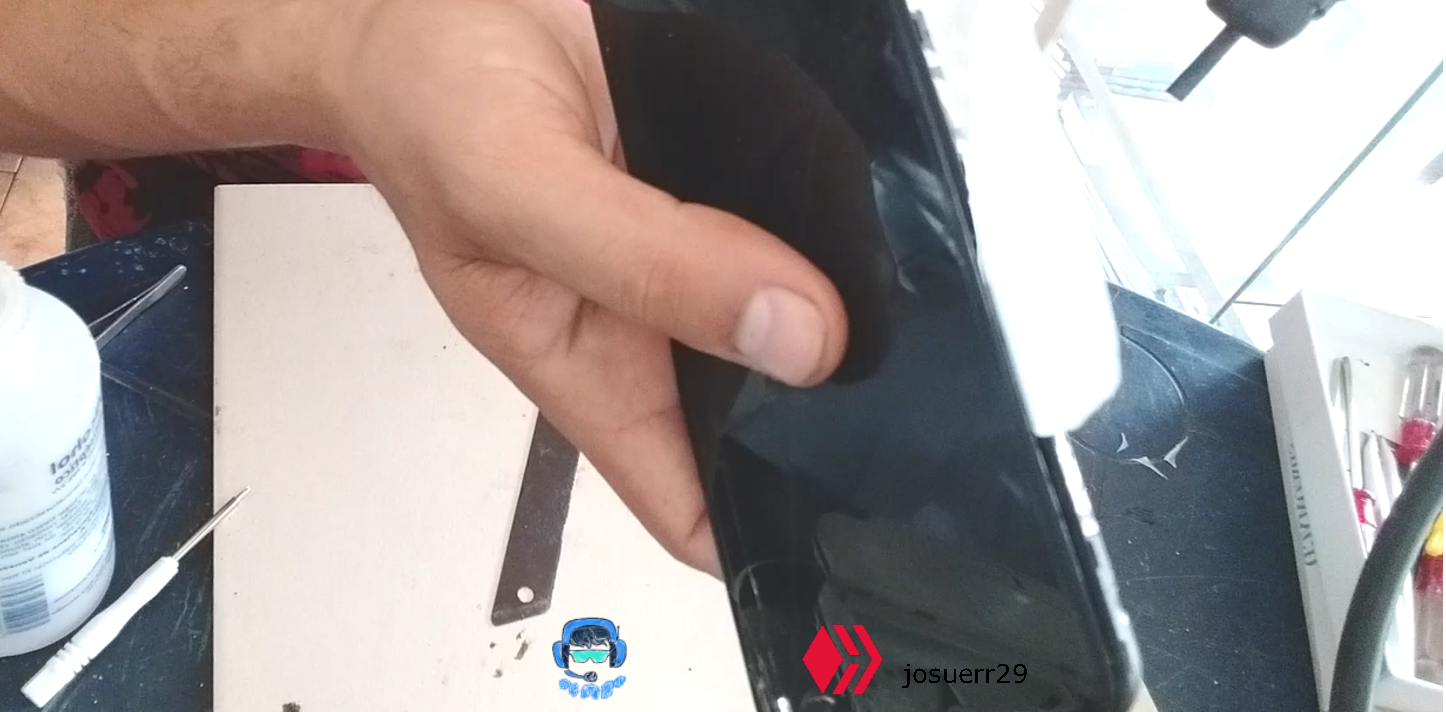
After this I have to lift the tempered glass very carefully, because this tempered glass breaks very easily and if one of these breaks coincides with a breakage of the middle of the device it could simply break it completely, this is in case the 3/4 is totally good.
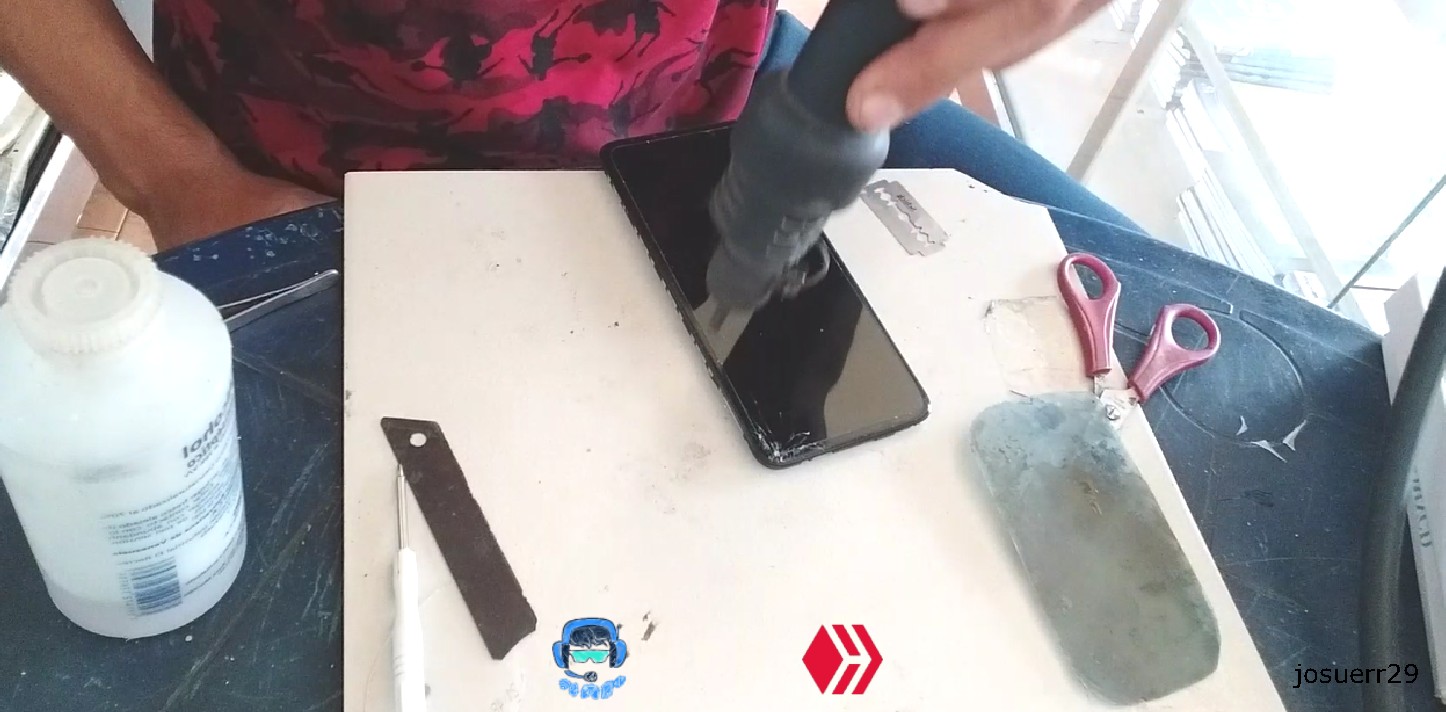
After this, if I can freely heat the unit, I set the steam station to 300 degrees and put as much air as possible to the compressor so it can heat up the mica enough to loosen some of the glue it has between it and the 34 and the bevel.
.jpg)
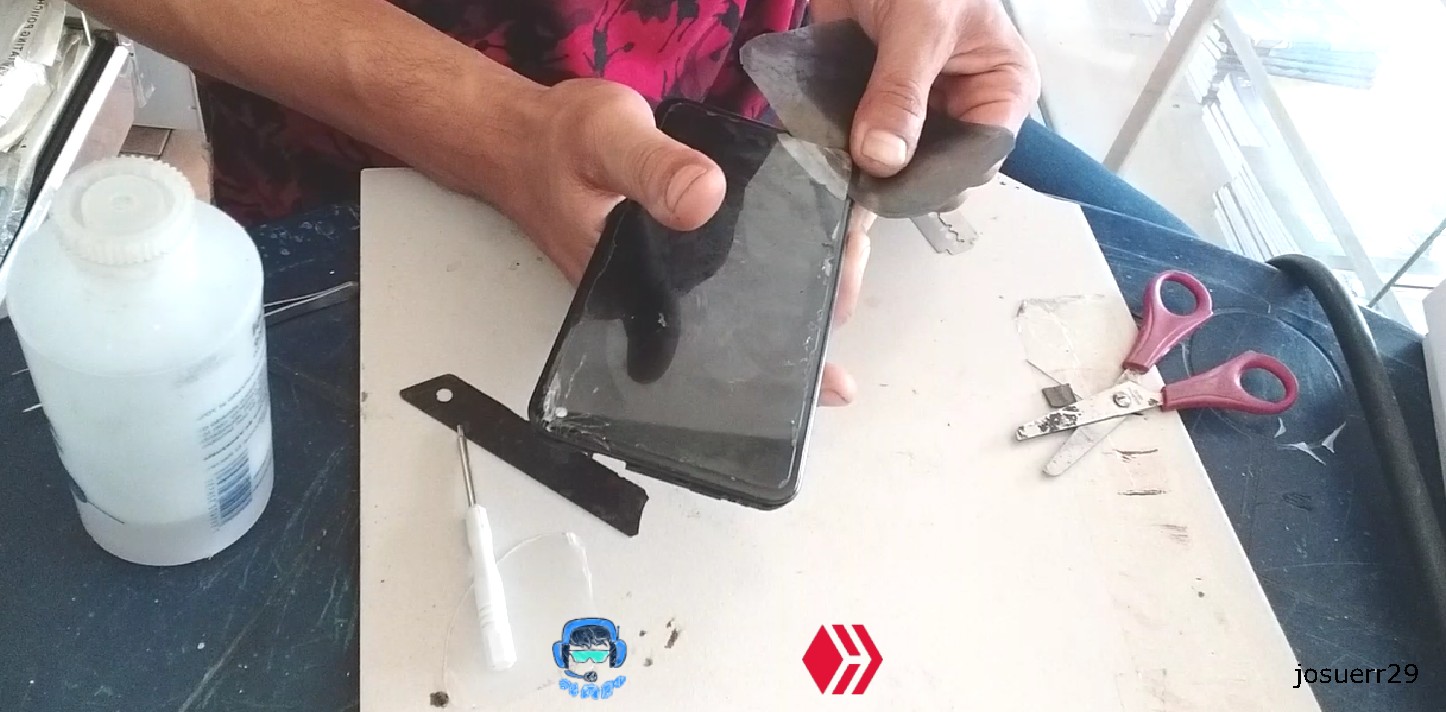
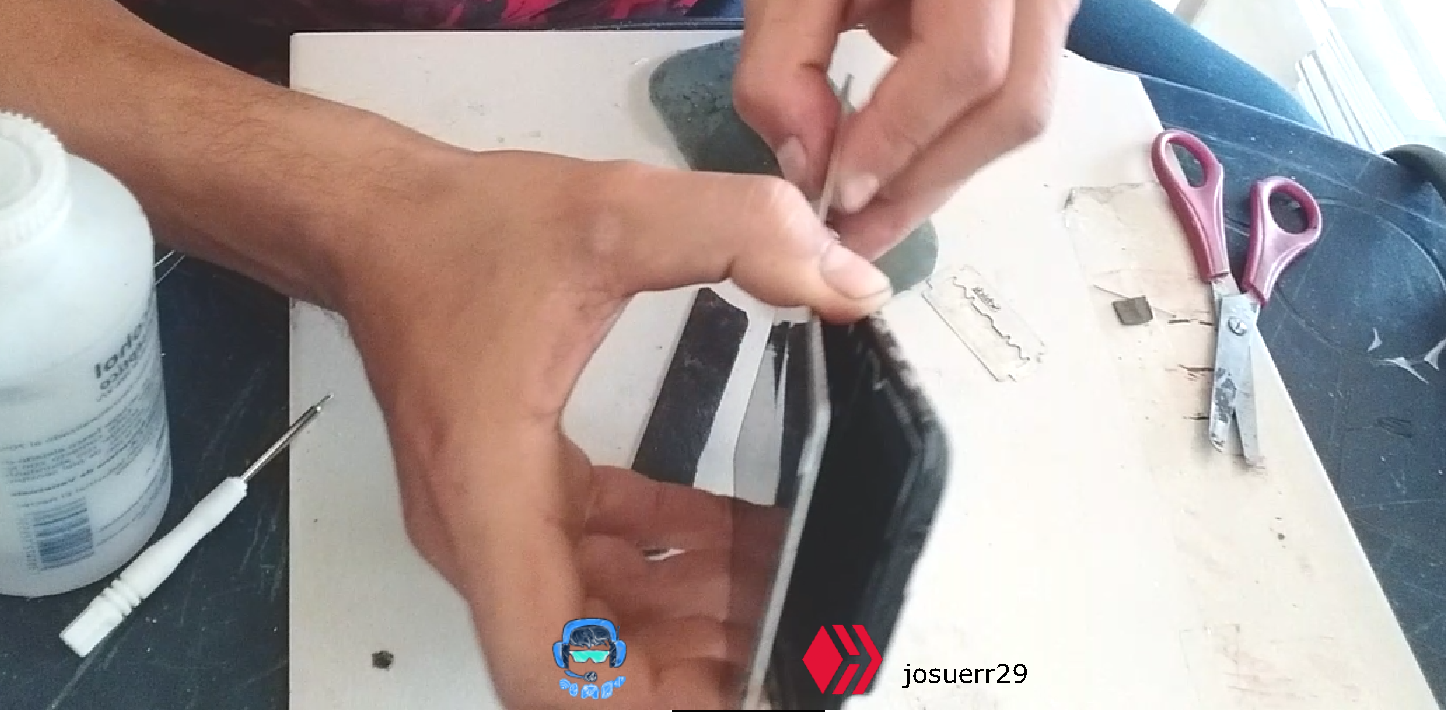
Then, after having placed heat to the lateral part of the equipment by the left side, I begin to put slightly between the bezel of the equipment a blade, this will make that they separate of the screen.
After this I simply insert a spatula for phone repairs.
This is a little wider than the blade, for this reason I introduce it to finish lifting the screen a little bit and at the same time it is a little soft so it doesn't break the whole screen.
After this already having heat I begin to move all the spatula by the lateral sides of the equipment, this will make that the glue of the sides will be diluted and opening smoothly.
After this, do the same procedure on the other side with the spatula so that you can open the two lateral sides of the equipment and thus be able to lift a large part of the screen.
.jpg)
The last remaining part would be the top one to put heat back again because by this time it would be cold and then wait again for a while with the station at the same temperature degrees by moving it.
.jpg)
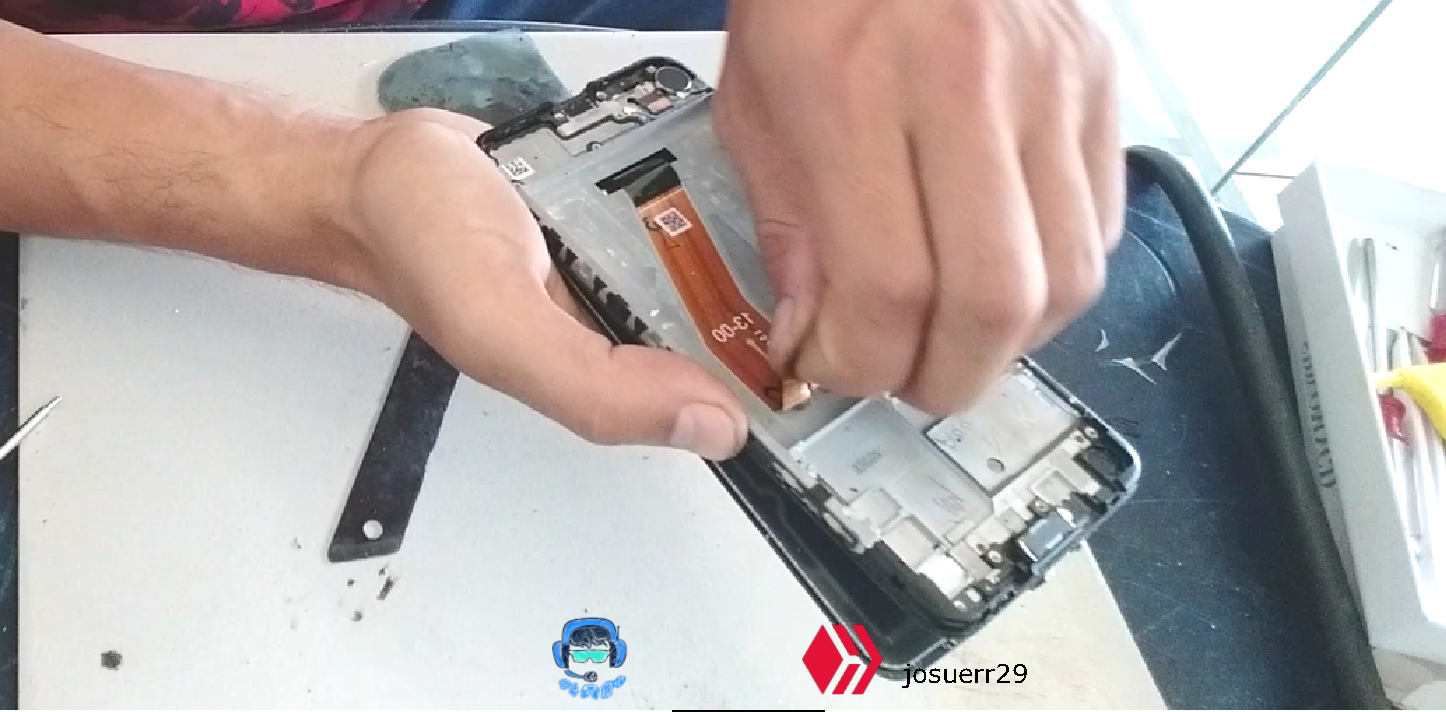
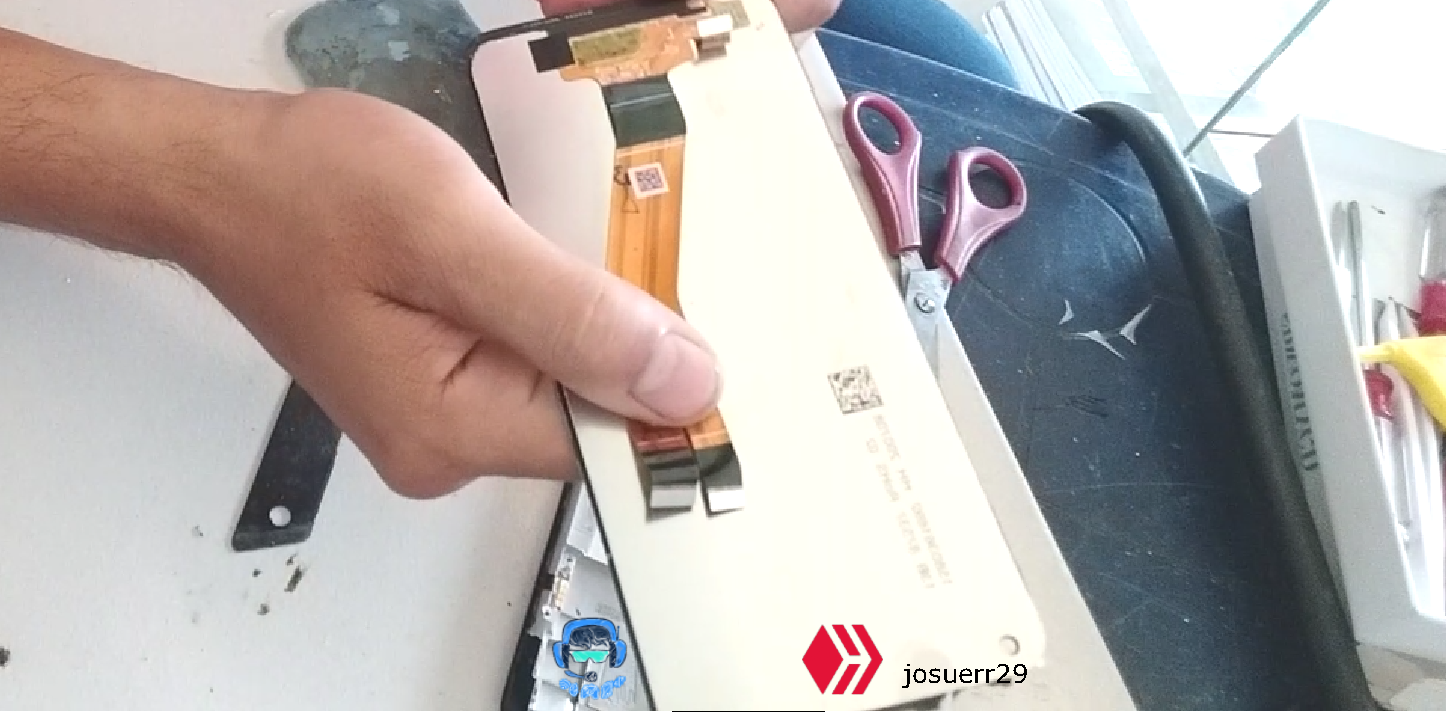
The last process and when the screen came out completely is to lift the Flex that are inside the bezel that are attached to the screen, these are glued and thus be able to remove the entire screen freely.
All this work is done with patience and care so that they can lift the screen quite well, take care of the screen, also take care of the equipment and everything is done with great care and patience In this way the phone is perfect, all work proved to be successful.
Español
Hola amigos de hive y amigos de geek zone cómo están Espero todos estén bien, todos estén disfrutando cada día de sus mejores días porque todo va viento en popa.
Quiero contar algo que me pasó en el taller. Por acá llegó un teléfono que venía porque el cliente quería simplemente cambiarle la pantalla, era un Samsung Galaxy a11 Entonces yo emocionado porque me quería ganar ese dinero, le dije que sí, claro que sí Y además yo sé cambiarlo Y claro que hice ese trabajo, grabe todo el trabajo para que ustedes lo vieran y tomé fotografías para que lo pudieran ver sí.
Sin embargo, mucho Después me topé con algo, cuando le ha quitado la pantalla al teléfono me doy cuenta de que es un modelo muy nuevo y aquí en mi país Venezuela el 3/4 para ese teléfono no ha llegado, solo para teléfonos antiguos Así que lamentablemente no pude completar el trabajo. Así que desarme y arme la pantalla, sin embargo, le quiero traer a cada uno de ustedes el paso a paso de cómo cambié la pantalla de este equipo.
Para empezar tenía que quitar el vidrio templado del equipo, ya que esté vidrio templado podría obstruir el calor que debía colocarle a la pantalla y así evitar que yo la pudiera sacar más fácilmente. Así que con una espátula de placa de rayos x comencé a pasarla entre el vidrio templado y el teléfono para poder separar este vidrio del equipo Cómo ven.
Después de esto levemente tengo que ir levantando él vidrió templado con mucho cuidado, ya que esté vidrio templado se parte muy fácilmente y si una de estas rupturas coincide con alguna ruptura de la mitad del equipo podría simplemente partirlo por completo, esto es en caso de que el 3/4 este totalmente bueno.
Luego de esto, si le puedo colocar calor libremente al equipo, colocó la estación de vapor en 300 grados y le colocó todo el aire posible al compresor para que pueda calentar bastante la mica y poder aflojar parte de la pega qué tiene Entre él y el 34 y el bisel.
Luego, De haberle colocado calor a la parte lateral del equipo por el lado izquierdo, comienzo a meter levemente entre el bisel del equipo una hojilla, esto hará que se separen de la pantalla.
Después de esto introduzco simplemente una espátula para reparaciones de teléfonos
Esta es un poco más ancha que la hojilla, por esta razón le introduzco para que termine de levantar un poco la pantalla y al mismo tiempo es un poco suave y así no rompe toda la pantalla.
Luego de esto ya teniendo calor comienzo a mover toda la espátula por los lados laterales del equipo, esto hará que la pega de los lados se vaya diluyendo y abriendo suavemente.
Después de esto, toca luego por el otro lado hacer el mismo procedimiento con espátula para que pueda abrir de los dos lados laterales del equipo y así poder levantar gran parte de la pantalla.
La última parte que queda sería la de arriba volver otra vez a colocar calor porque ya para este momento estaría fría y volver luego a esperar tiempo con la estación de los mismos grados de temperatura moviéndola.
El último proceso ya cuando la pantalla salió por completo es levantarlos Flex que quedan dentro del bisel que van sujetados a la pantalla, estos van pegados y así poder sacar toda la pantalla libremente.
Todo este trabajo se va haciendo con Paciencia y mucho cuidado para que puedan levantar la pantalla bastante bien, cuidar la pantalla, cuidan también el equipo y todo lo hacen con sumo cuidado y mucha paciencia De esta manera el teléfono queda perfecto, todo el trabajo resultó ser exitoso
fuentes del contenido
Traducción deepl
gift:
Logo facebook
logo instagram
Logo hive
Logo week zone
Ganar algunios pequeños tokens por buscar en google. Registrare aqui
presearch
 Instagram
.png)
Comments