Tutorial: Cómo hacer lindos llaveros de madera// Tutorial: How to make cute wooden keychains
0 comments
Hola comunidad, un abrazo cálido 🤗 Dios bendiga de manera grande a cada uno de ustedes. Un bonita forma de hacer diseños de llaveros en madera. Les invito a mirar el tutorial hasta el final...
Hello community, a warm hug 🤗 God bless each one of you in a big way. A nice way to make wood keychain designs. I invite you to watch the tutorial until the end ...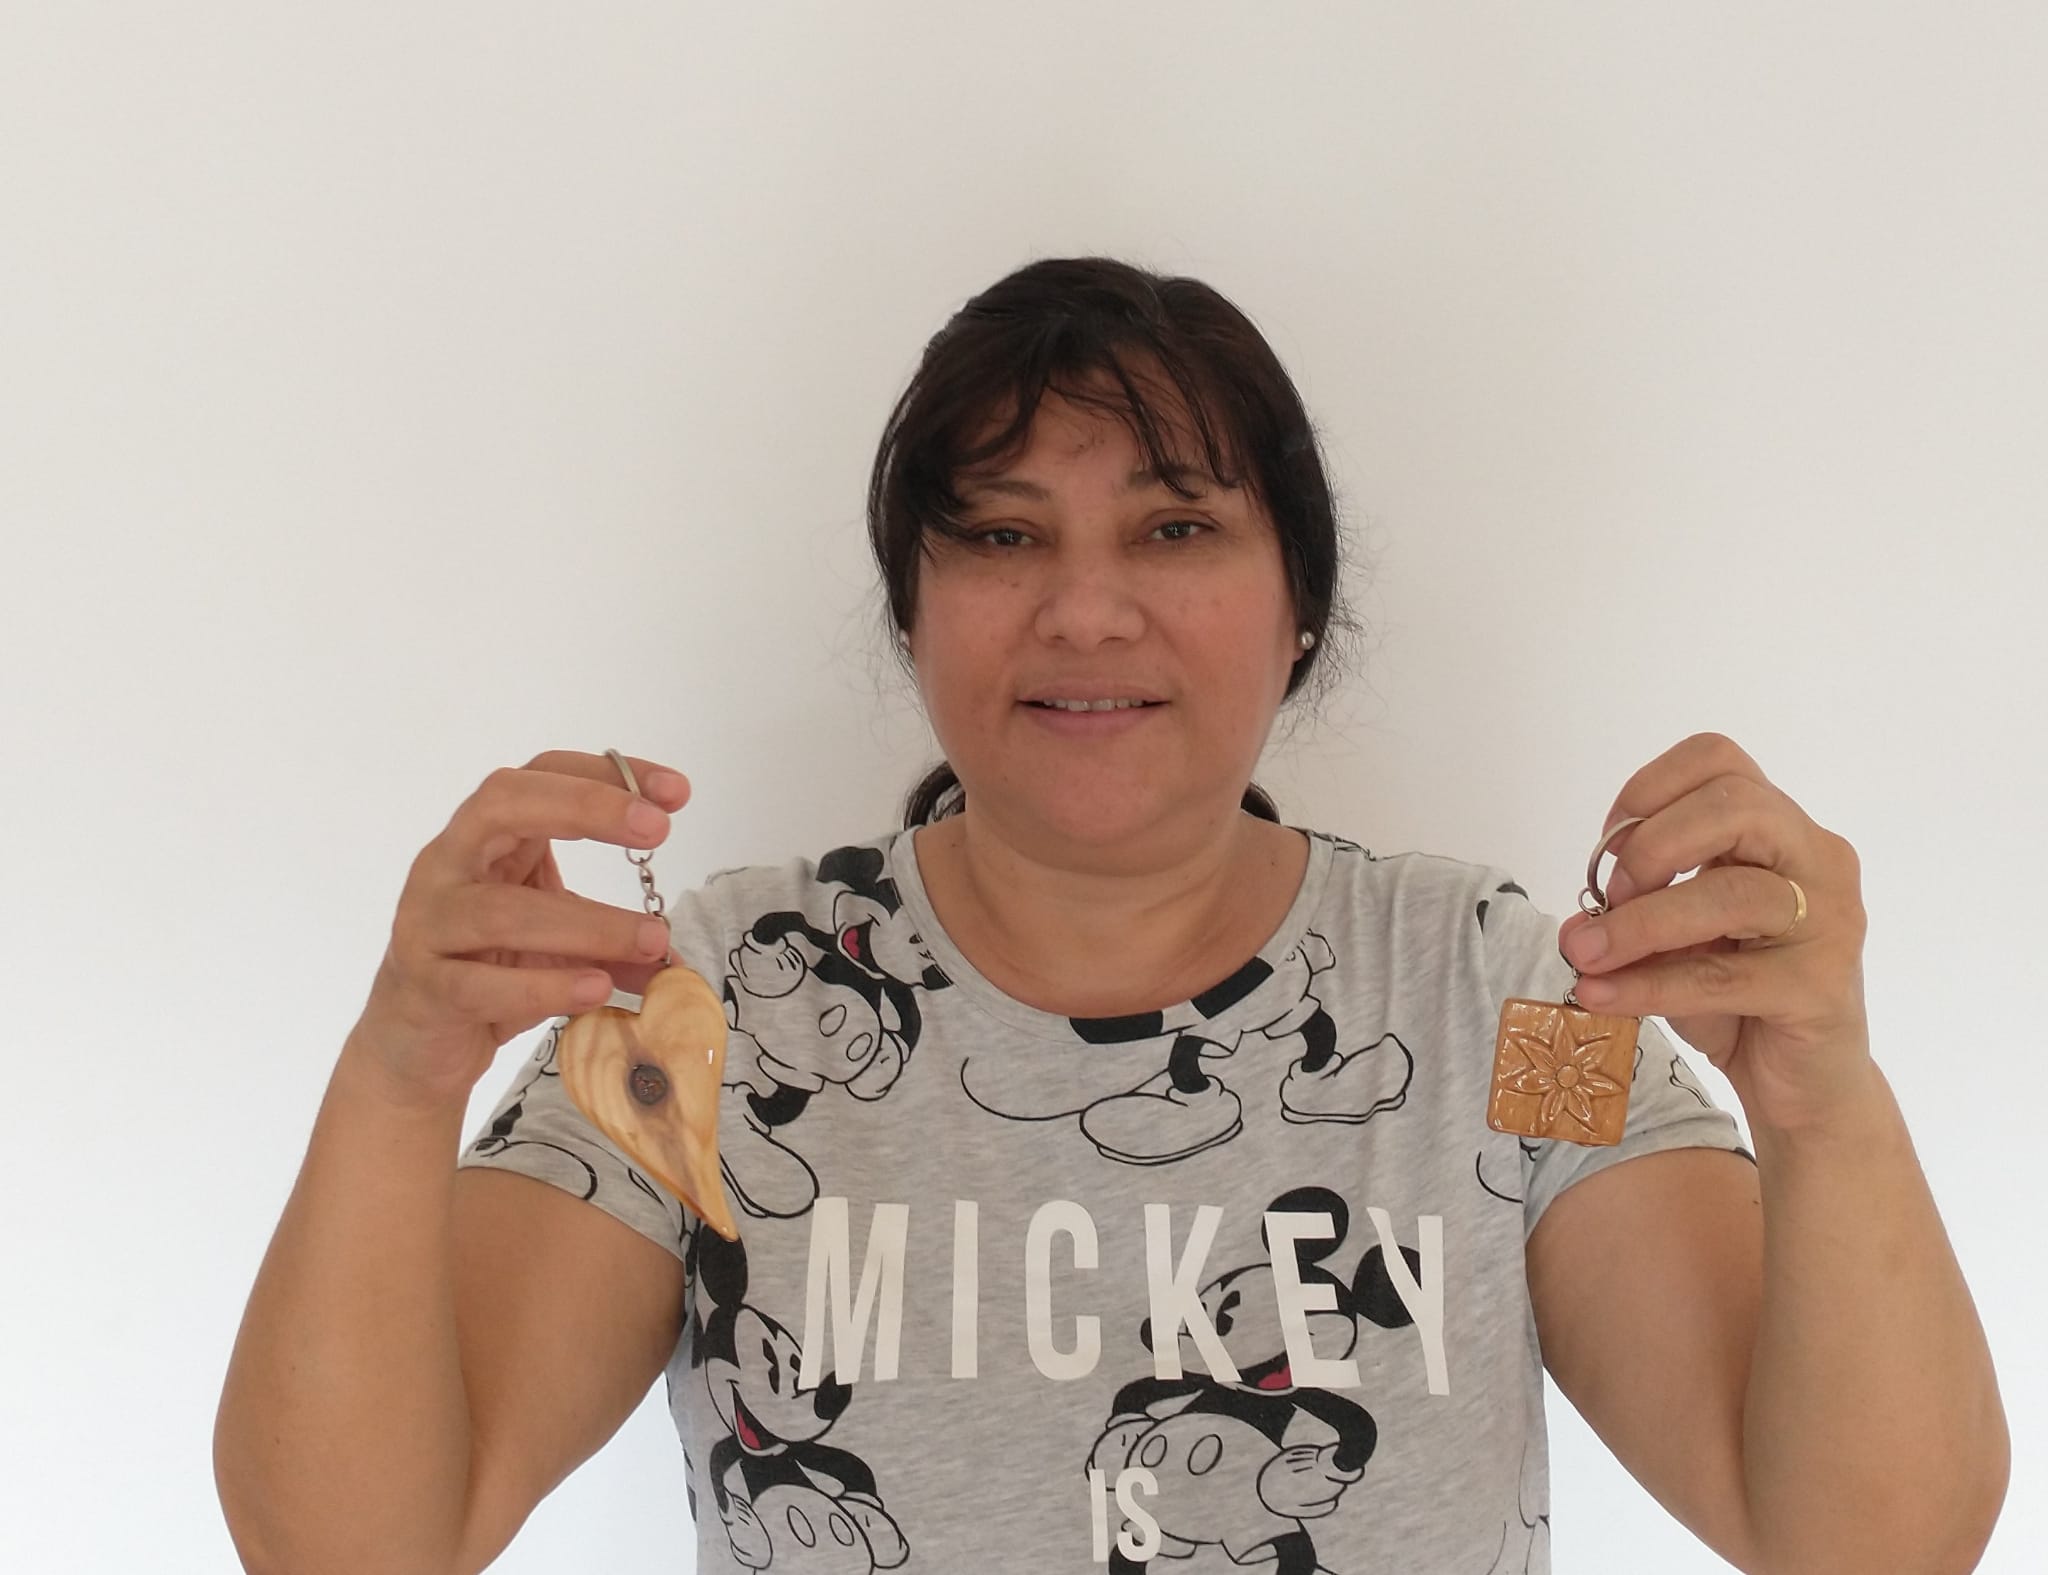
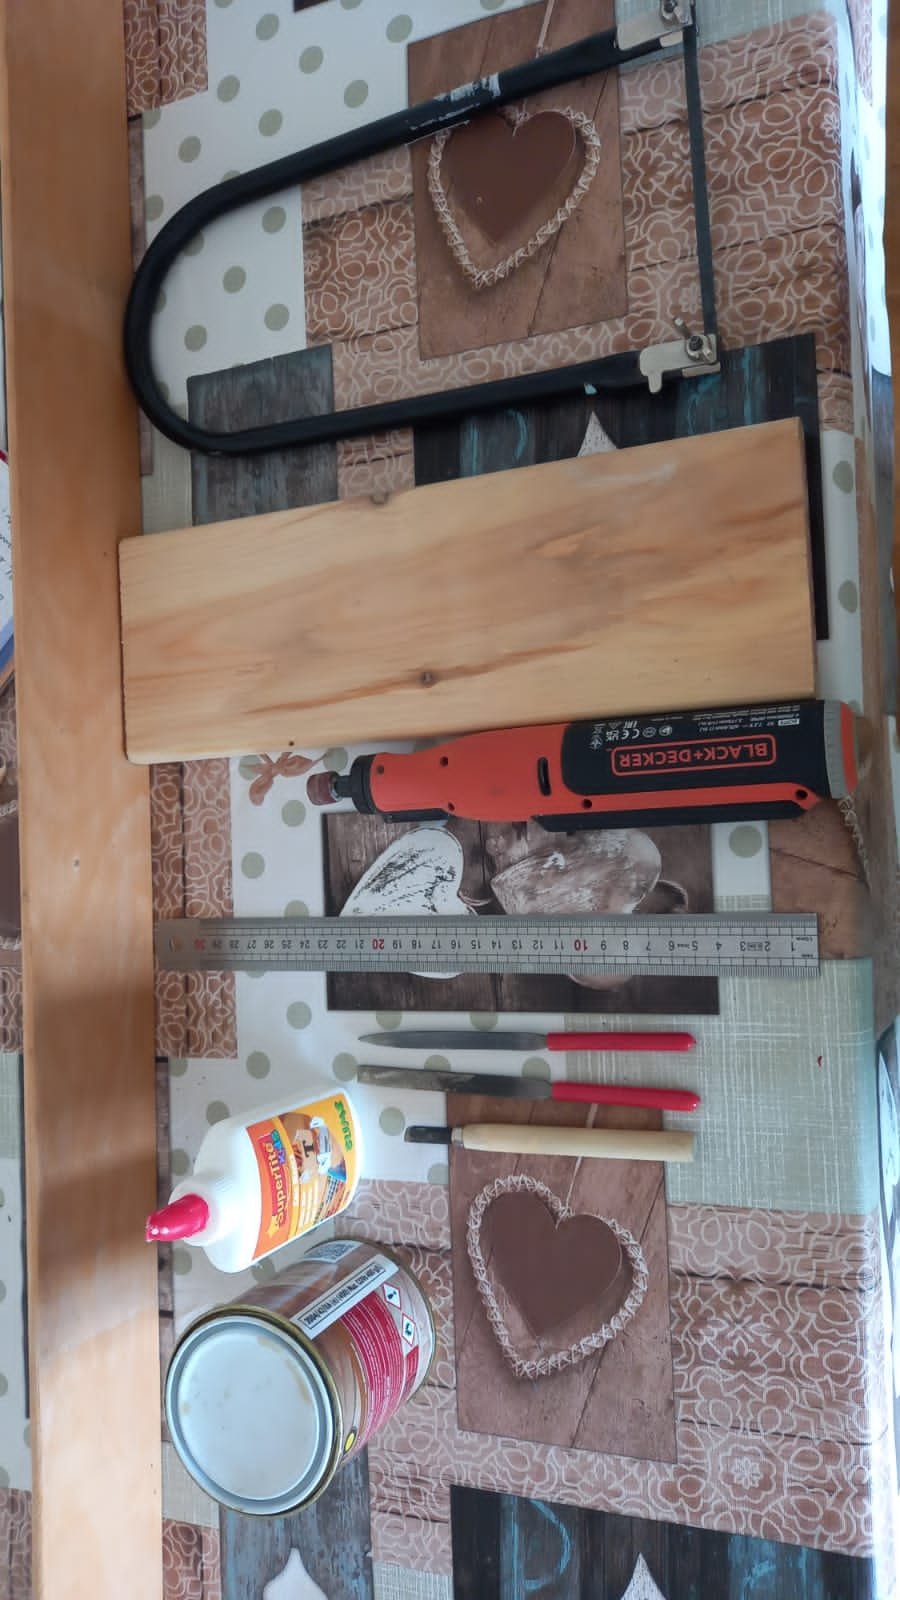
MATERIALES// MATERIALS
- Madera de diferente grosor
- Guías
- Barniz
- Pega
- Limas pequeñas
- Regla
- Sierra de paquetería.
- Wood of different thickness
- Guides
- Varnish
- Job
- Small files
- Rule
- Parcel saw.
Paso 1: Trazamos un dibujo en la madera de lo que vamos a diseñar. En este caso corazones, o imágenes dentro de un cuatro.
Step 1: We draw a drawing on the wood of what we are going to design. In this case hearts, or images within a four.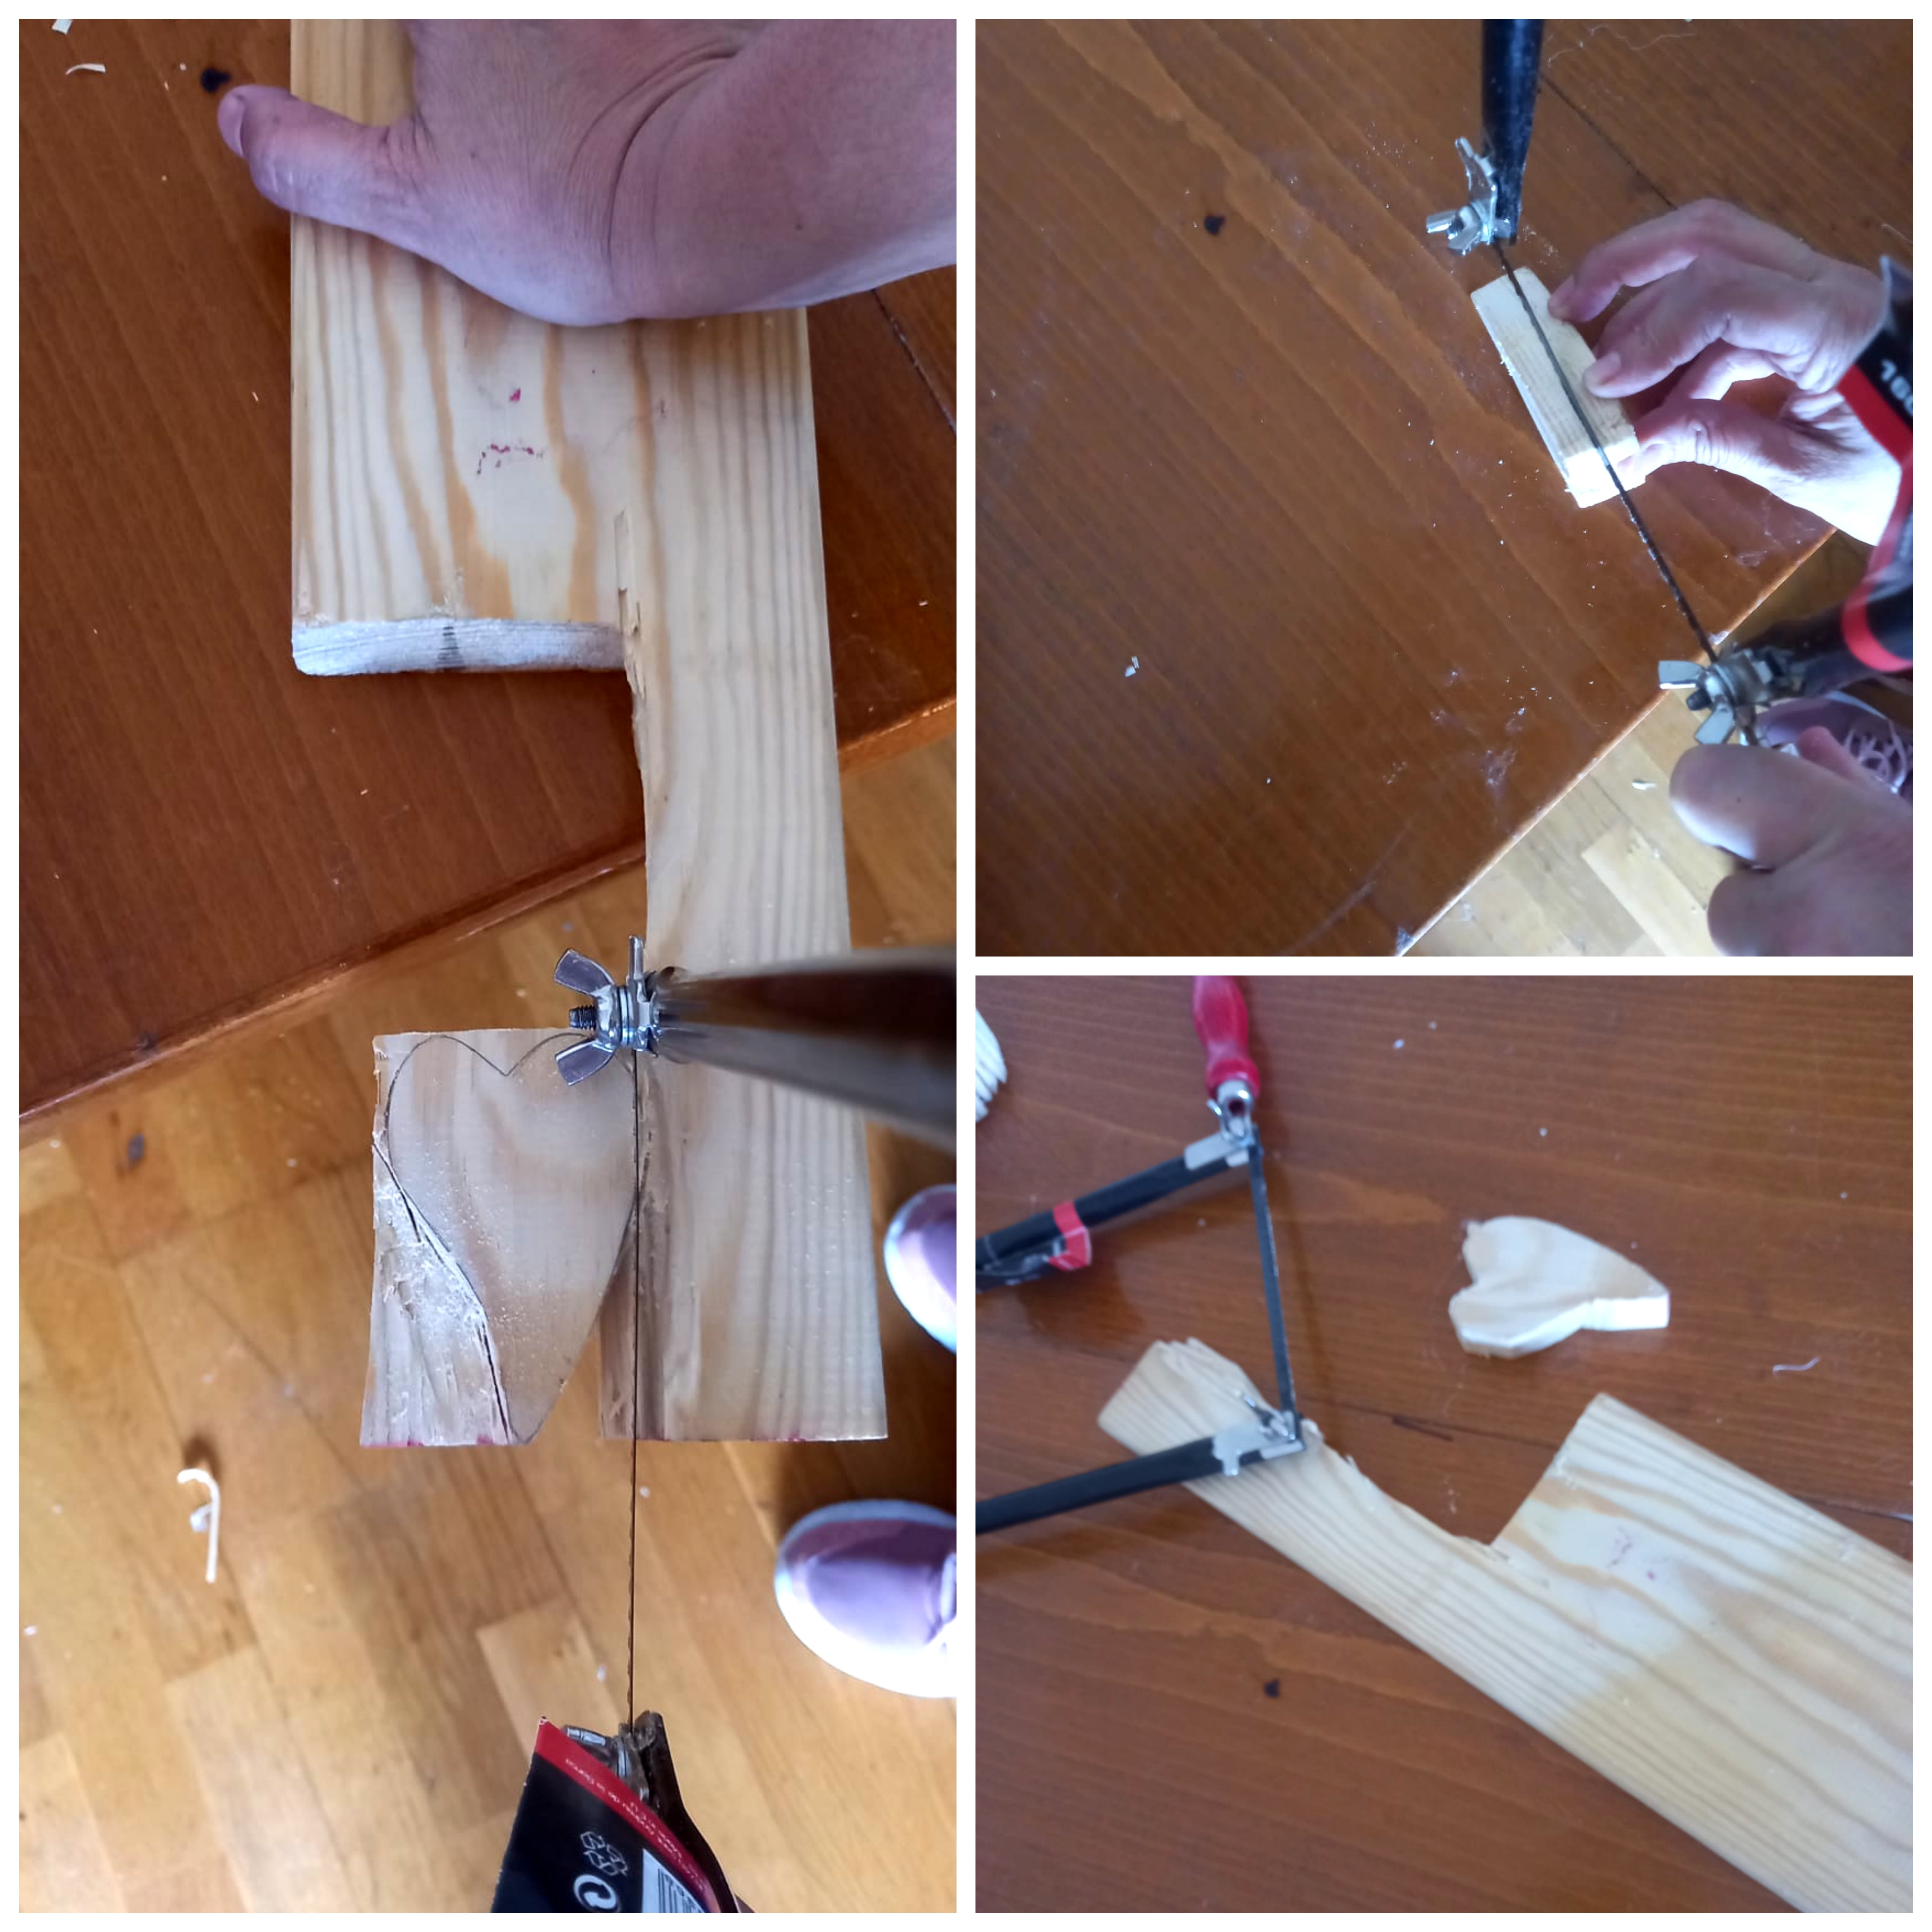 Paso 2: ligamos las piezas para pulir y quitar lo poroso.
Step 2: we bind the pieces to polish and remove the porous.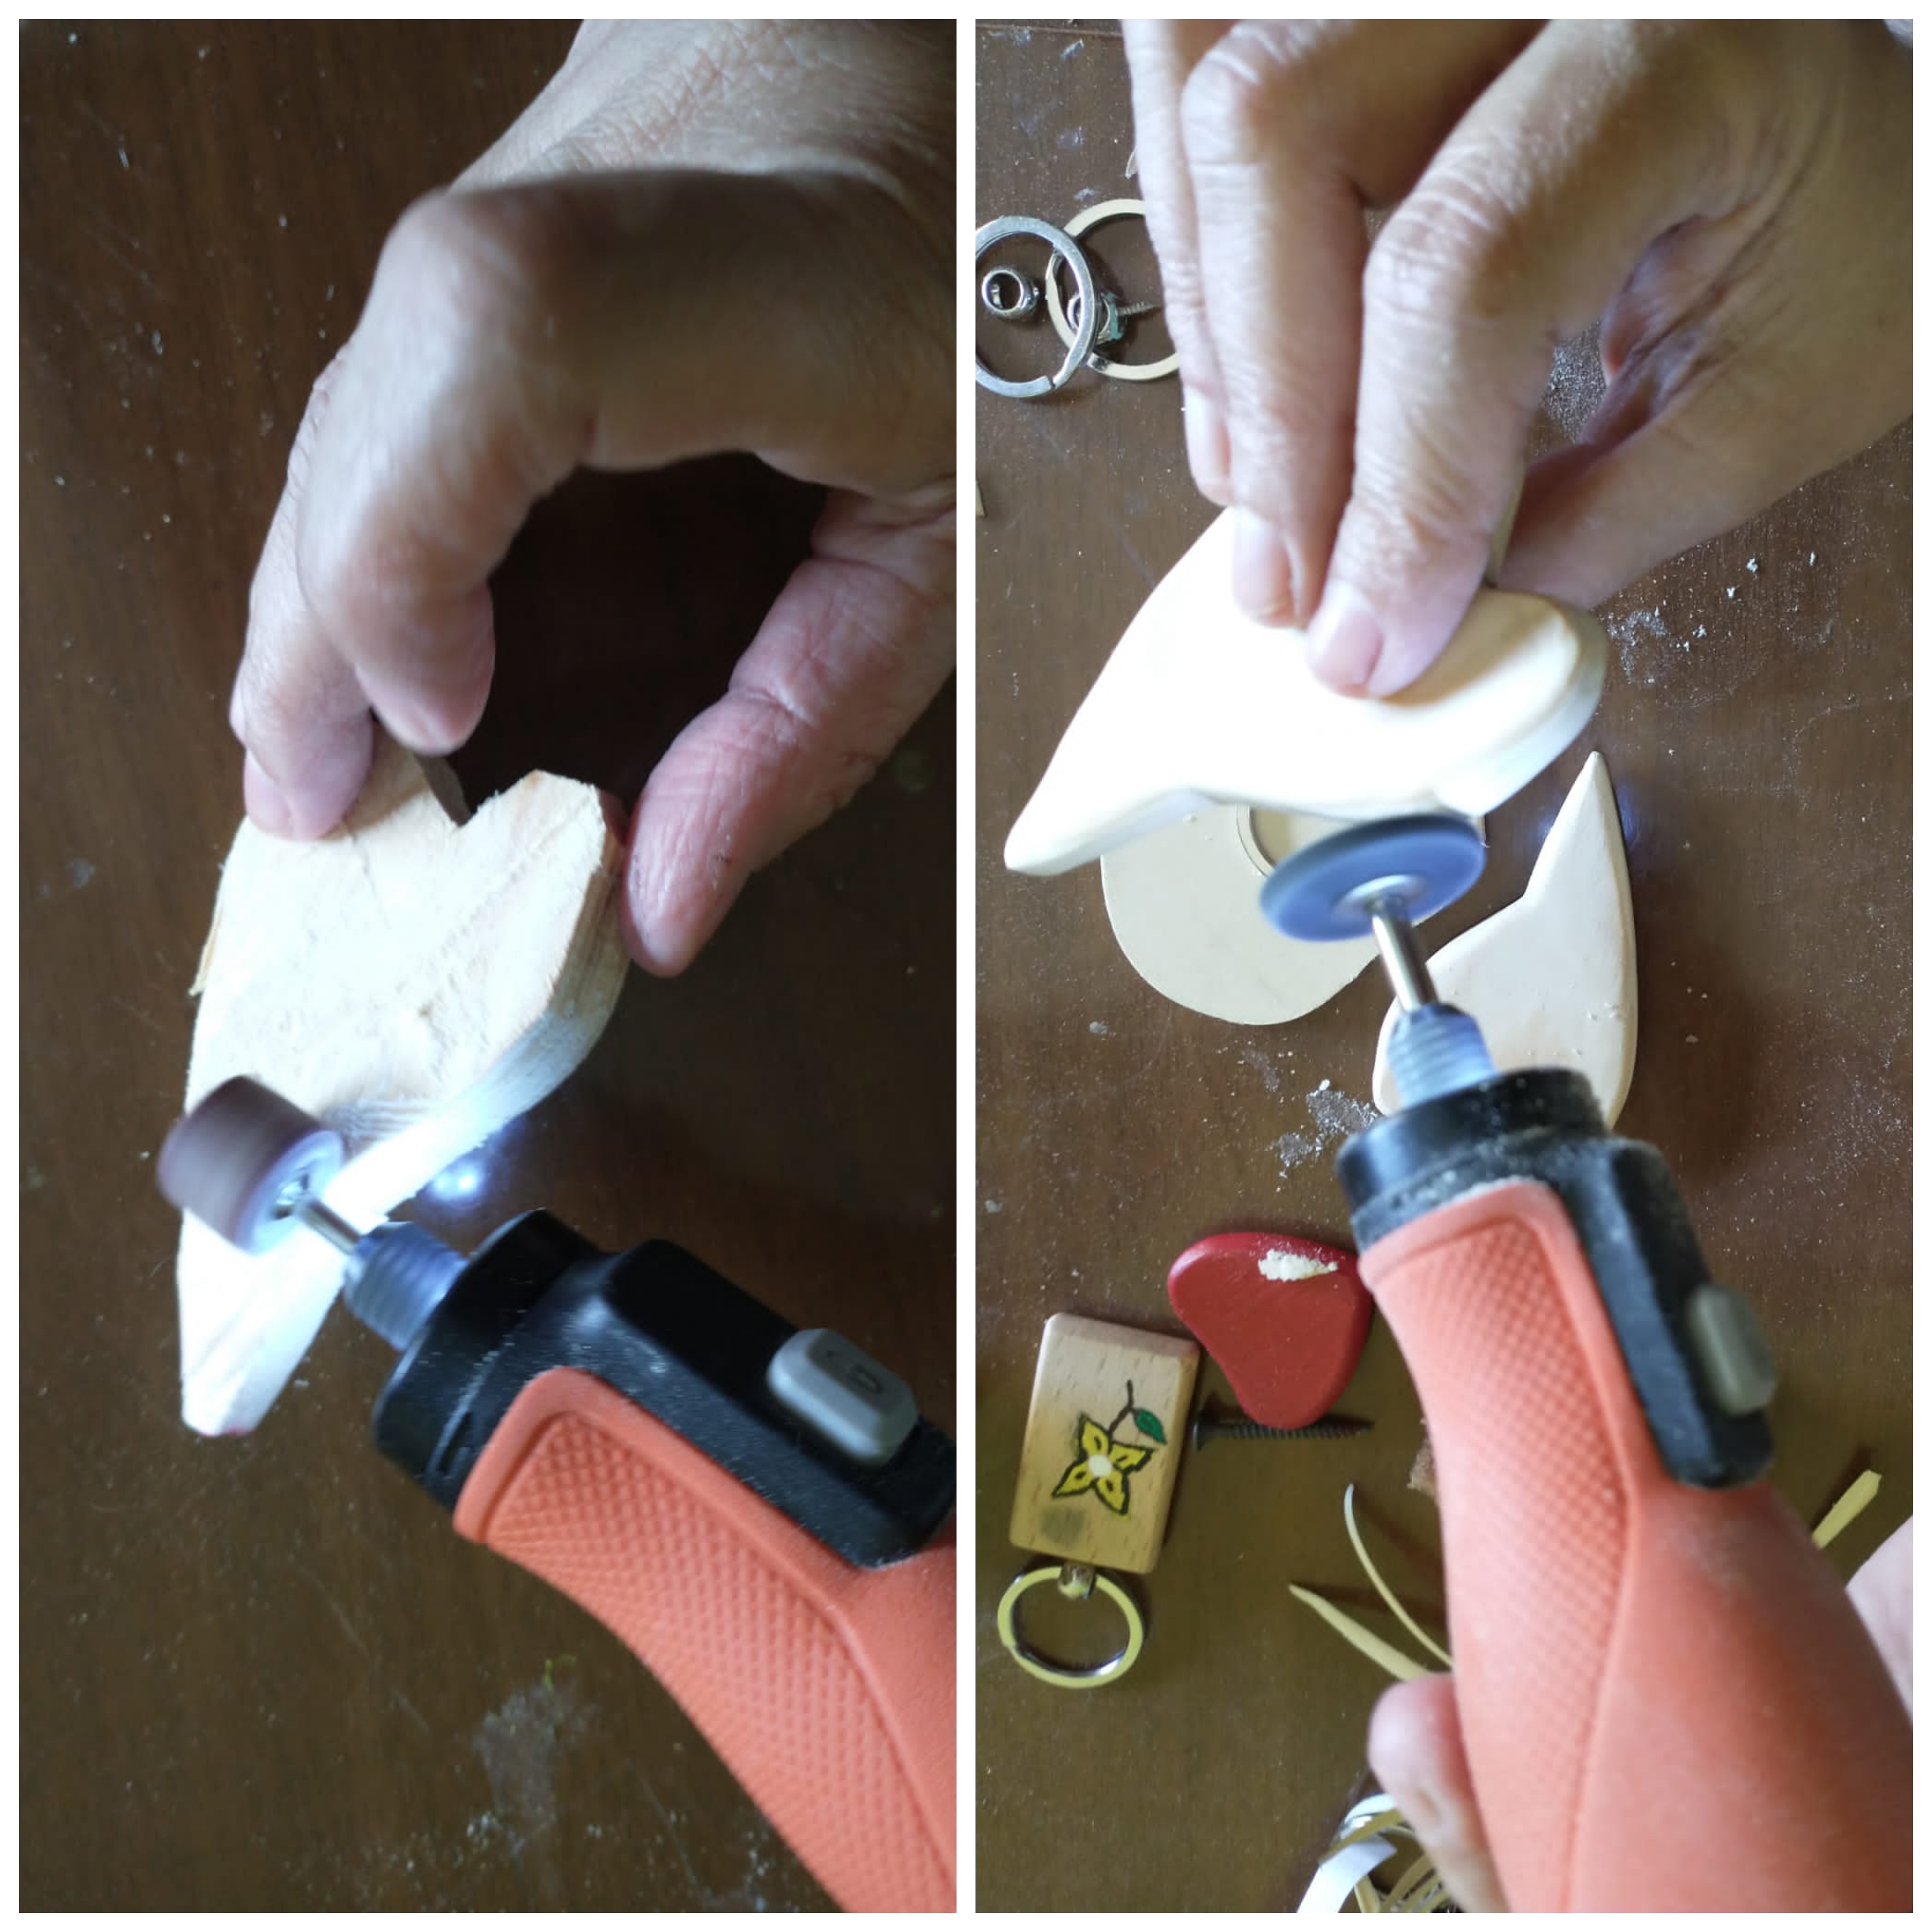
Paso 3: Al tener nuestros diseños listos. Colocamos un poco de sellador, dejamos secar por 4 horas aproximadamente. luego barnizados y lo ponemos a secar nuevamente, en este caso será 12 horas. Para así tener ya nuestro diseño listo para colocar nuestras llaves ❣️
Step 3: Having our designs ready. We put a little sealer, let it dry for approximately 4 hours. then varnished and we put it to dry again, in this case it will be 12 hours. In order to have our design ready to place our keys ❣️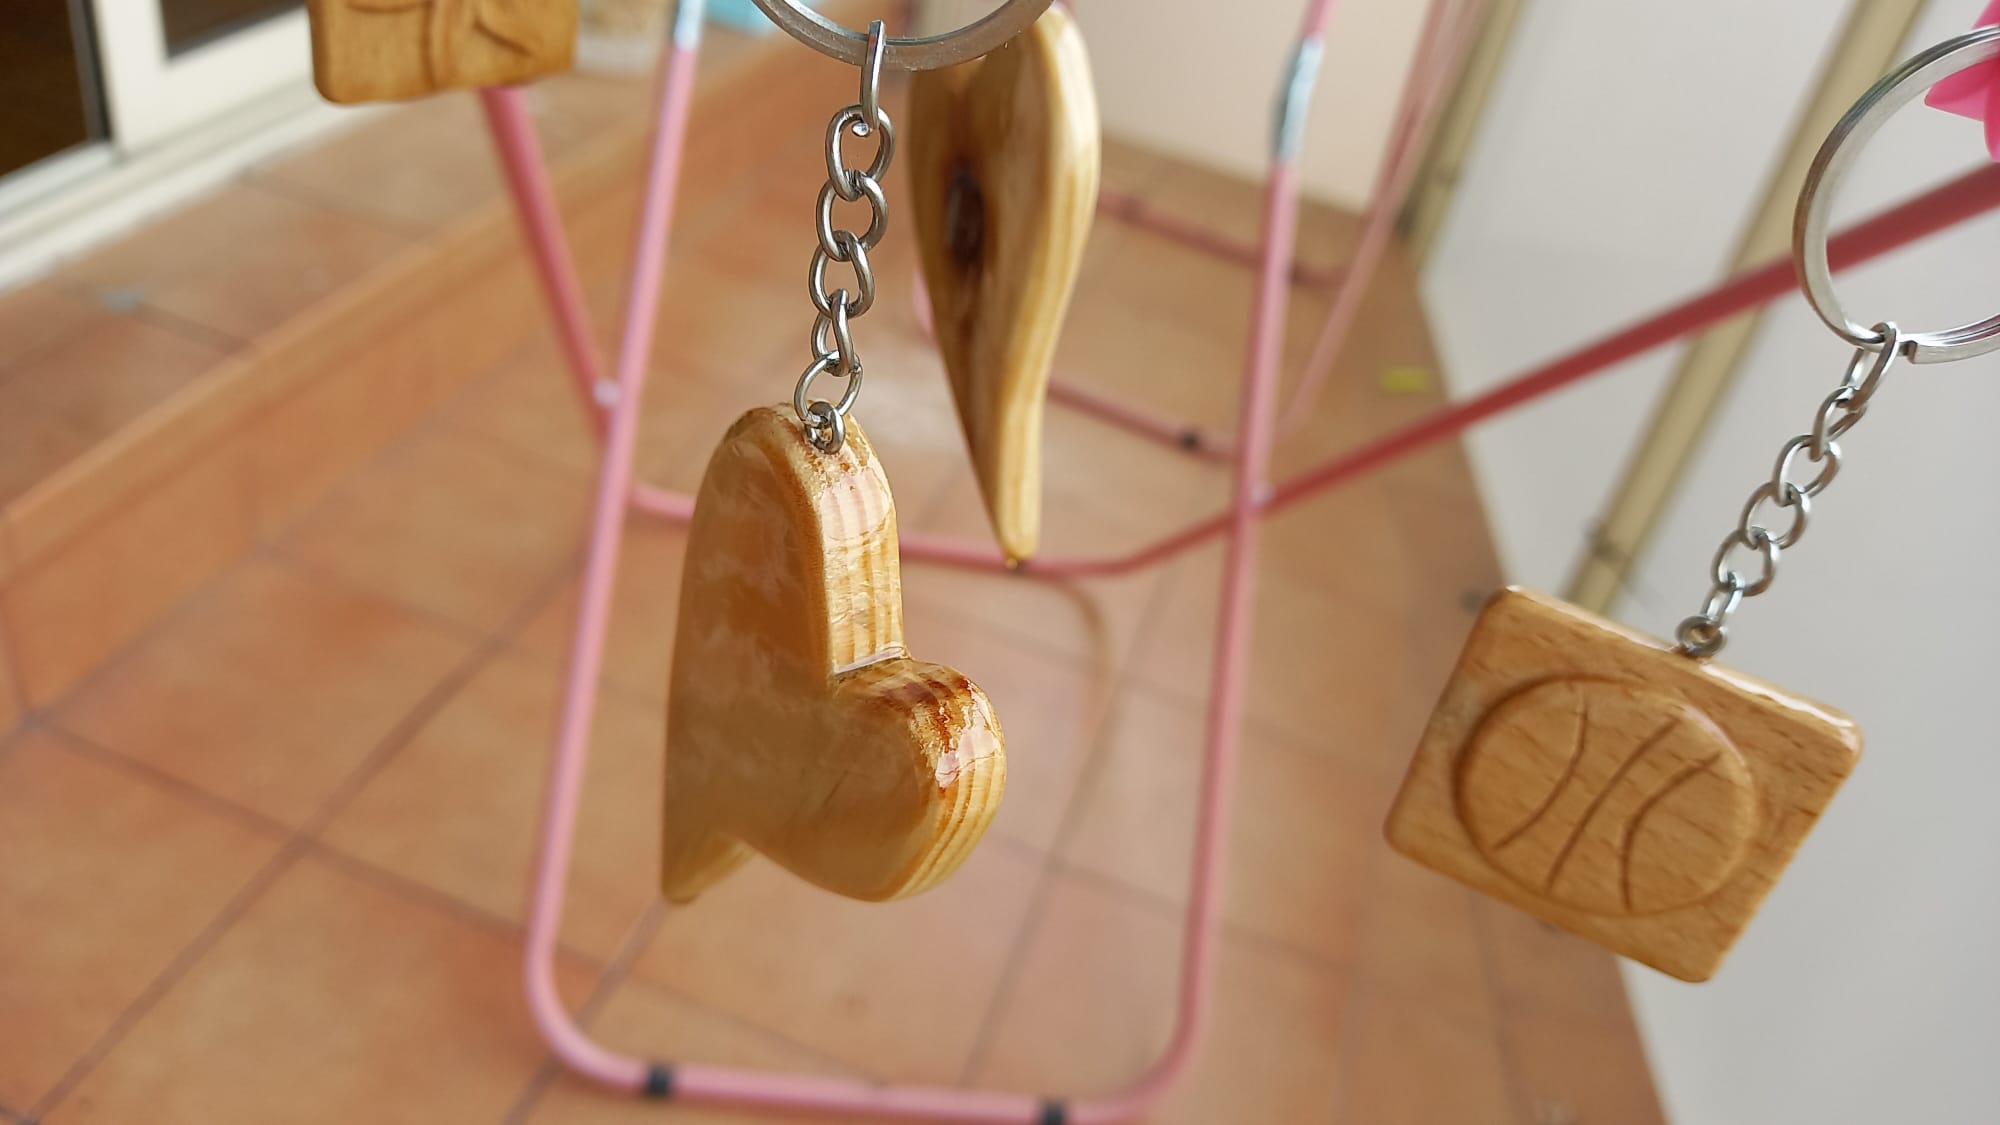 Si te gustó el tutorial del día de hoy puedes dejar tu comentario y compartir ésta bonita y creativa idea super fácil de hacer 🥰 nos vemos en mi próximo post familia 🤗
If you liked today's tutorial you can leave your comment and share this beautiful and creative idea, super easy to do hacer see you in my next post family 🤗
Comments