APRENDE COMO HACER MINI PIÑATA O DULCERO DE PLIM PLIM. LEARN HOW TO MAKE PLIM PLIM MINI PIÑATA OR DULCERO.
2 comments
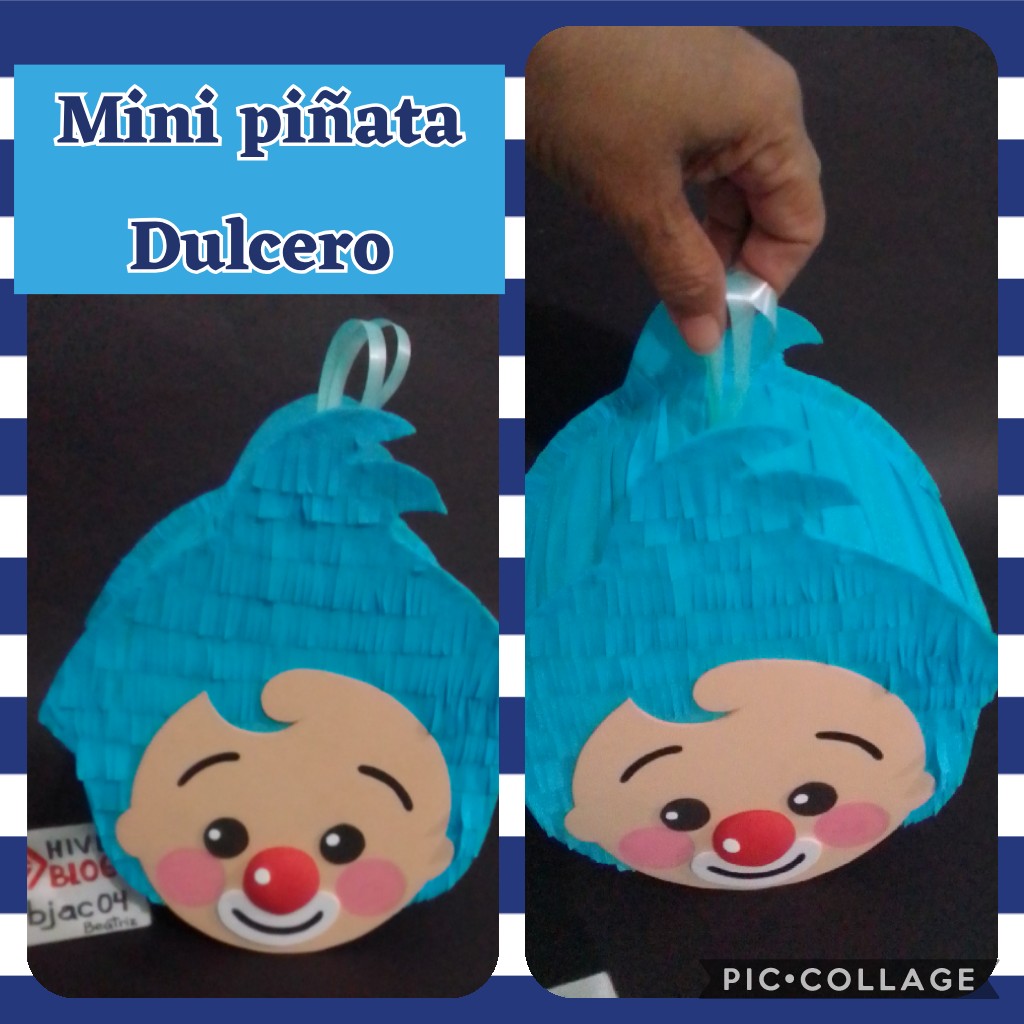
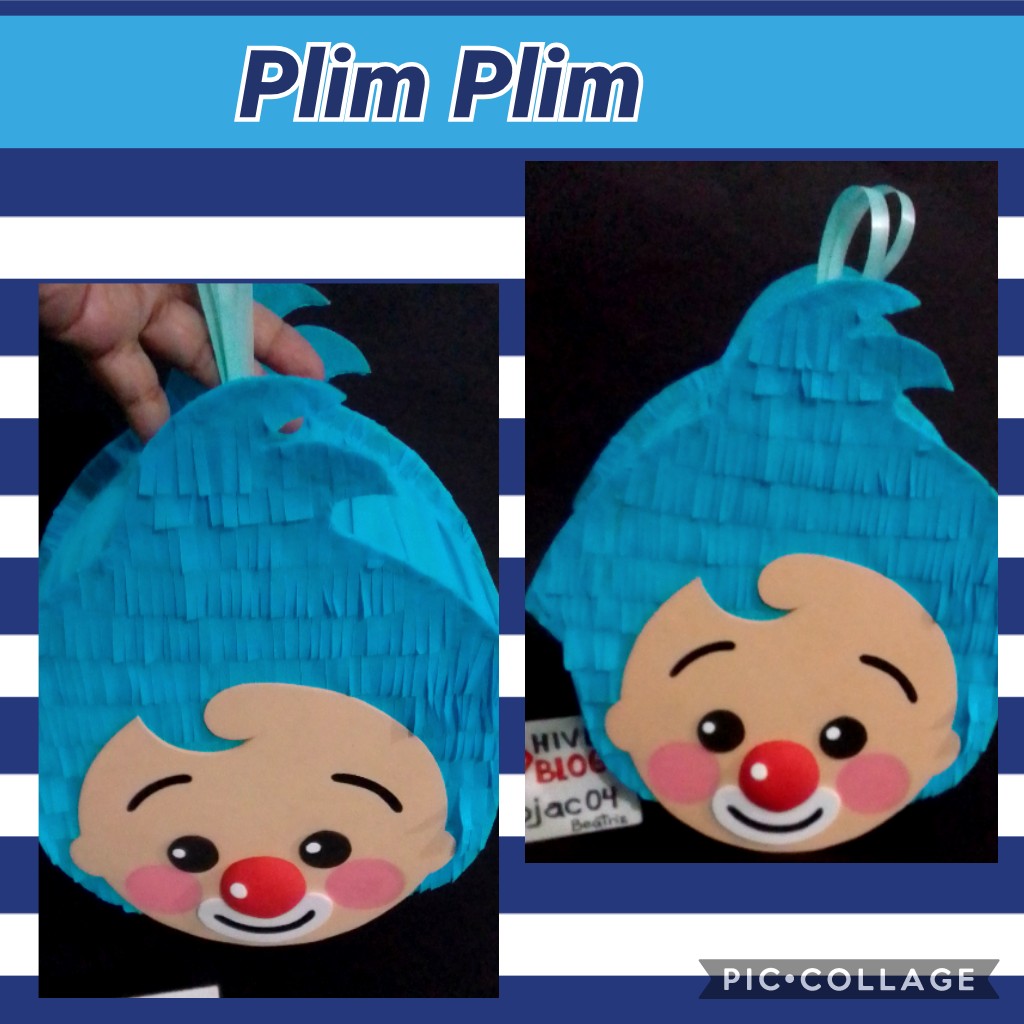
Se trata de una mini piñata o dulcero que podrás realizar para vender u obsequiar en cualquier ocasiòn, y que se pueden rellenar con dulces o juguetes y que alegraran y encantaran a los niños, verás que son muy fáciles de hacer.
Y lo mejor con materiales que puedes conseguir y que como siempre son económicos.
It is a mini piñata or candy box that you can make to sell or give as a gift on any occasion, and that can be filled with sweets or toys and that will cheer and delight the children, you will see that they are very easy to make.
And the best with materials that you can get and that as always are cheap.
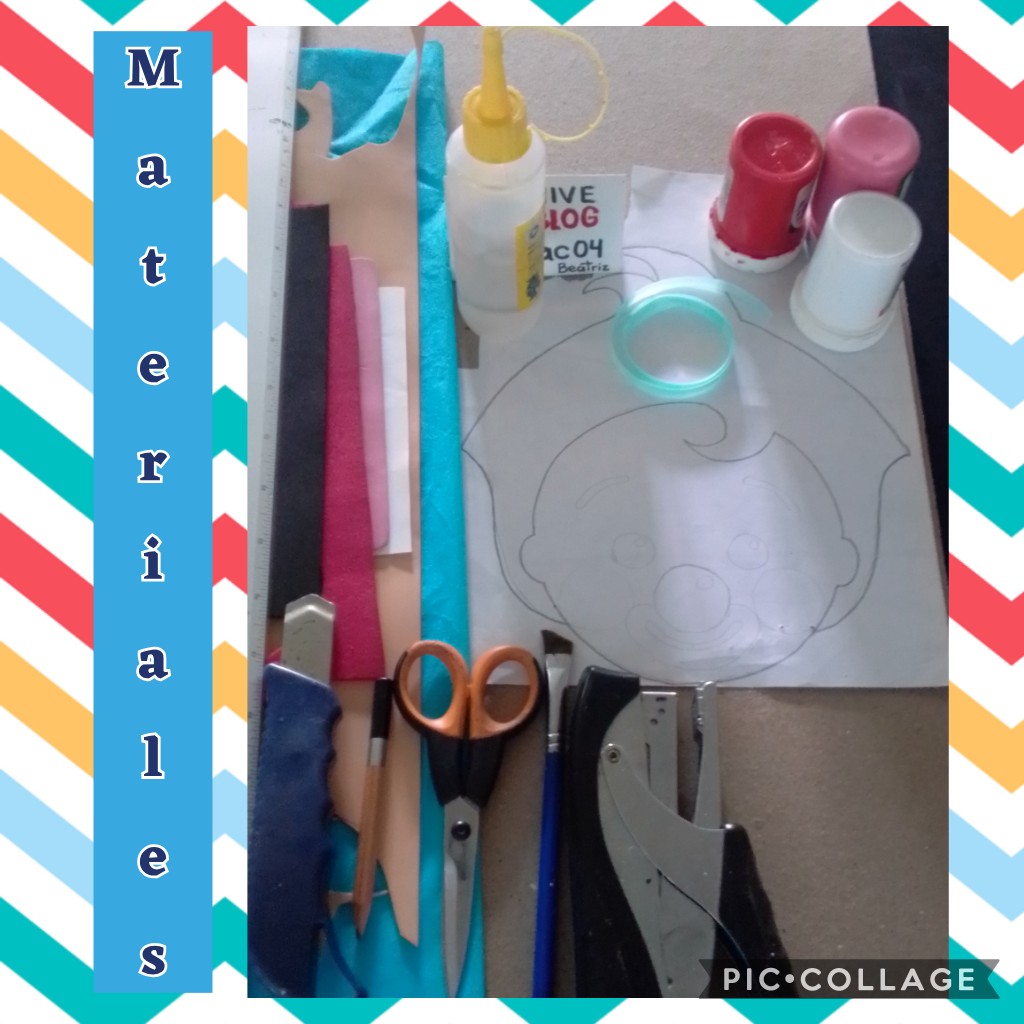
<Cardboard for piñatas, Clown face mold, crepe paper, foam of various colors for the face, scissors, brushes, paints, pencil, knife, stapler, ruler, liquid silicone, and gift ribbon.
Empecemos con el PASO A PASO:
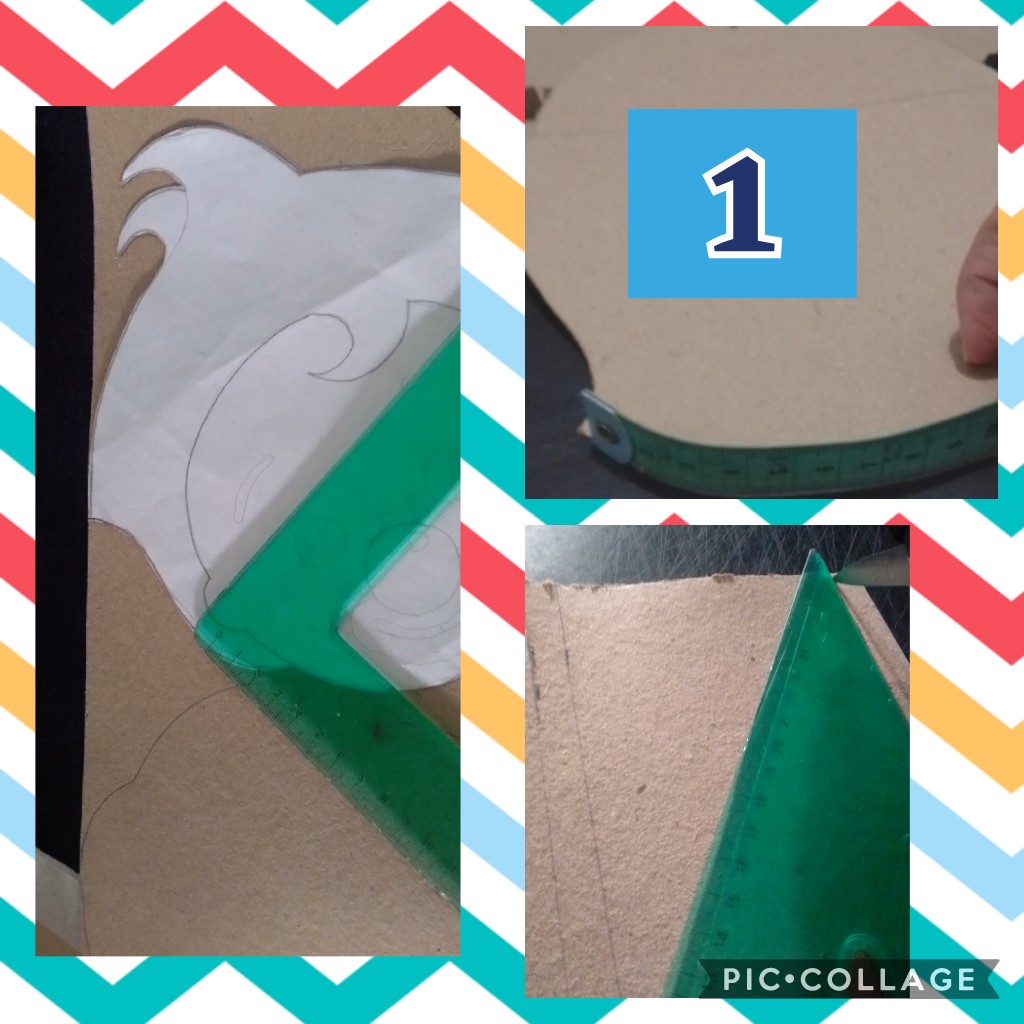
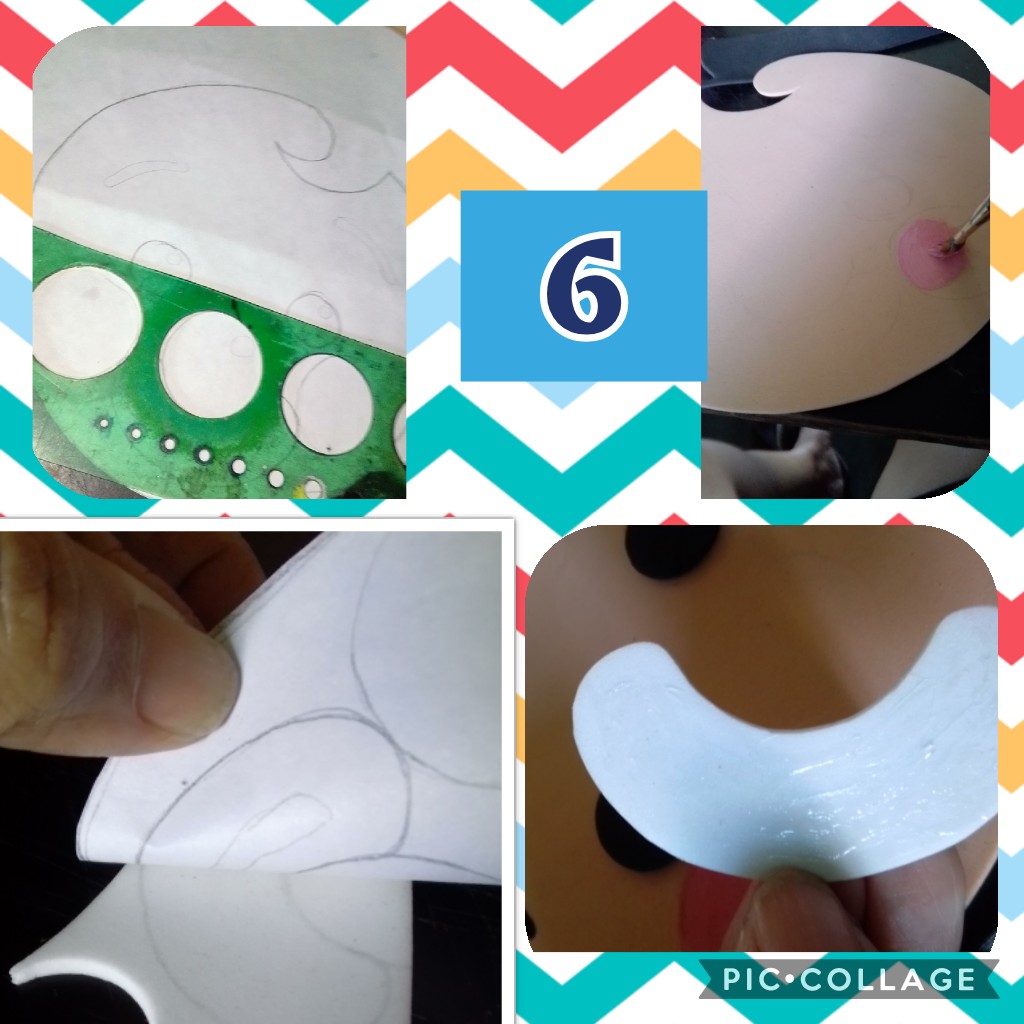
Recortamos el molde y lo pasamos al cartón dibujando toda la orilla y recortamos 2 caras, luego medimos todo el contorno u orilla de la cara para recortar una tira del ancho que quieras la mini piñata y le adicionas una pestaña de 1 cm por cada lado y con la orilla de la tijera repasamos dicha orilla para luego doblar..
We cut out the mold and we pass it to the cardboard drawing the entire edge and cut out 2 faces, then we measure the entire contour or edge of the face to cut a strip of the width you want the mini piñata and add a 1 cm tab on each side and With the edge of the scissors we go over said edge and then fold.
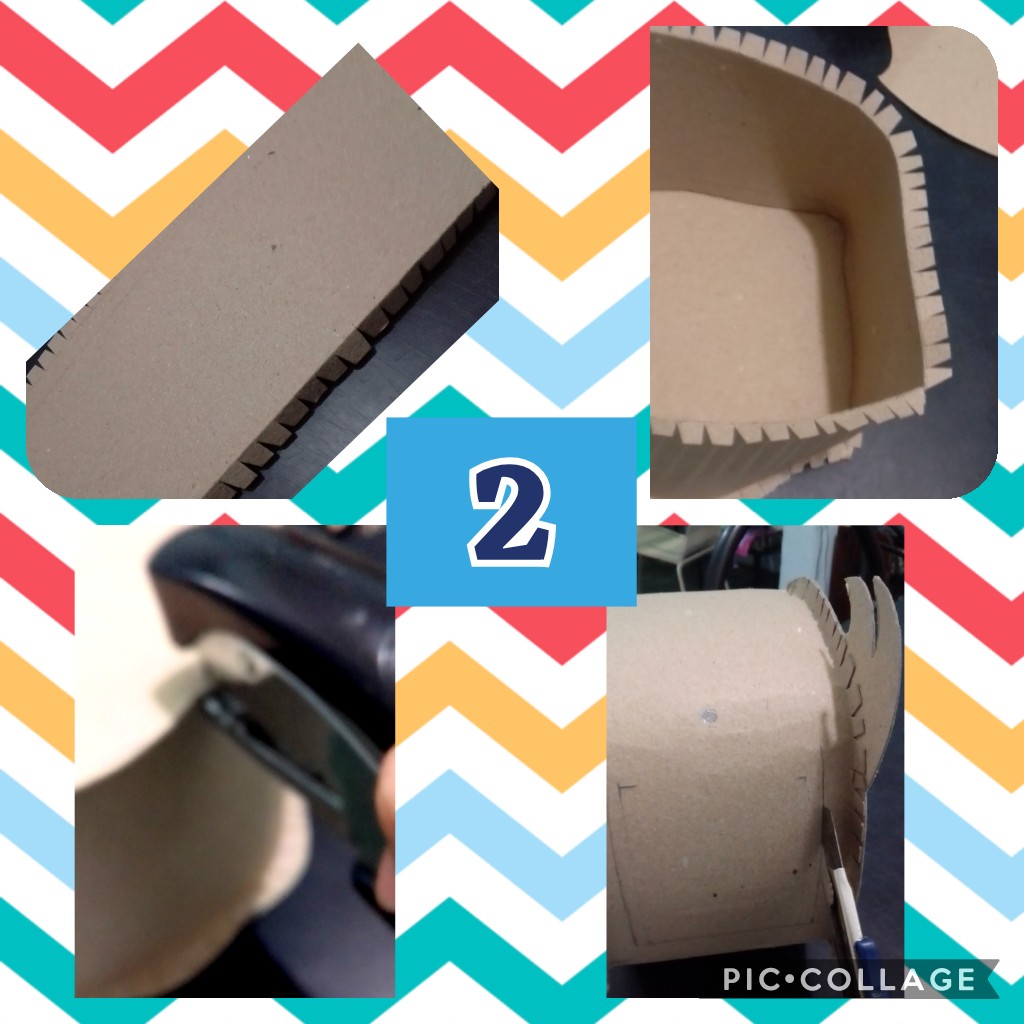
Recortamos la pestaña recortando cuadritos de 1 cm y doblamos para luego pegar con la engrapadora primero un lado de la cara y seguidamente la otra cara, cerrándola totalmente.
Luego marcamos un cuadrado de un lado donde recortaremos con la cuchilla para abrir y meter lo que desees y hacemos arriba en todo el medio un punto donde irá colocada la cinta para agarrarla la piñata.
We cut the flange by cutting 1 cm squares and fold it and then stick with the stapler first one side of the face and then the other face, closing it completely.
Then we mark a square on one side where we will cut with the knife to open and put what you want and we make a point in the middle where the tape will be placed to grab the piñata.
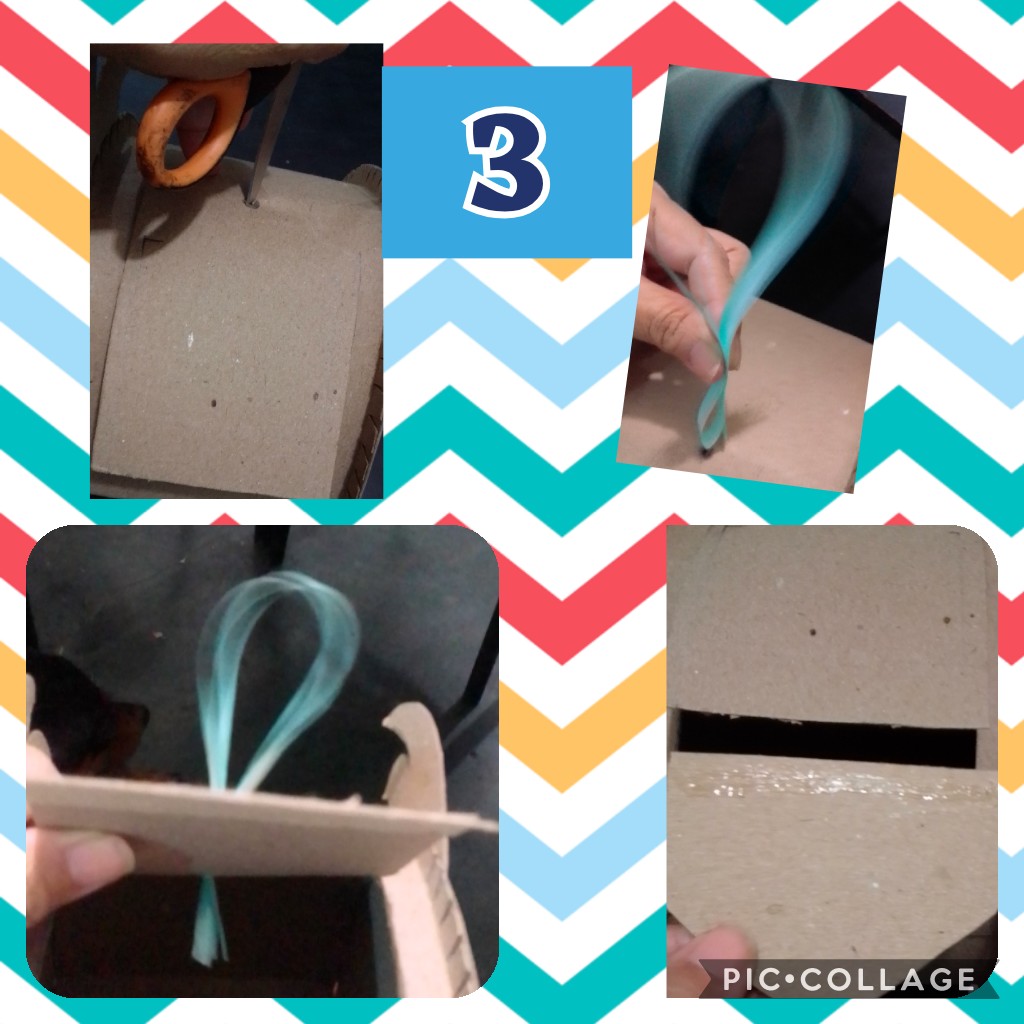
Aquì abrimos el orificio y metemos la cinta de arriba hacia abajo y hacemos un nudo en la parte de adentro, y antes hacemos una extensiòn de cartón para meter y que no quede abierta la pieza por donde se metan las dulces.
Here we open the hole and put the tape from top to bottom and make a knot on the inside, and before we make a cardboard extension to put it so that the piece where the sweets are put is not open.
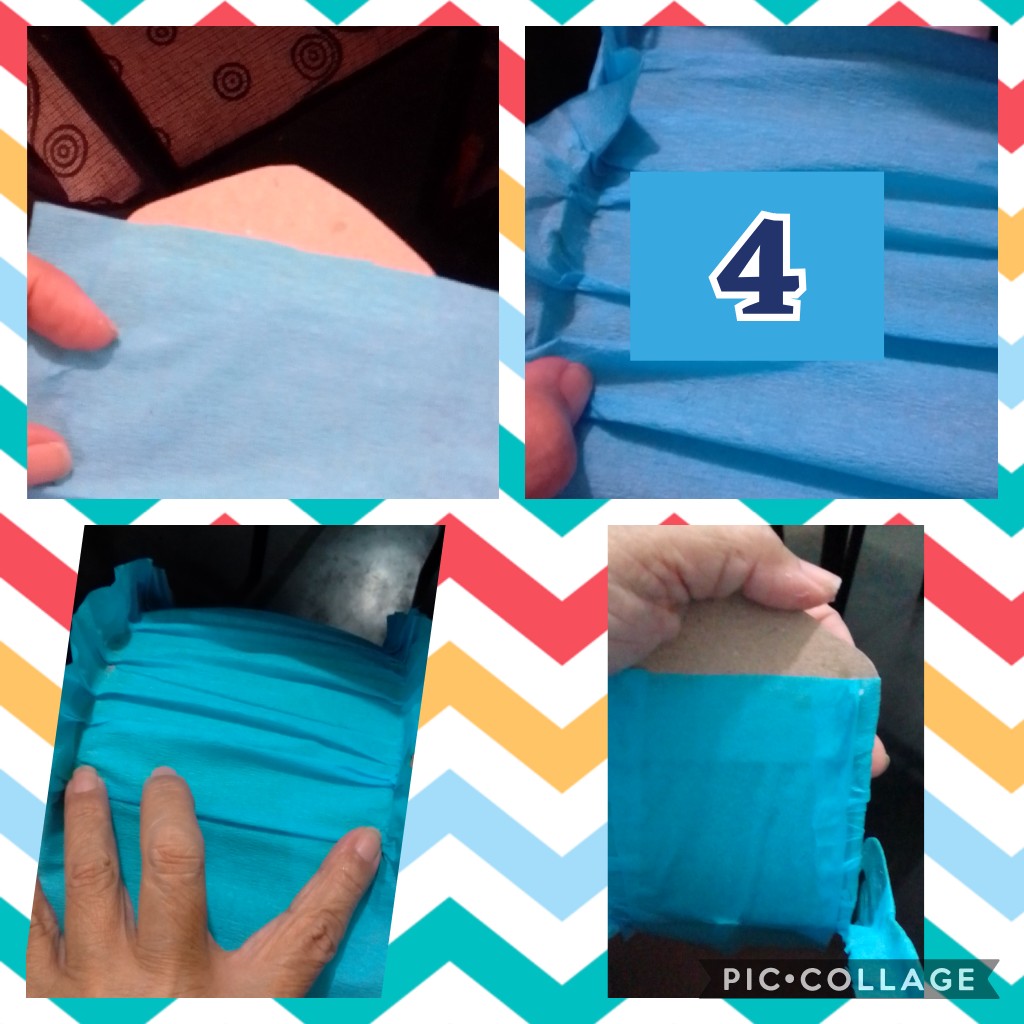
Ahora recortamos una tira de papel crepé para forrar todo el ancho de la piñata empezando por la abertura y echando silicón por ambos lados e ir haciendo pliegues como se ve en las fotos.
Now we cut out a strip of crepe paper to line the entire width of the piñata starting with the opening and applying silicone on both sides and making folds as seen in the photos.
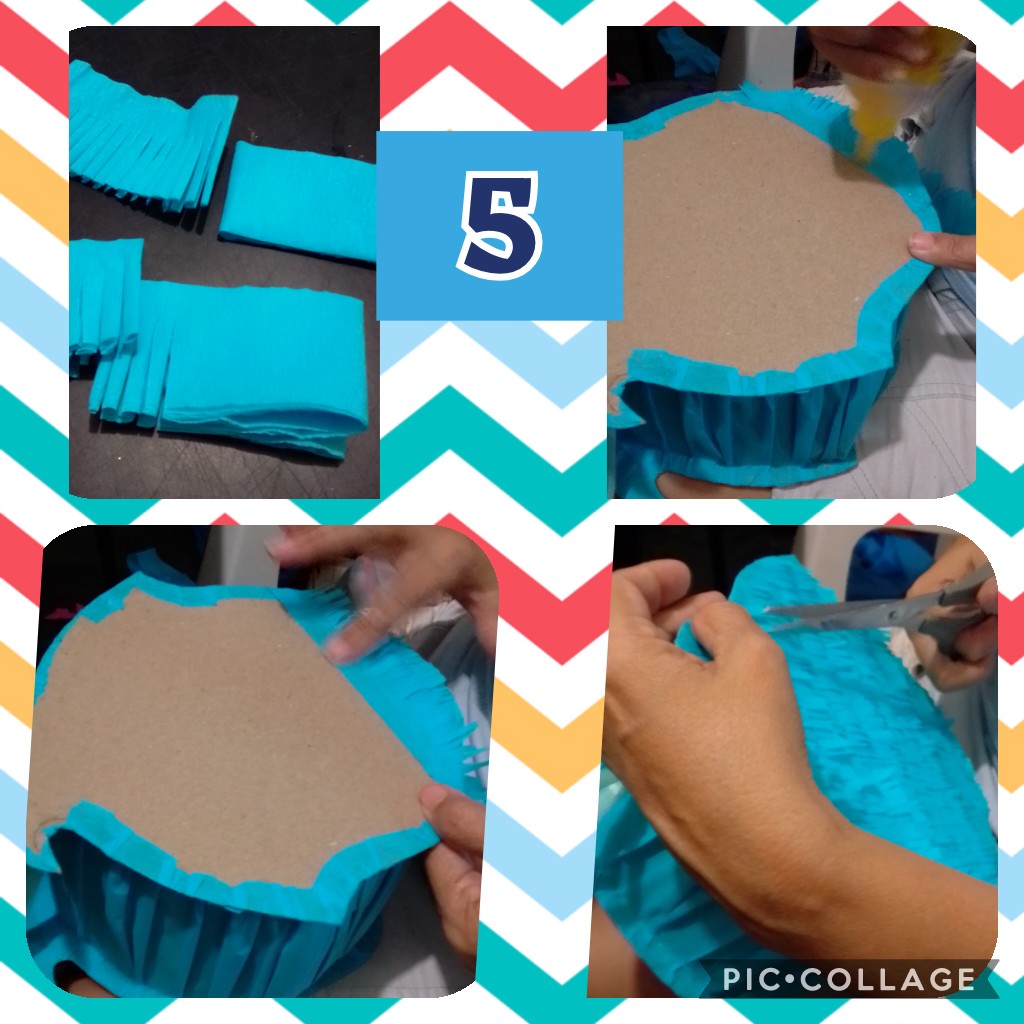
Ya pegada toda la tira, el sobrante se pega a la parte de la cara y luego se recortan tiras de 3 cms de ancho y se le hacen tiritas delgadas para empezar a cubrir las piezas de abajo hacia arriba hasta cubrirla toda.
Once the entire strip is glued, the excess is glued to the part of the face and then strips of 3 cm wide are cut and thin strips are made to start covering the pieces from the bottom up until they are all covered.
En este paso, transferimos la cara en foami y recortamos en color carne, y con una regla de círculos marcamos los cachetes, ojos naríz y luego pintamos y recortamos algunas piezas en foami, la boca, naríz y ojos y vamos pegando y armando la cara.
In this step, we transfer the face in foam and cut it in flesh color, and with a rule of circles we mark the cheeks, eyes, nose and then we paint and cut some pieces in foam, the mouth, nose and eyes and we are gluing and assembling the face .
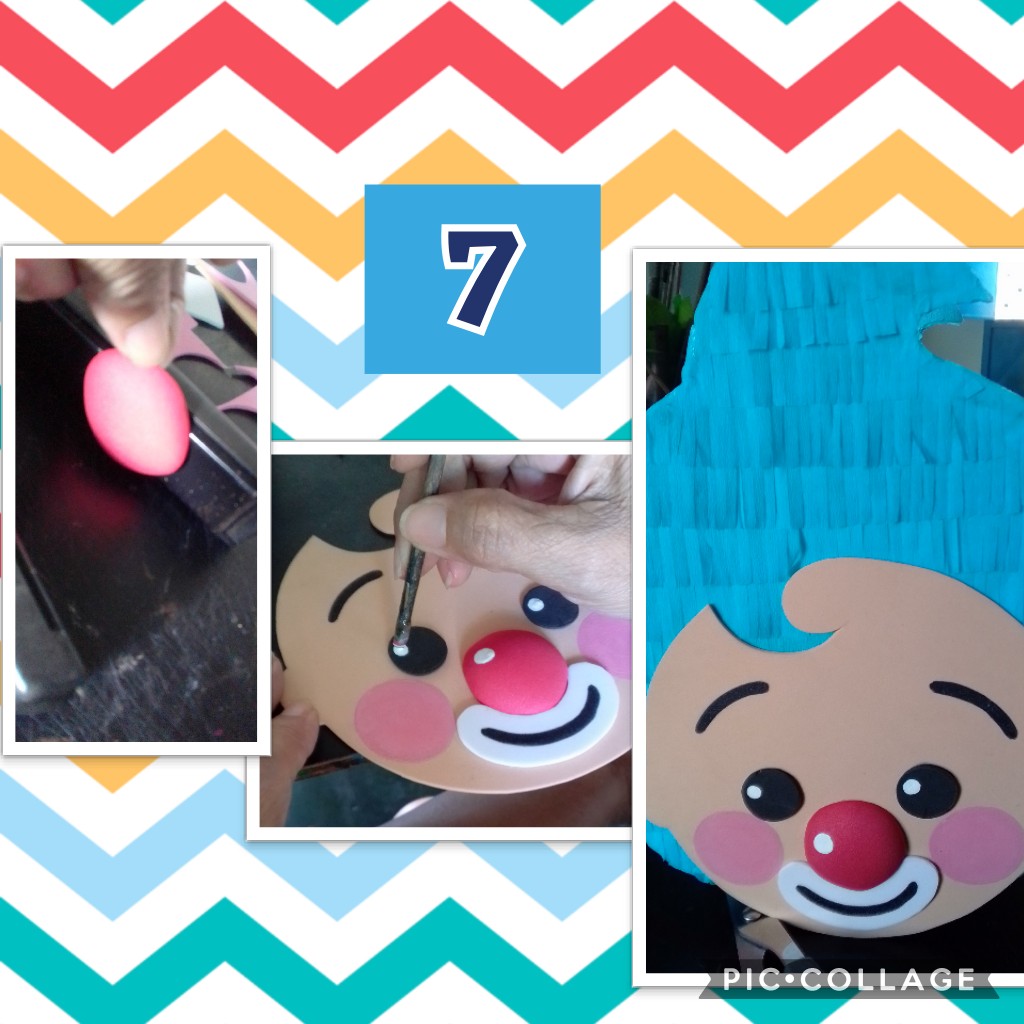
Recortada la naríz, la colocamos en la plancha para que tome forma y agarre volumen, la pegamos, luego pintamos con marcador las cejas y el centro de la boca y le damos brillo con pintura blanca en los ojos y
naríz y por último pegamos la carita a la piñata o dulcero ya forrado.
! [plimpaso7.jpg] (https://images.hive.blog/DQmRx5Z2PhCVU3CwA1hJtVqdqWFM1GdGMbH7BgQyxxgUSpT/plimpaso7.jpg)
With the nose trimmed, we place it on the iron so that it takes shape and takes on volume, we glue it, then we paint the eyebrows and the center of the mouth with a marker and shine it with white paint on the eyes and
nose and finally we stick the face to the piñata or candy box already lined.

Y YA ESTÁ LISTA LA MINI PIÑATA O DULCERO QUE ESTOY SEGURA LE ENCANTARÁ AL NIÑO O NIÑA QUE DESEES REGALAR.!
Y COMO SIEMPRE LES DIGO, EL APRENDER NUNCA ESTÁ DEMÁS Y EN ESTOS TIEMPOS LIBRES QUE TENEMOS POR ESTA PANDEMIA ES BUENO REALIZAR CUALQUIER ACTIVIDAD Y SI TE GUSTA COMO PROYECTO PARA LA VENTA, MUCHO MEJOR...
ESPERO LES GUSTE ESTE MI PASO A PASO! DE VERDAD ME ES GRATO COMPARTIR LO POCO QUE SÉ CON USTEDES...
Comments