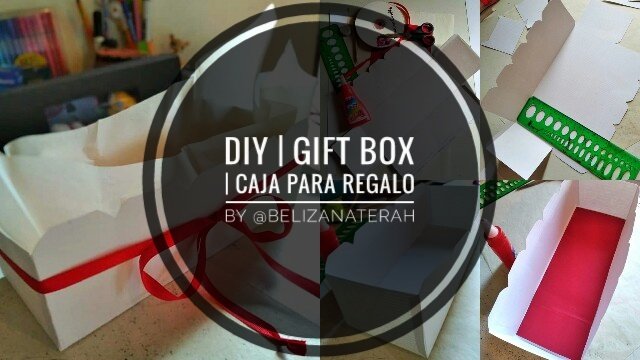
Step by step: Box for arrangement-gift 🎁📦 | Paso a paso: Caja para arreglo-regalo 🎁📦
0 comments
Hello hivefriends! I hope you are well ✌
In this opportunity I bring you a box that is simple but, it is very nice and it is very useful when making arrangements, to give on any occasion.
You can play with the sizes and colors according to what you need, and you can also create your own designs.
When making this box, you must take into account the thickness of the cardboard, it must be resist what you put inside.
The materials I used were the following:

📌Materials:
⚫ Tabloid size white card stock
⚫ Scrap of red cardboard
⚫ Tabloid size tracing paper
⚫ Red ribbon 72cm approx
⚫ Mold
⚫ White glue
⚫ Scissor
⚫ Rule
⚫Eraser
⚫Pencil
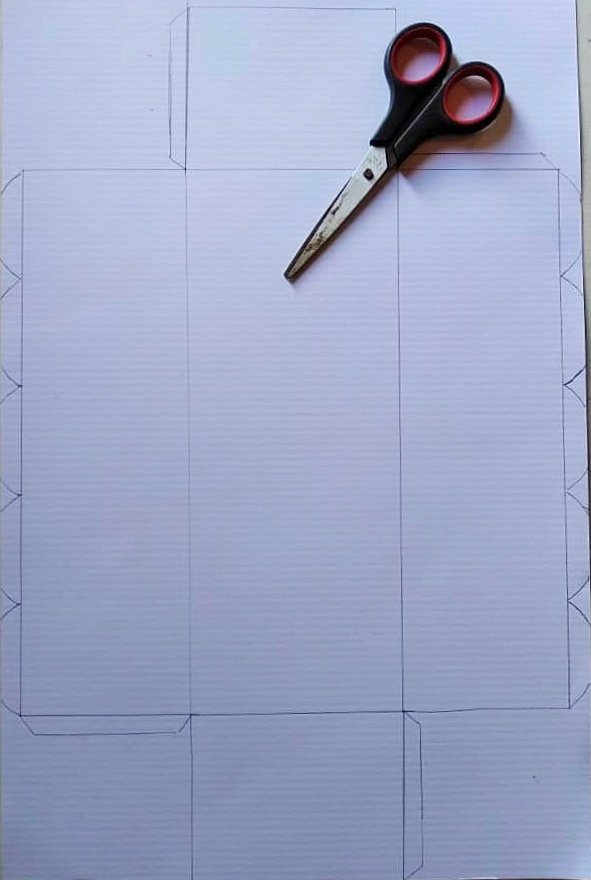
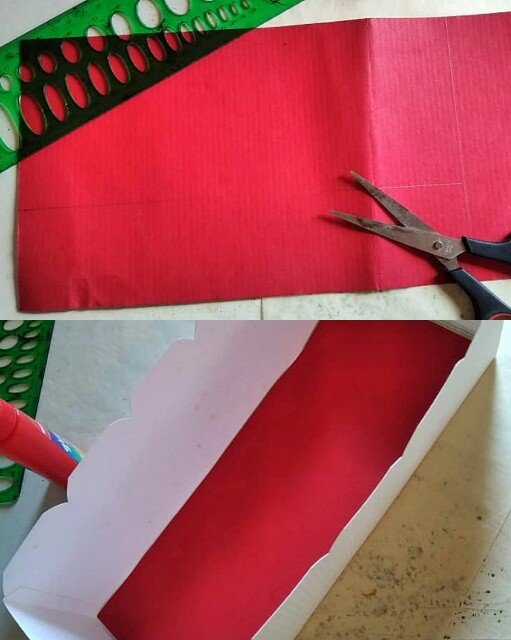
Previously I made the mold of the box, this is a rectangle 26cm long by 10cm wide and 8cm high on the smaller sides and 9cm on the larger ones, this is because I left 1cm on them to make some flaps shaped like semi waves for a better finish. Just as I show it in the image 👇

📌Steps:
1- The first thing I did was mark the outline of the mold on the white cardboard and cut it out with scissors. Taking into account the internal lines to guide me later when it comes to folding the sides to assemble the box.
2- Fold the sides helping me with a ruler and then I began to paste them with white glue, until I assembled the box. It is important to let the glue dry well.
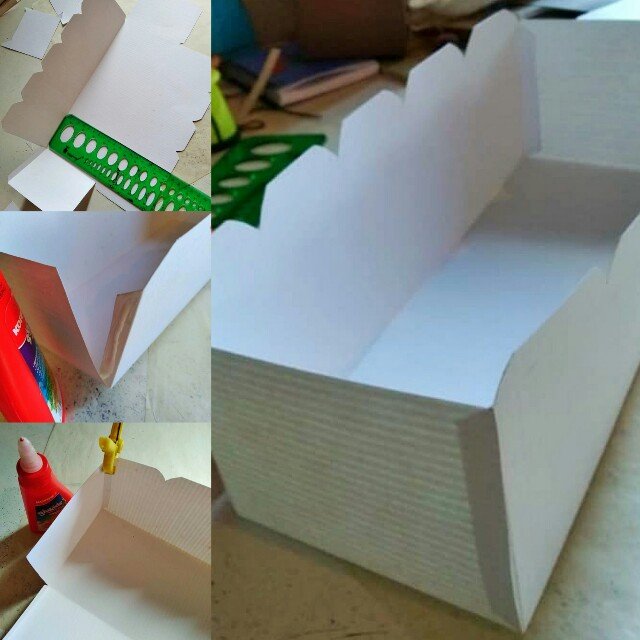
3- In the piece of red cardboard cut a rectangle a few millimeters smaller than the base of the rectangle, to have more support.
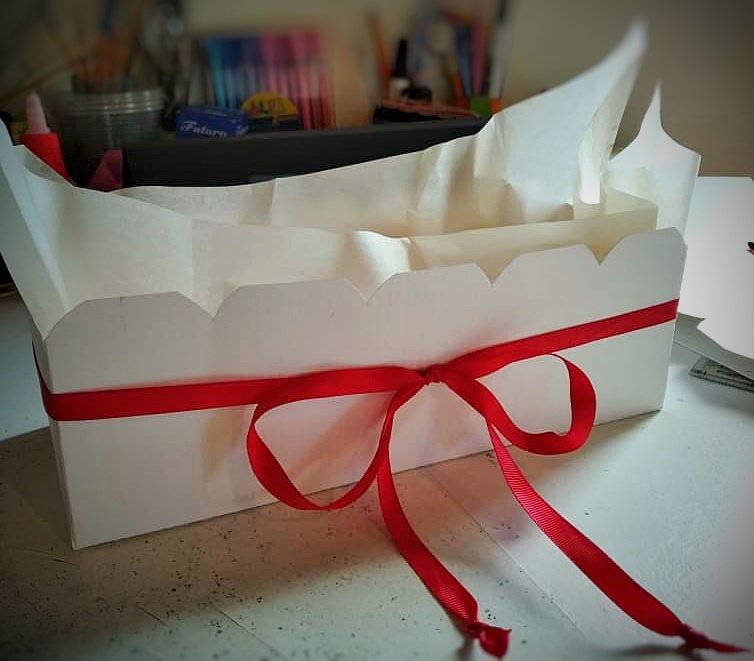
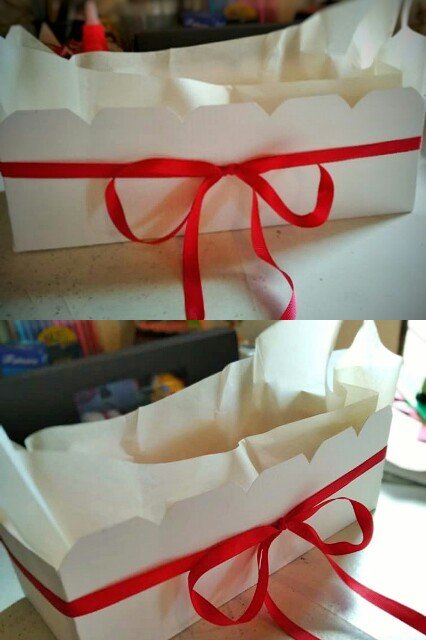
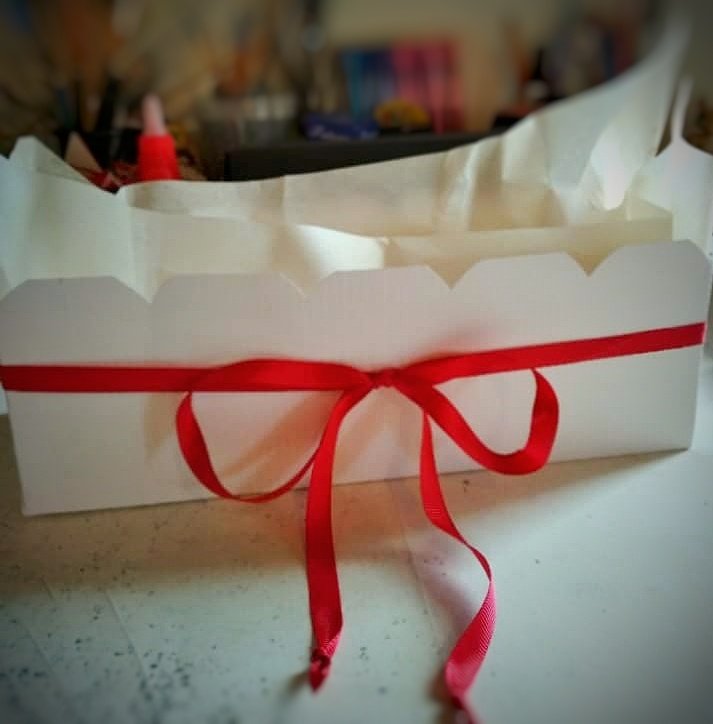
4- To finish, I placed the tracing paper inside the box, arranging it so that it is even on each side, this will make it look better visually. And with the red ribbon decorate tying it on the outside.
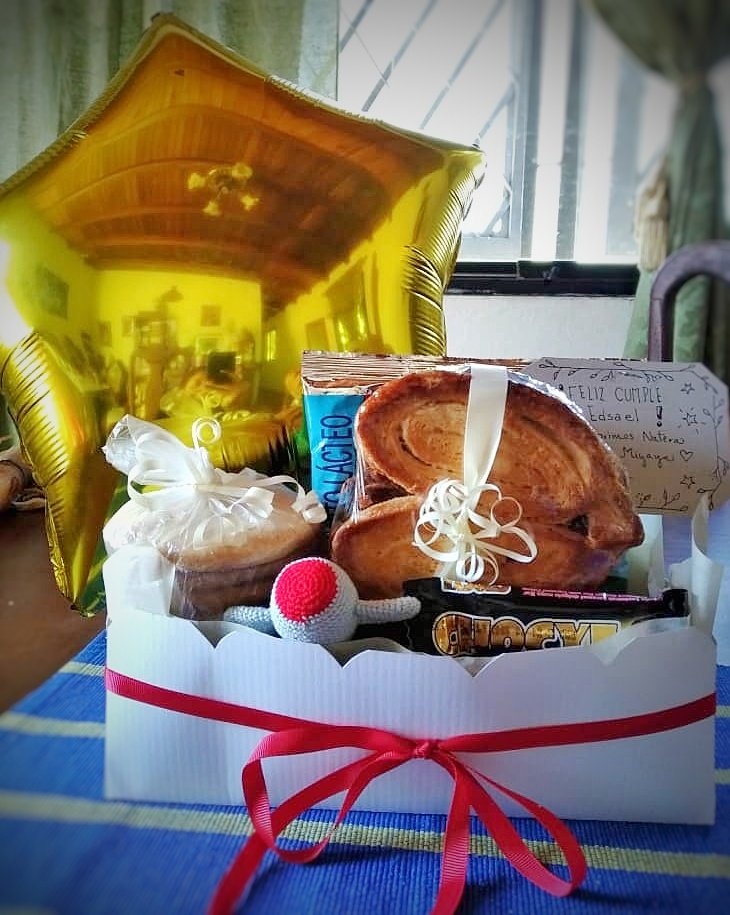
And that's how my box is ready to make arrangements and give away.
I made this box to give to a little cousin who had his birthday, and that's how his gift turned out. It is a very versatile box and you can use it in many different ways, you just have to get creative 😉
Thanks for reading me! Until a new post 😊
¡Hola hiveamigos! Espero se encuentren bien ✌
En esta oportunidad les traigo una caja que es simple pero, queda muy bonita y es muy útil a la hora de hacer arreglos, para regalar en cualquier ocasión.
Puedes jugar con los tamaños y colores de acuerdo a lo que necesites, y así también podrás crear tus propios diseños.
A la hora de realizar esta caja, debes tomar en cuenta el grosor de la cartulina, ésta debe ser dura para resistir lo que coloques dentro.
Los materiales que utilicé fueron los siguientes:
📌Materiales:
⚫Cartulina blanca tamaño tabloide
⚫Retazo de cartulina roja
⚫Papel vegetal tamaño tabloide
⚫Cinta roja 72cm aprox
⚫Molde
⚫Pega blanca
⚫Tijera
⚫Regla
⚫Borrador
⚫Lápiz
Previamente realicé el molde de la caja, éste es un rectángulo de 26cm de largo por 10cm de ancho y de altura tiene 8cm en los laterales mas pequeños y 9cm en los más grandes, ésto se debe a que en ellos dejé 1cm para realizar unas solapas con forma de semi ondas para un mejor acabado. Así como lo muestro en la imagen 👇
📌Pasos:
1- Lo primero que hice fue marcar el contorno del molde en la cartulina blanca y lo recorte con la tijera. Tomando en cuenta las líneas internas para, guiarme luego a la hora de doblar los lados para armar la caja.
2- Doble los lados ayudándome con una regla y luego comencé a pegarlos con pega blanca, hasta armar la caja. Es importante dejar secar bien el pegamento.
3- En el retazo de cartulina roja corte un rectángulo unos milímetro mas pequeño que la base del rectángulo, para tener mayor soporte.
4- Para finalizar coloqué dentro de la caja el papel de calcar, acomodándolo de manera que quede parejo en cada lado, esto hará que se vea mejor. Y con la cinta roja decore amarrándolo por fuera.
Y listo así quedo mi caja para hacer arreglos y regalar.
Esta caja la hice para regalar a un primito que cumplió años, y así quedó su regalo. Es una caja muy versátil y la puedes usar de muchas maneras diferentes, solo debes ponerte en modo creativo 😉
¡Gracias por leerme! Hasta un nuevo post 😊
Comments