Building dry toilets for our tiny house || Construction de toilettes sèches pour notre tiny house [EN/FR]
22 comments
Hello friends and DIYlovers!
Today, I want to share with you the construction of new dry toilets for our tiny house.
Actually, for the beginning, we (@genesisledger and I) chose to use the dry toilets of our van. But they're not really adapted to our tiny house, and they're not very comfortable.
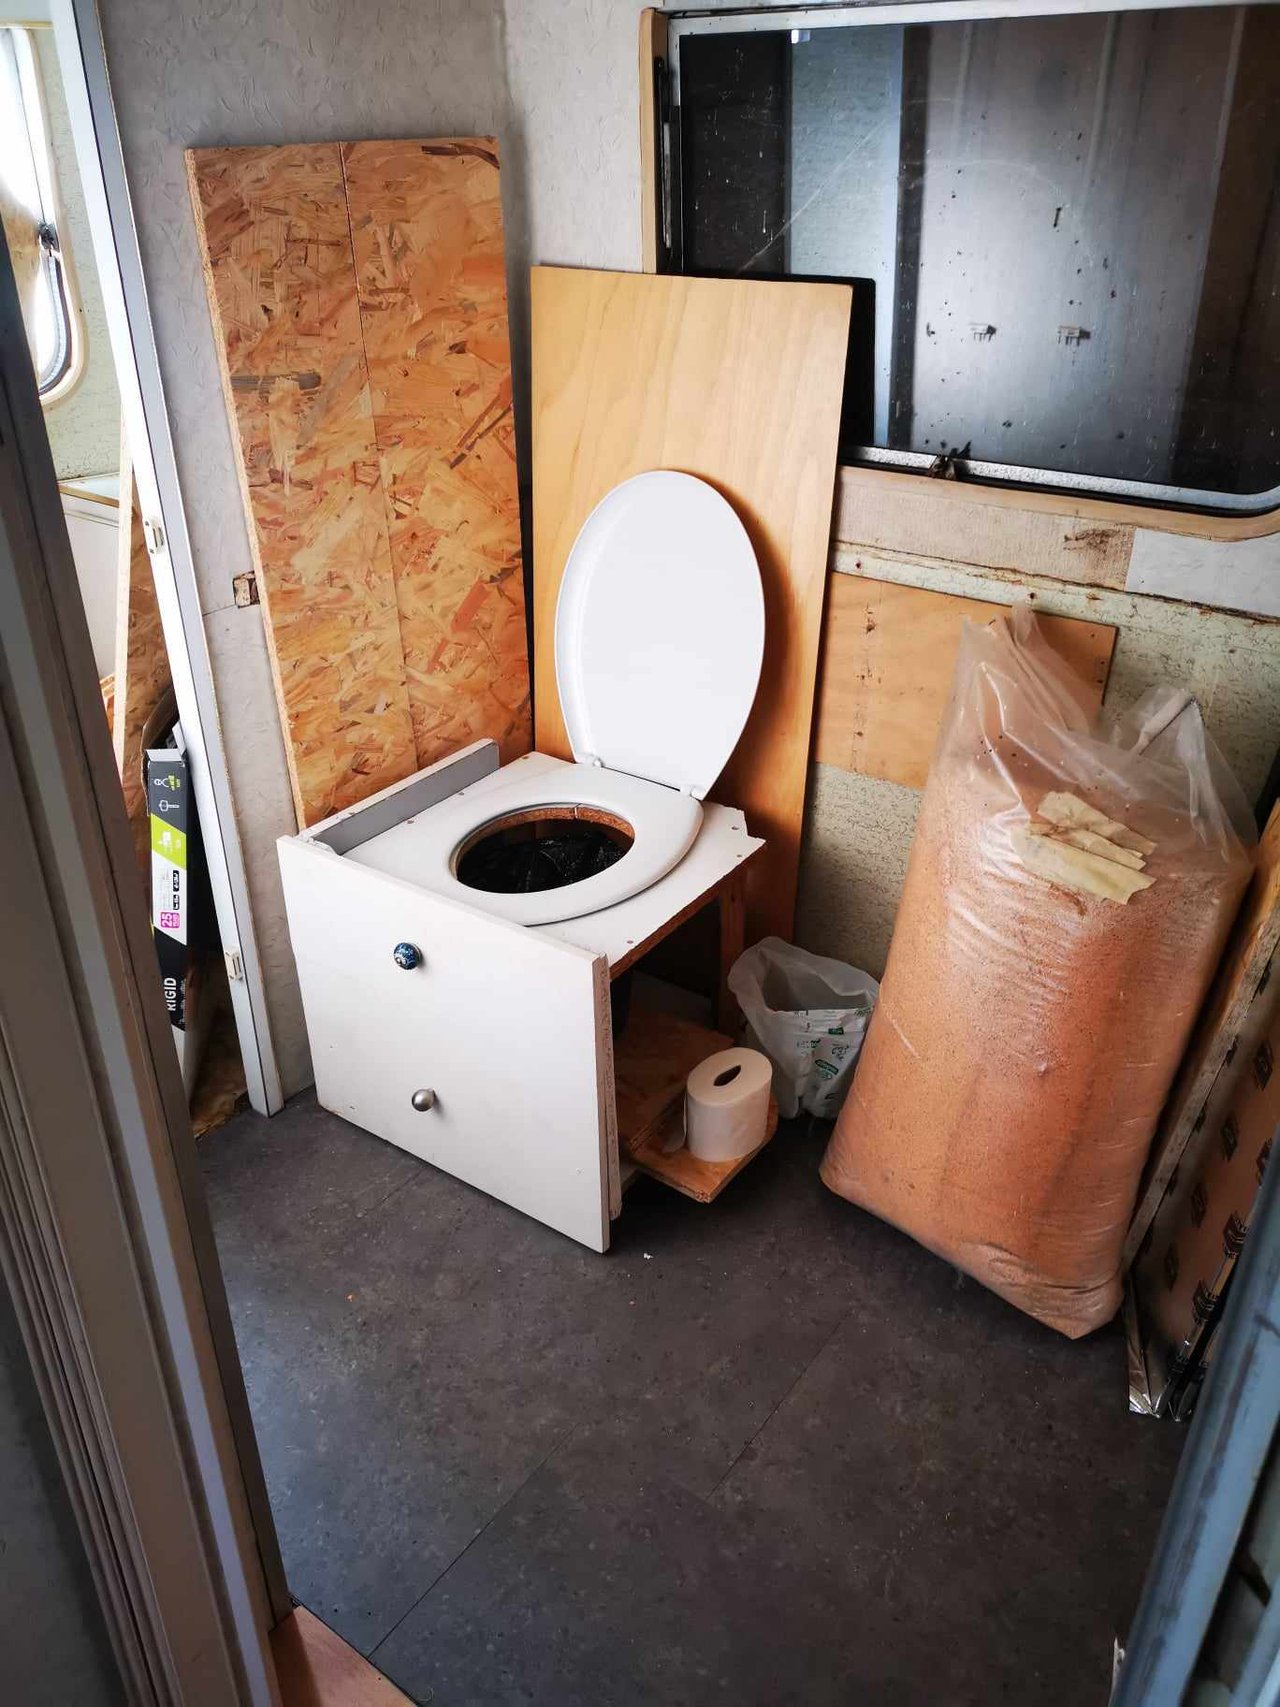 Toilets of the van in our tiny house
 So we set ourselves the challenge of building new ones: taller, more comfortable and, above all, more adapted to our future bathroom.
What's more, my parents came to stay with us for a few days, so they were able to help out. And they were delighted to be involved in the design of our little house.
Step 1: Make a plan
As I'm pretty bad at drawing, I didn't take the time to draw a plan. Instead, I wrote it down.
I watched a whole bunch of videos on Youtube, then combined everything to determine the shape and dimensions.
Here's an overview of the dimensions I had at the end of my brainstorming phase:
A large cube 62 cm long, 50 cm wide and 45 cm high.
With :
- 2 panels 62 cm x 50 cm: 1 for the top, 1 for the bottom;
- 2 panels 62 cm x 45 cm: 1 for the front, 1 for the back;
- 2 panels 50 cm x 45 cm: 1 for right side, 1 for left side;
- 1 board 45.8 cm x 45 cm: for interior partition.
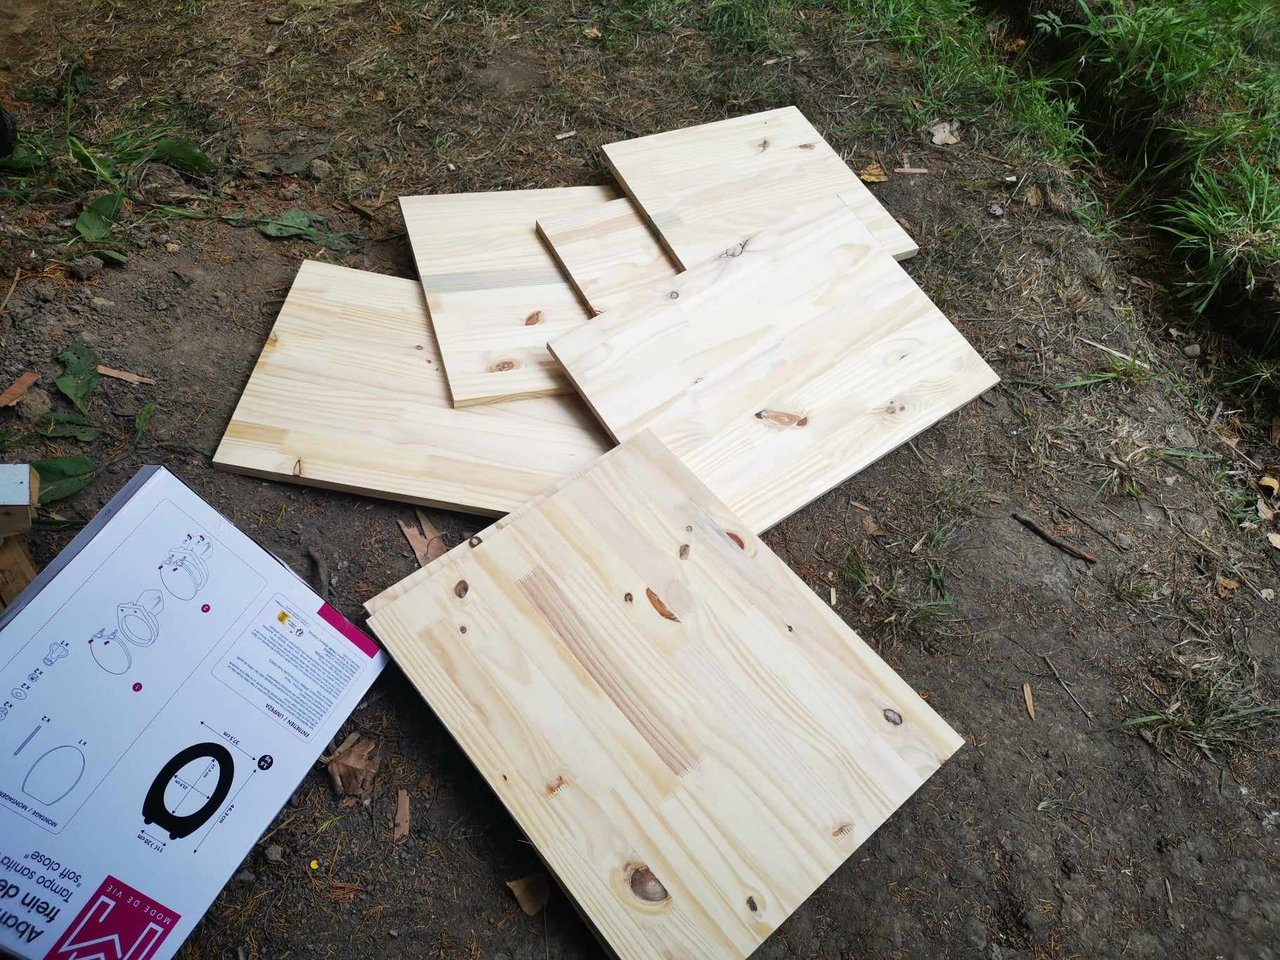
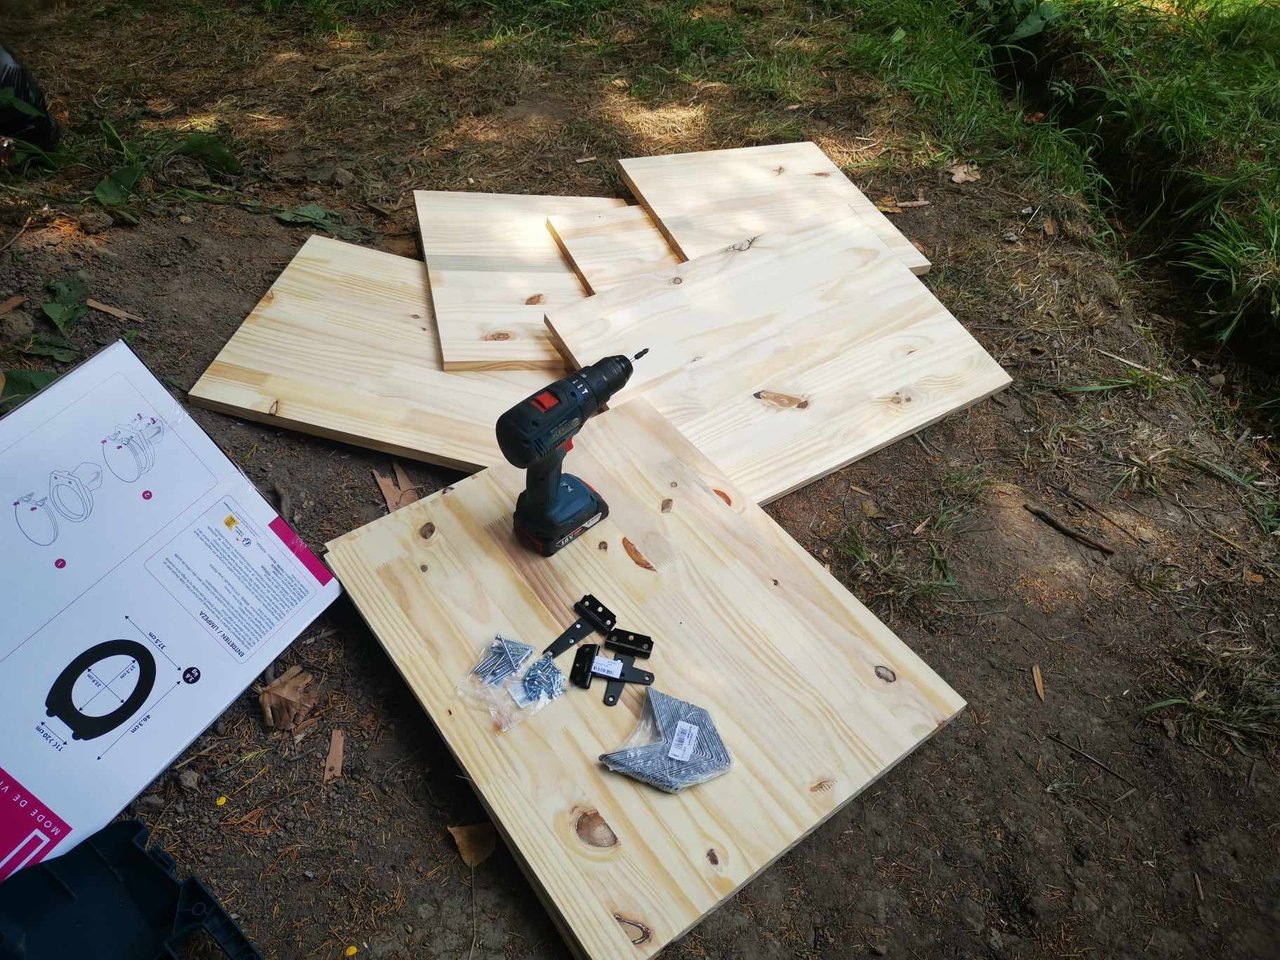
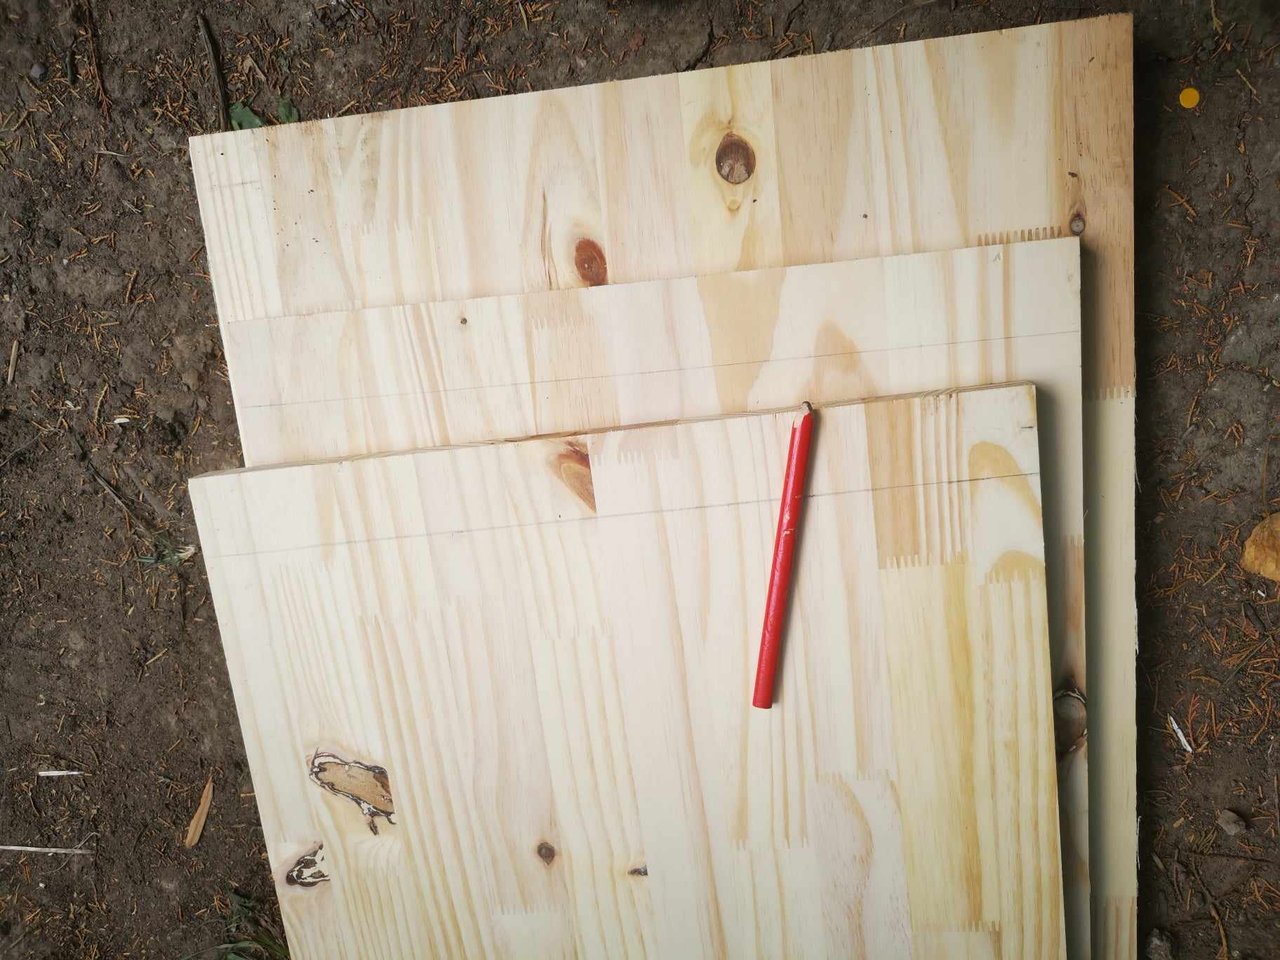
Step 2: Buying materials
Here's the list of materials you'll need to build your dry toilet:
- 2 wooden panels, 62 cm x 50 cm ;
- 2 wooden panels 62 cm x 45 cm ;
- 2 wooden panels 50 cm x 45 cm ;
- 1 wooden panel 45.8 cm x 45 cm ;
- Angle brackets ;
- 3 hinges ;
- Screws;
- Toilet seat.
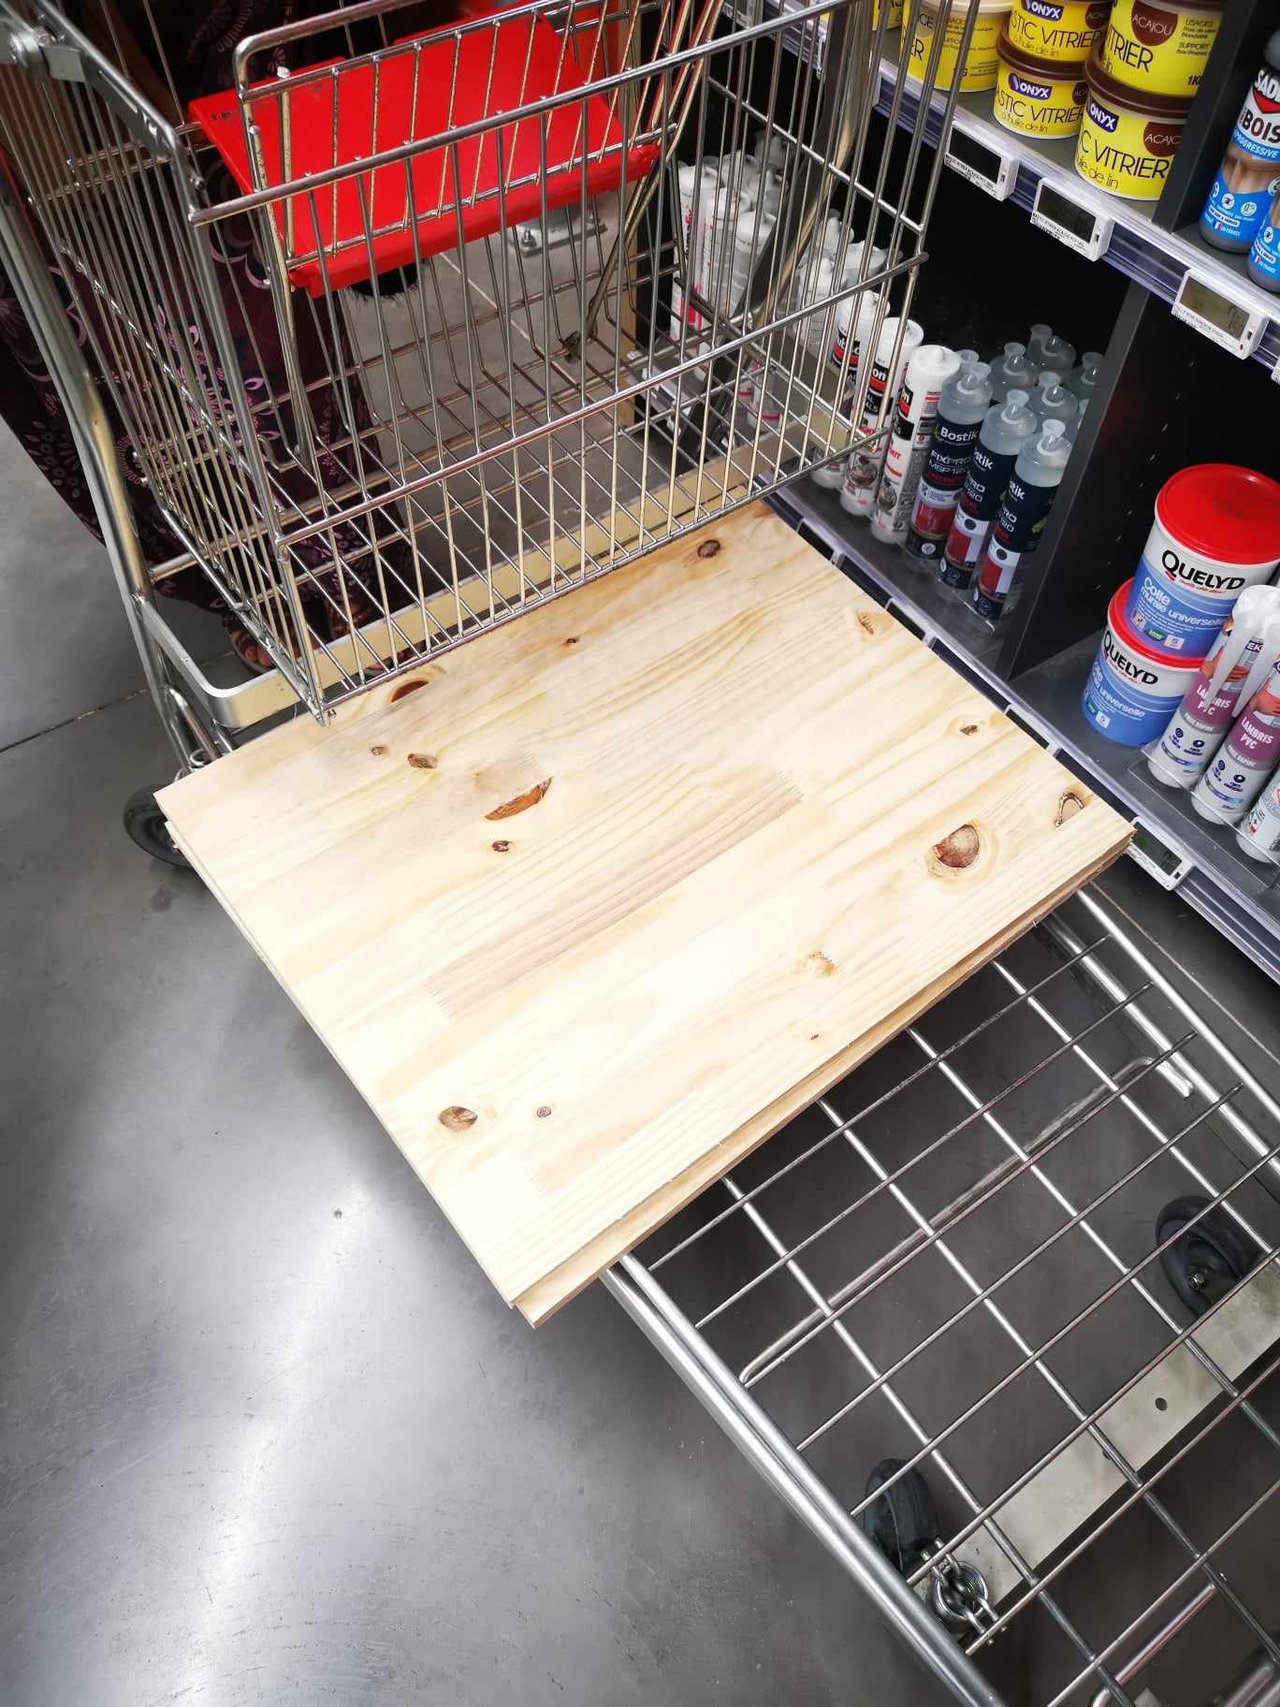
To buy all these materials, we went to our nearest DIY store. This store has a wood workshop and offers cutting services. So we had our panels cut directly in the store. That way, all we had to do was assemble them.
But in the end, as you'll see, we had to modify the dimensions slightly.
In fact, if I'd taken the time to draw a plan, I'd have realized beforehand that my measurements were wrong. But, as they say, you learn by making mistakes.
For the wood, we opted for fir, as it's relatively affordable, quite hard-wearing and very aesthetically pleasing.
We chose 21 mm thick panels.
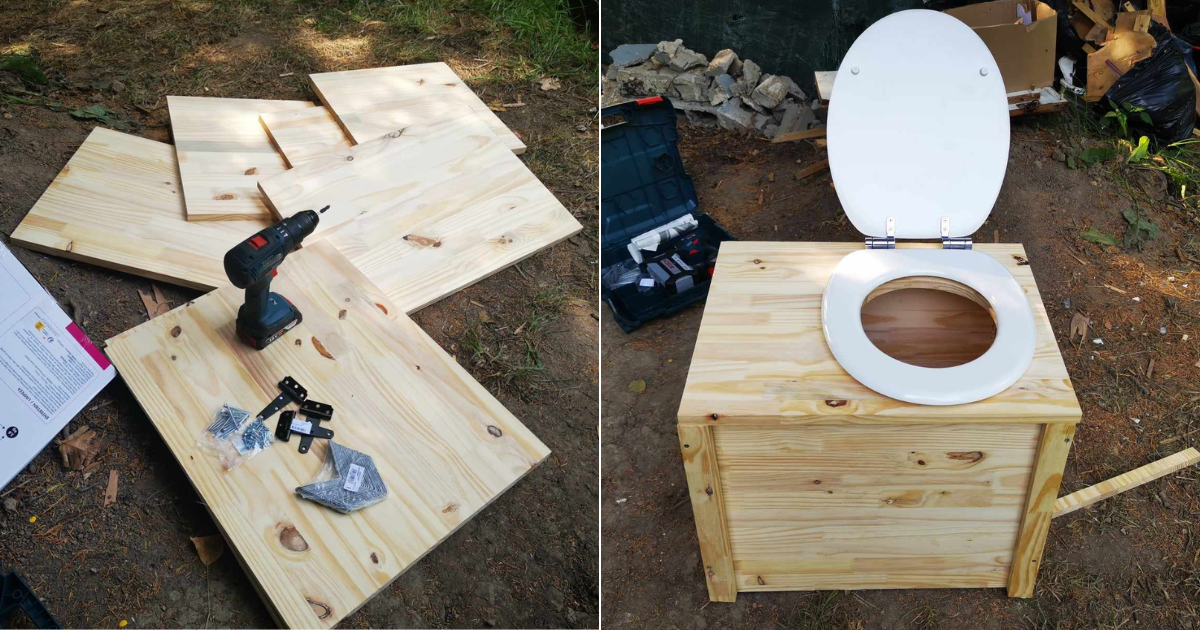
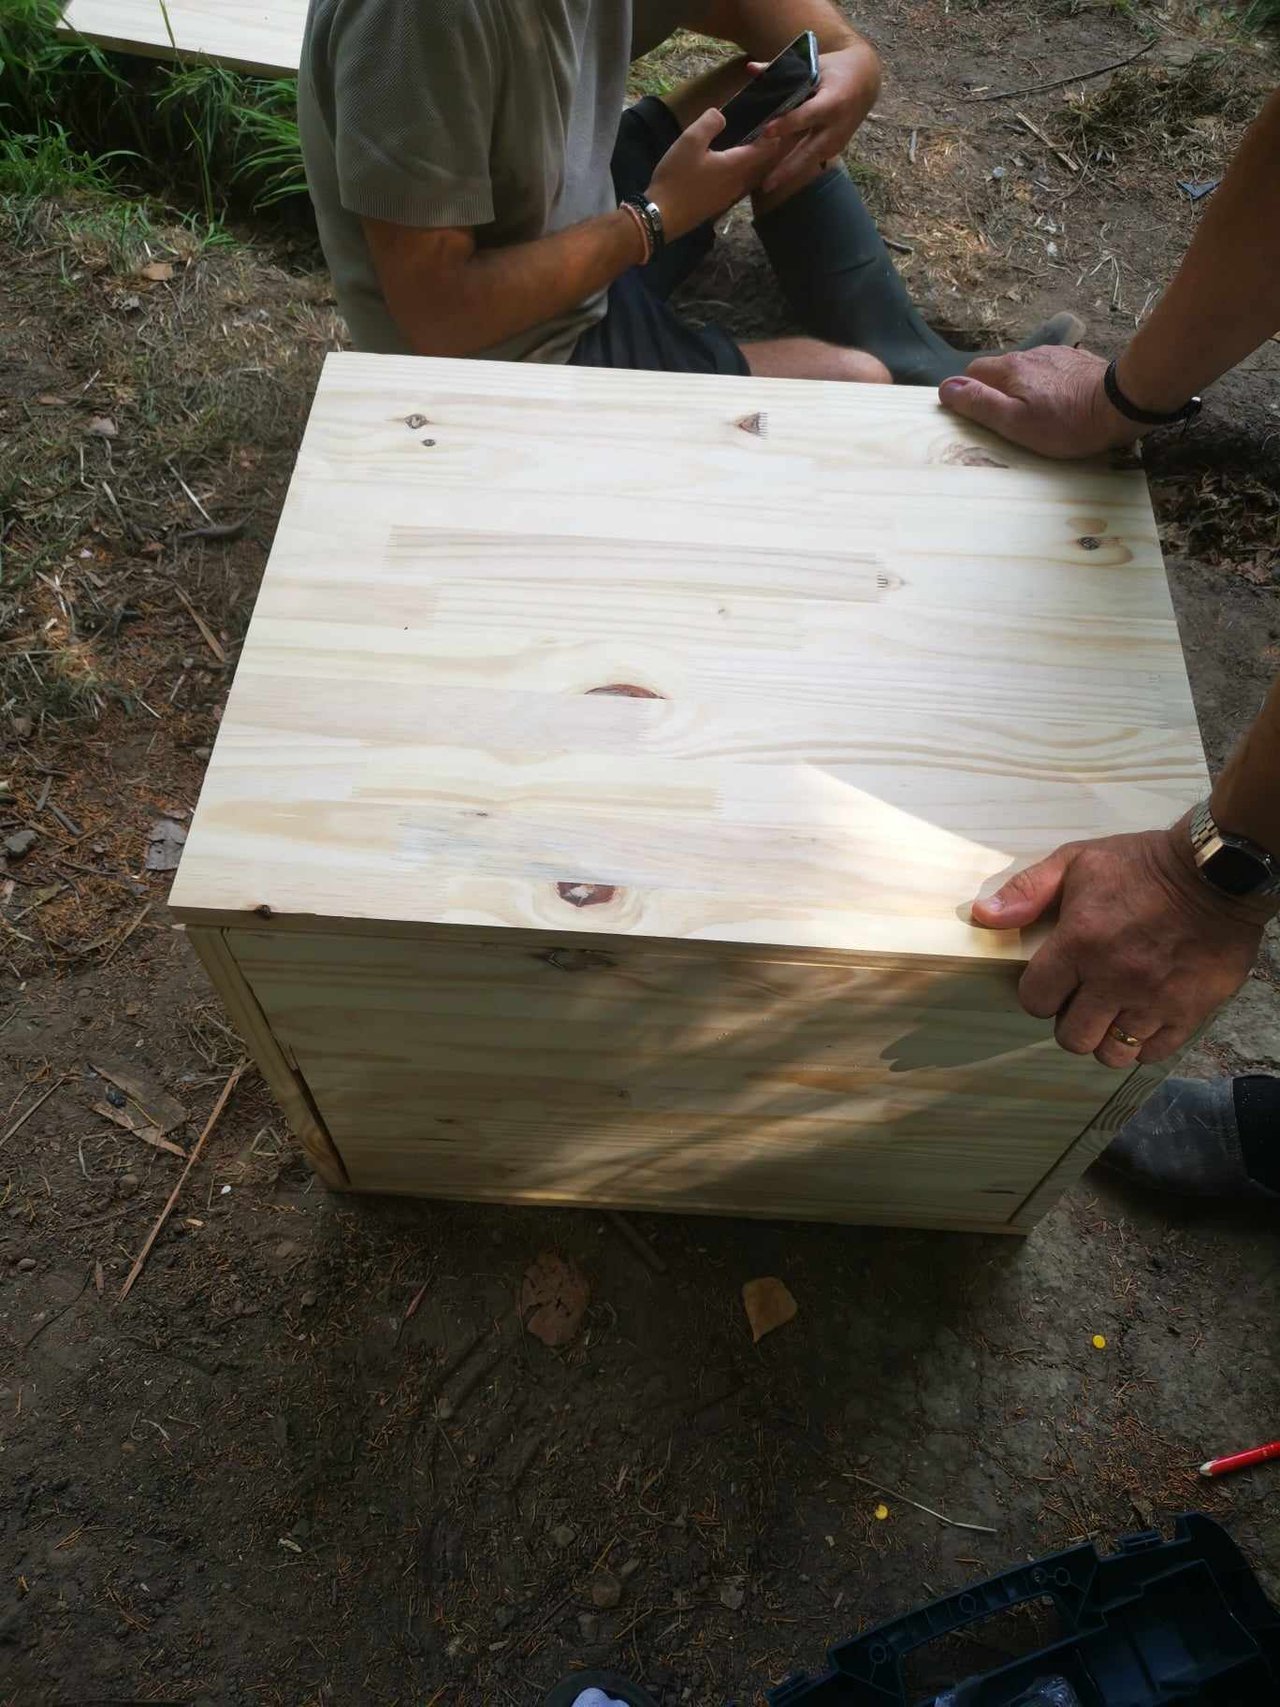
Step 3: Assembly
For assembly, we started by taking one of the 62 cm x 50 cm panels, the one below. And we also took one of the 50 cm x 45 cm panels to secure one side of the toilet with the brackets.
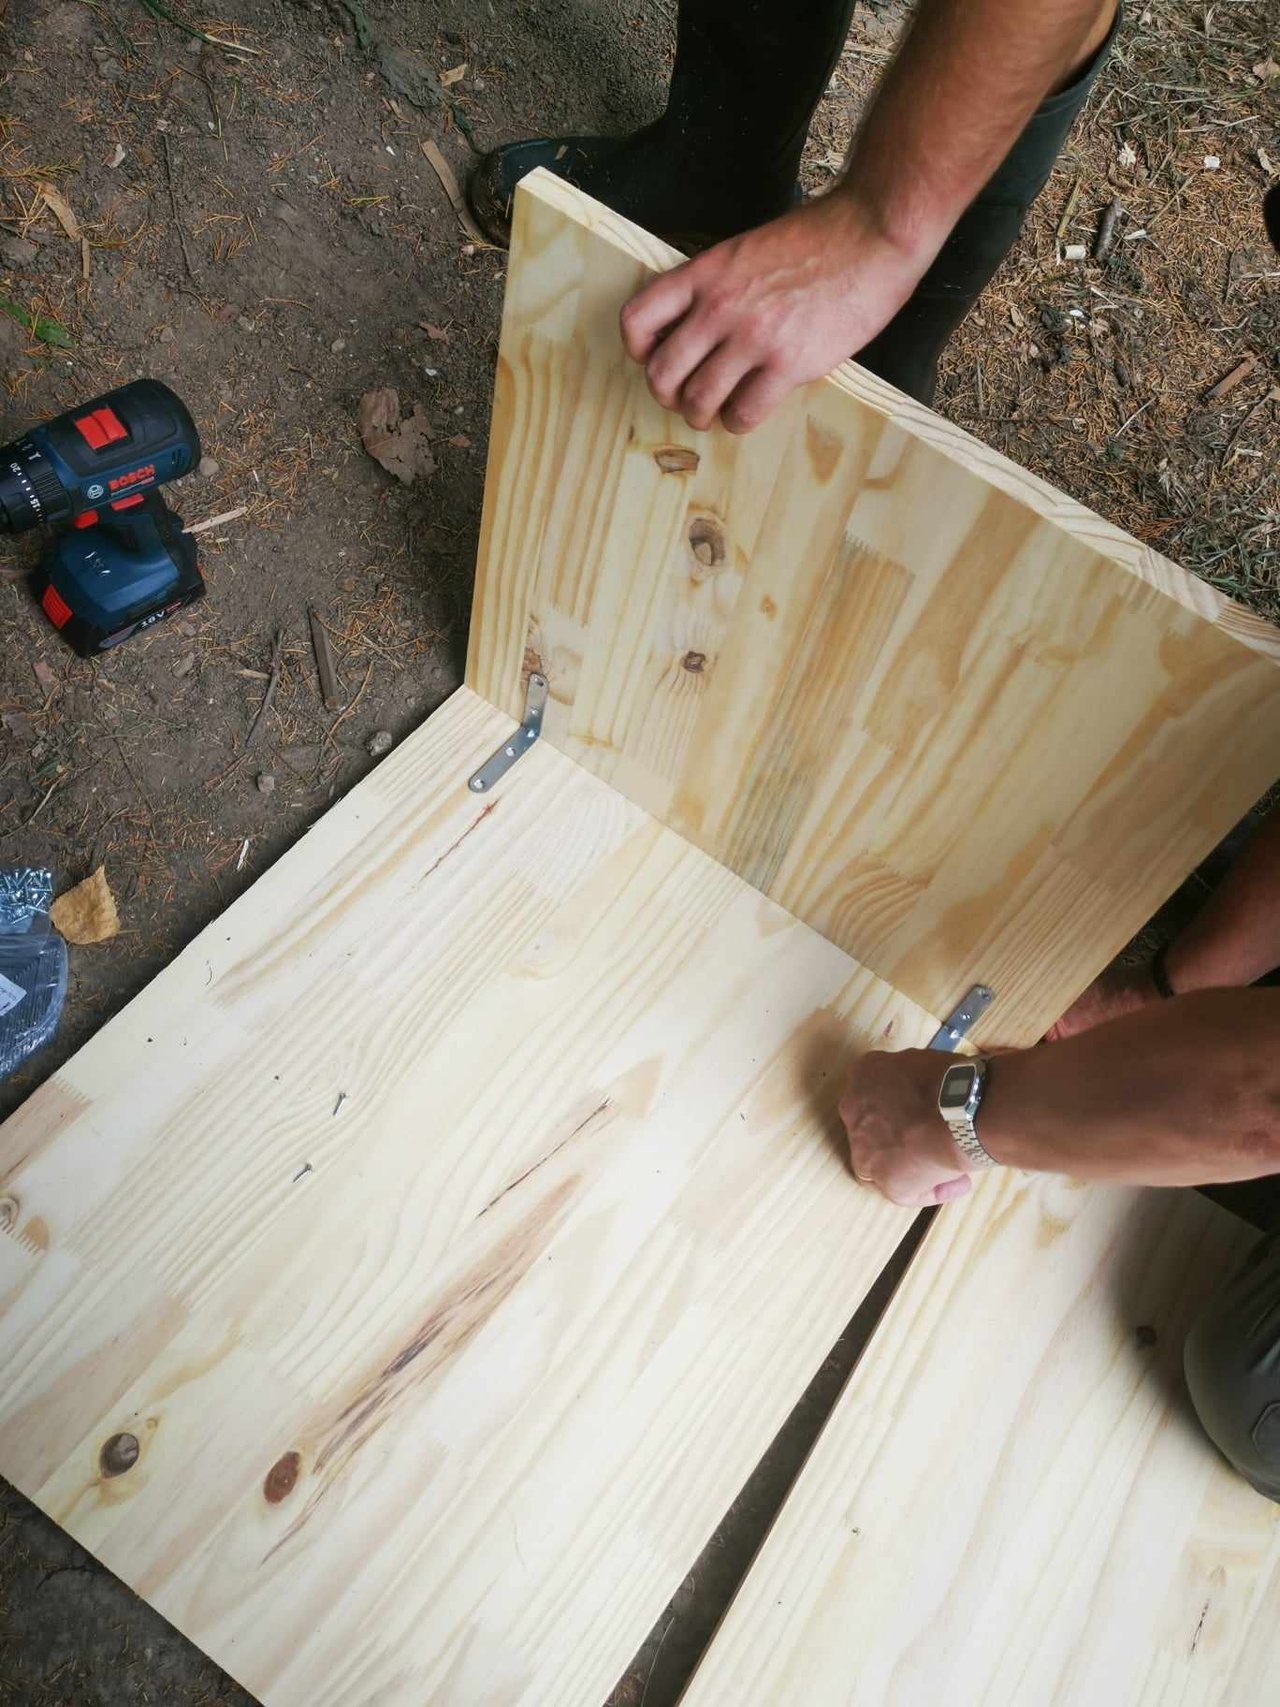
Once we'd defined where to put the brackets, we started by fixing them: first on the underside, then on the side.
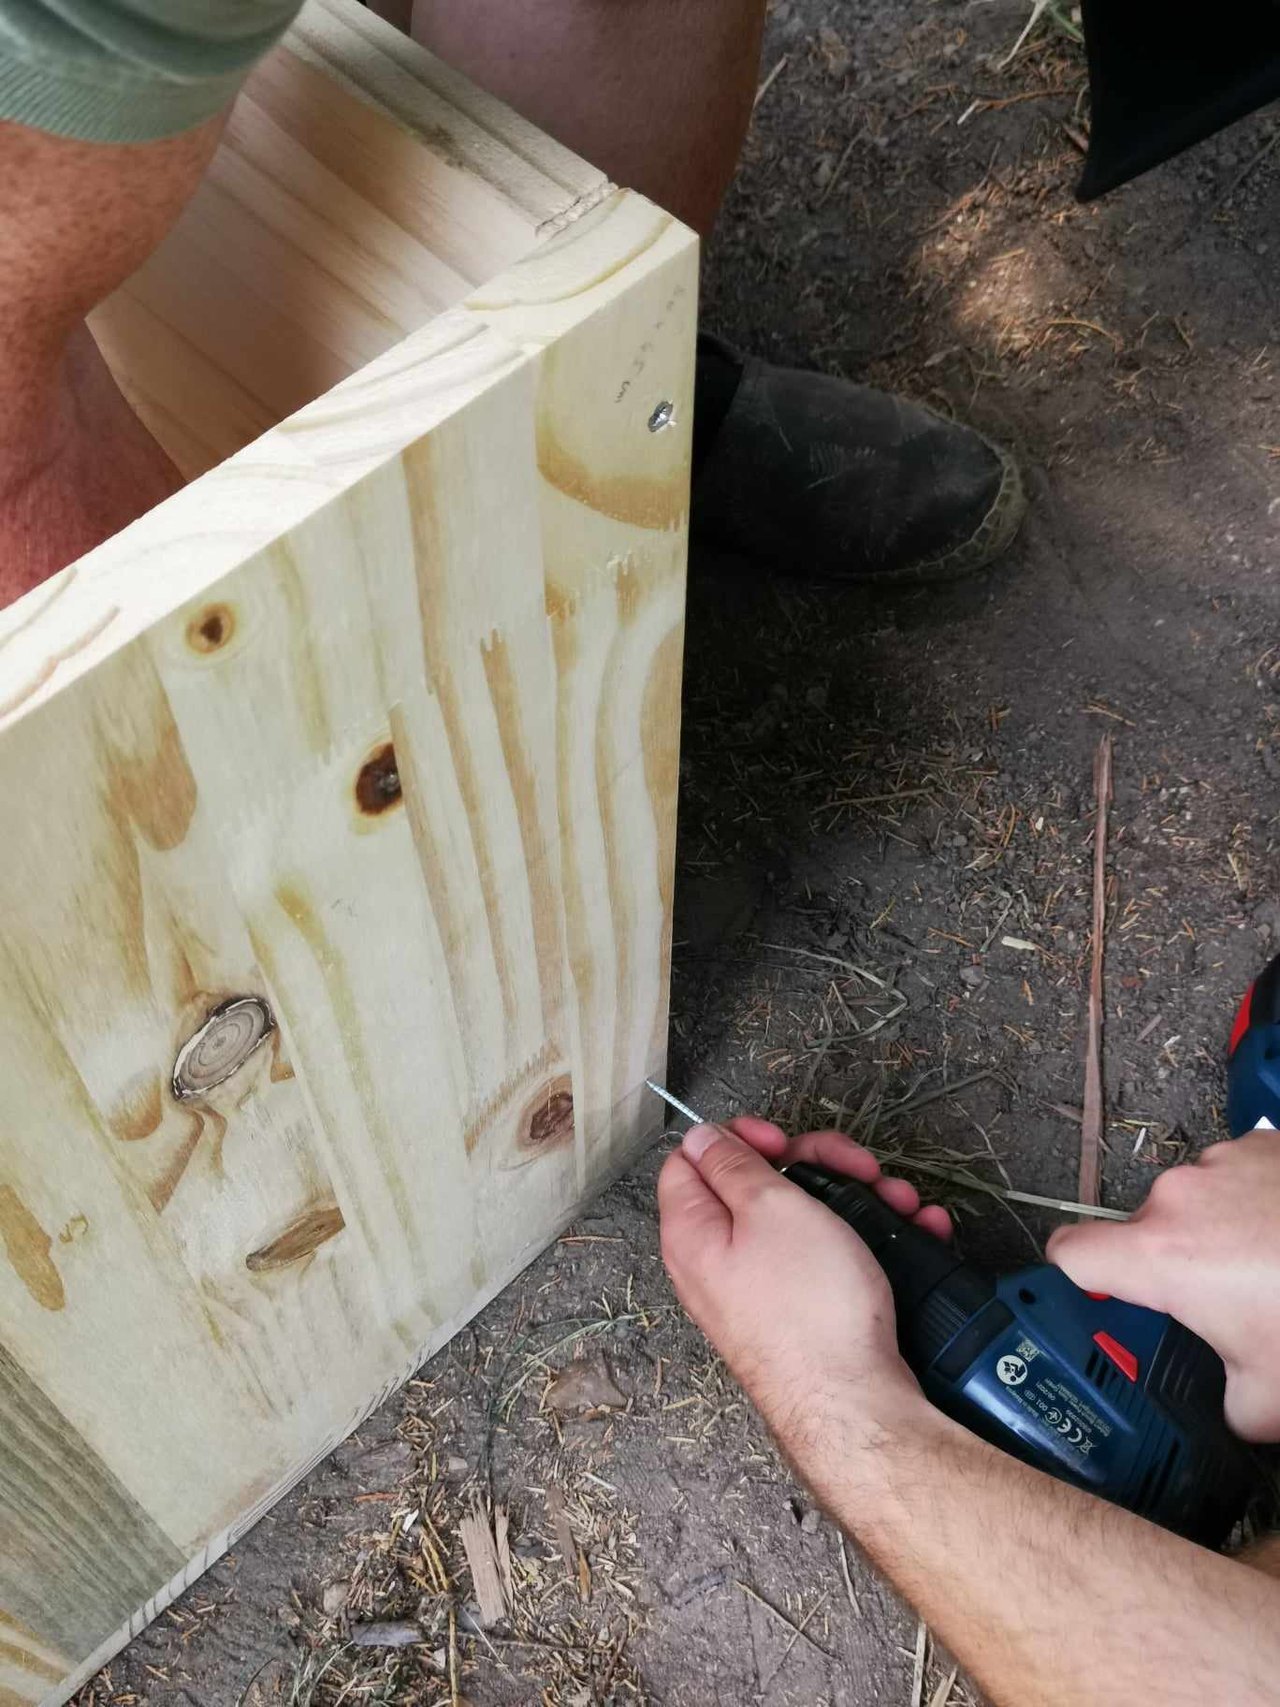
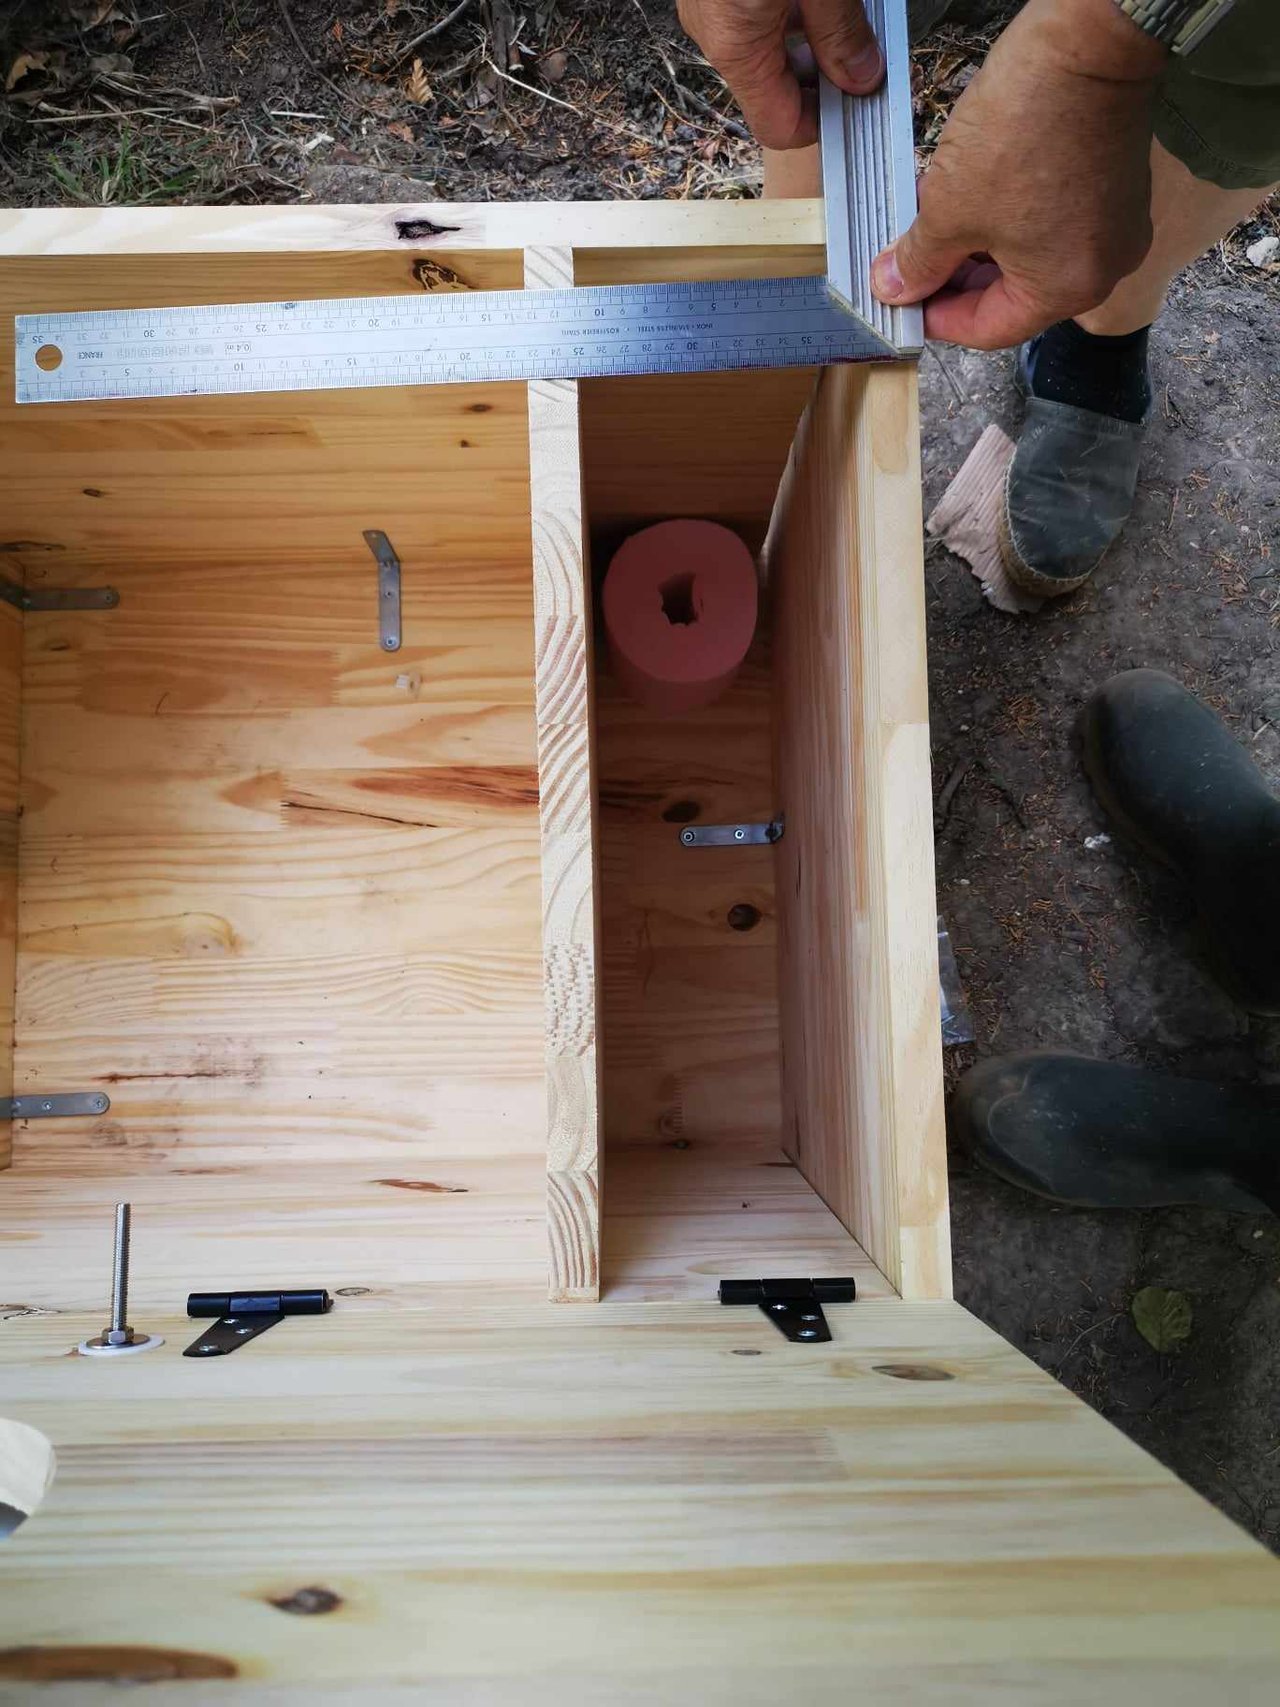
Then we took the front face and placed it where it would be fixed. And that's when we realized my mistake: I hadn't taken the thickness of the panels into account when defining the measurements.
In short, we had to recut the front and back panels.
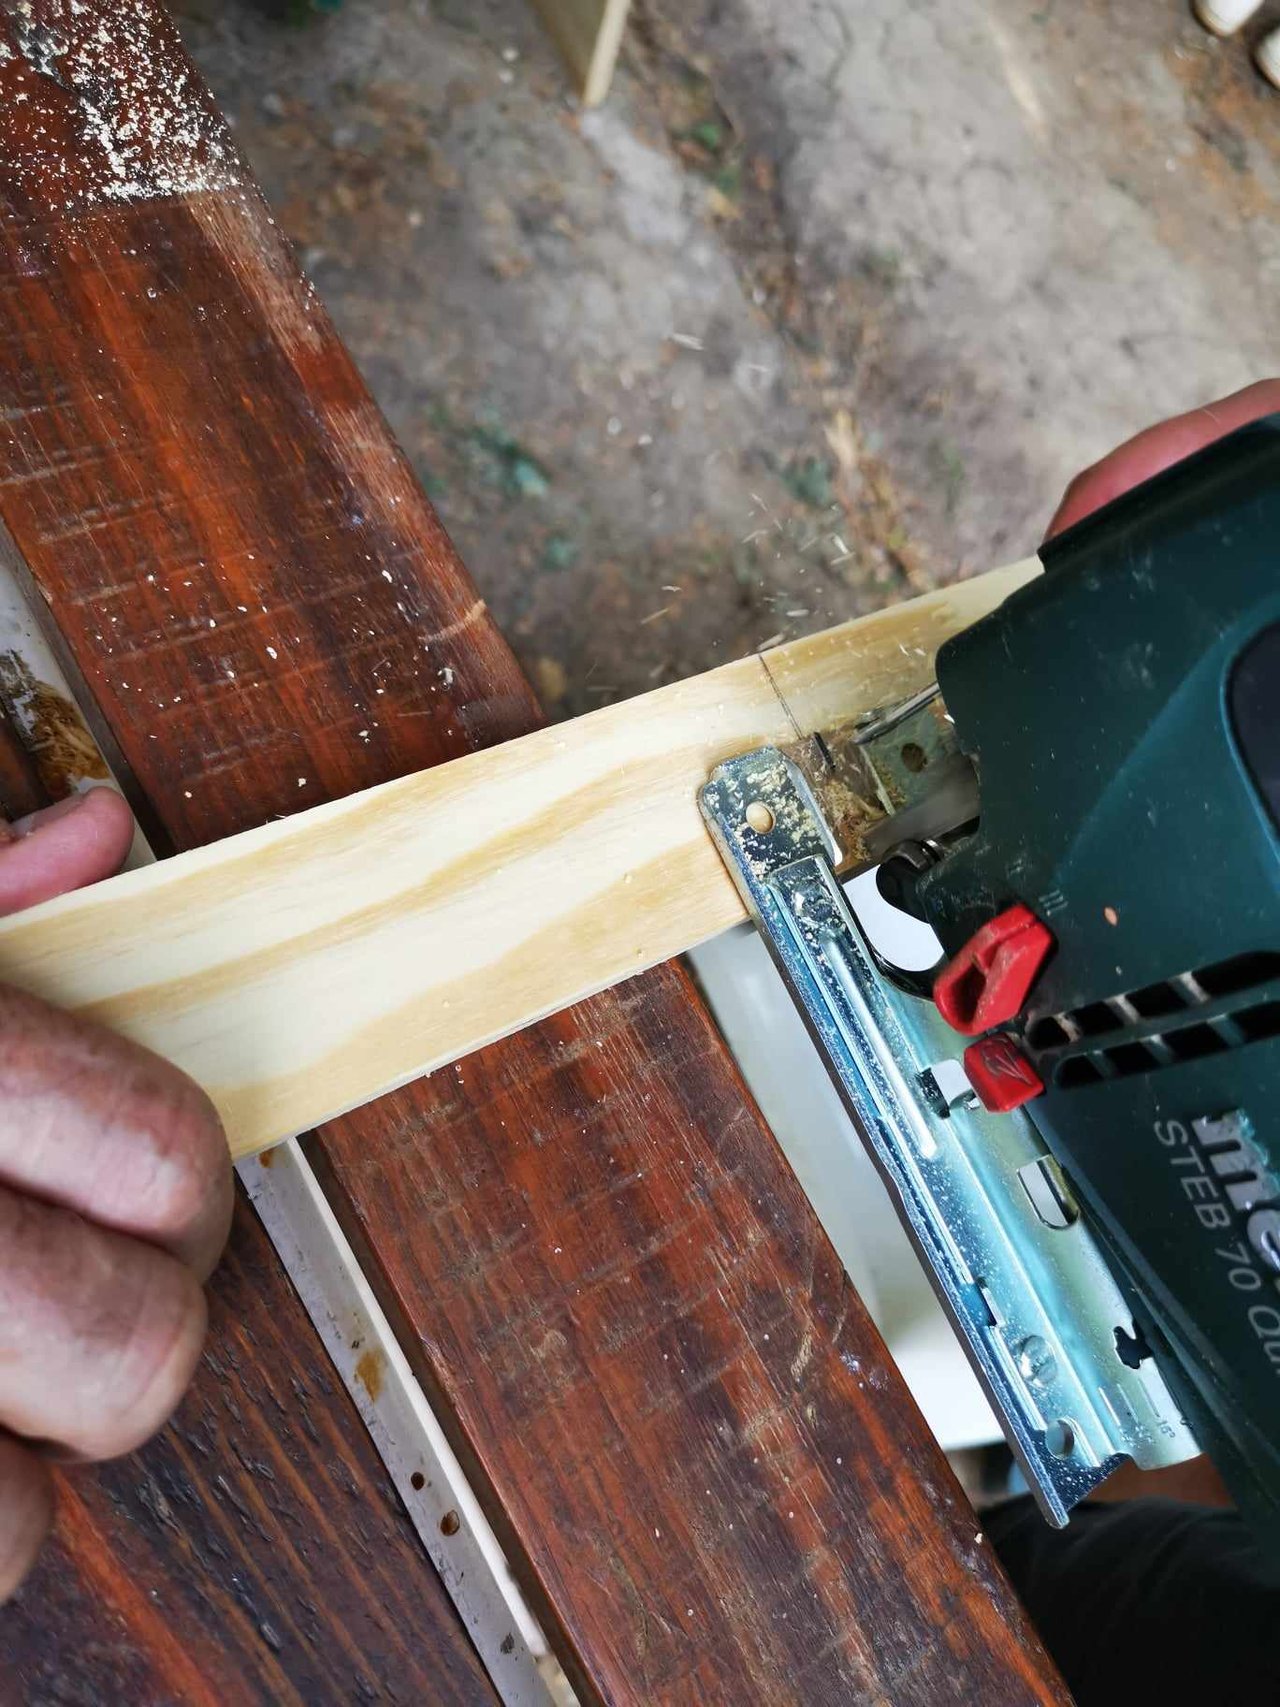
And we didn't have the right blade in the jigsaw, so the cut isn't straight (but my dad found a solution so it doesn't show - I'll tell you about it later).
So, once we'd recut these two faces, we could get on with the assembly.
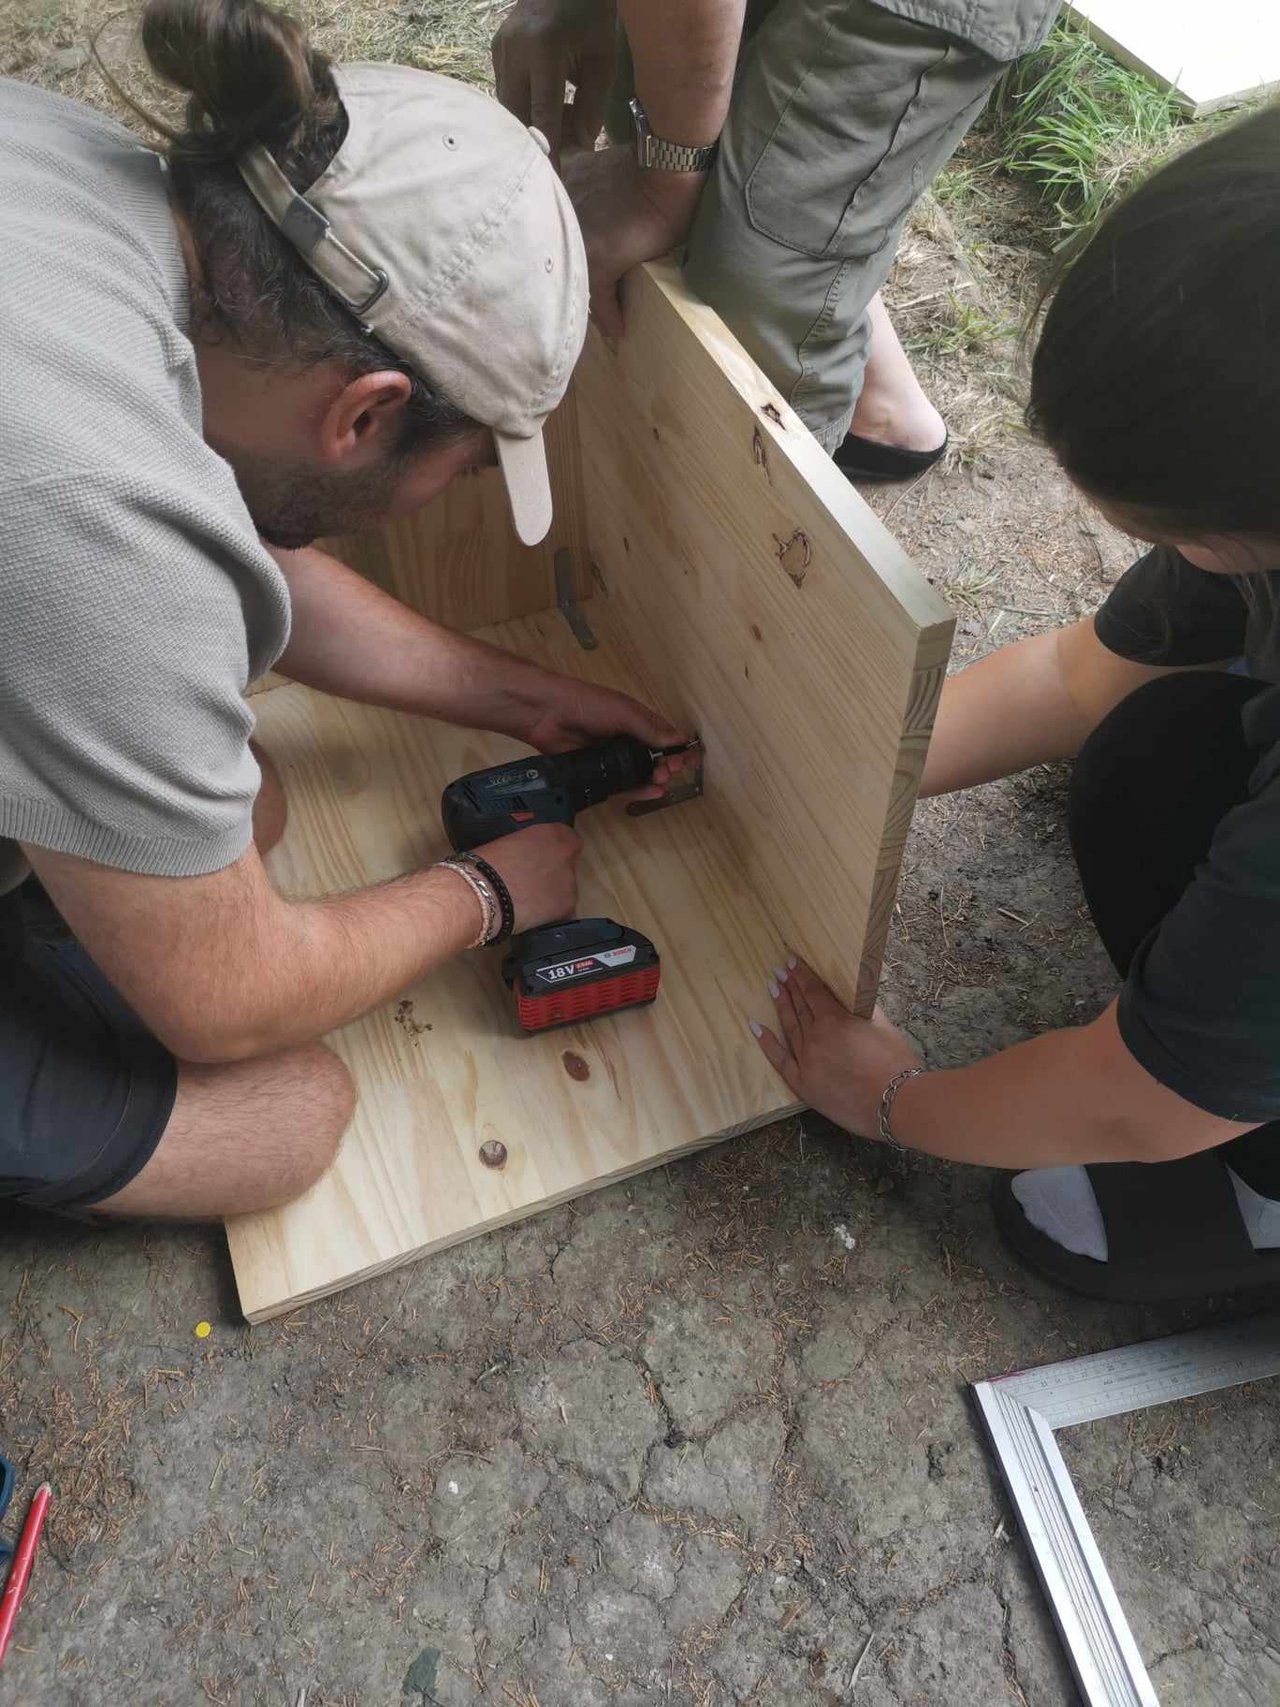
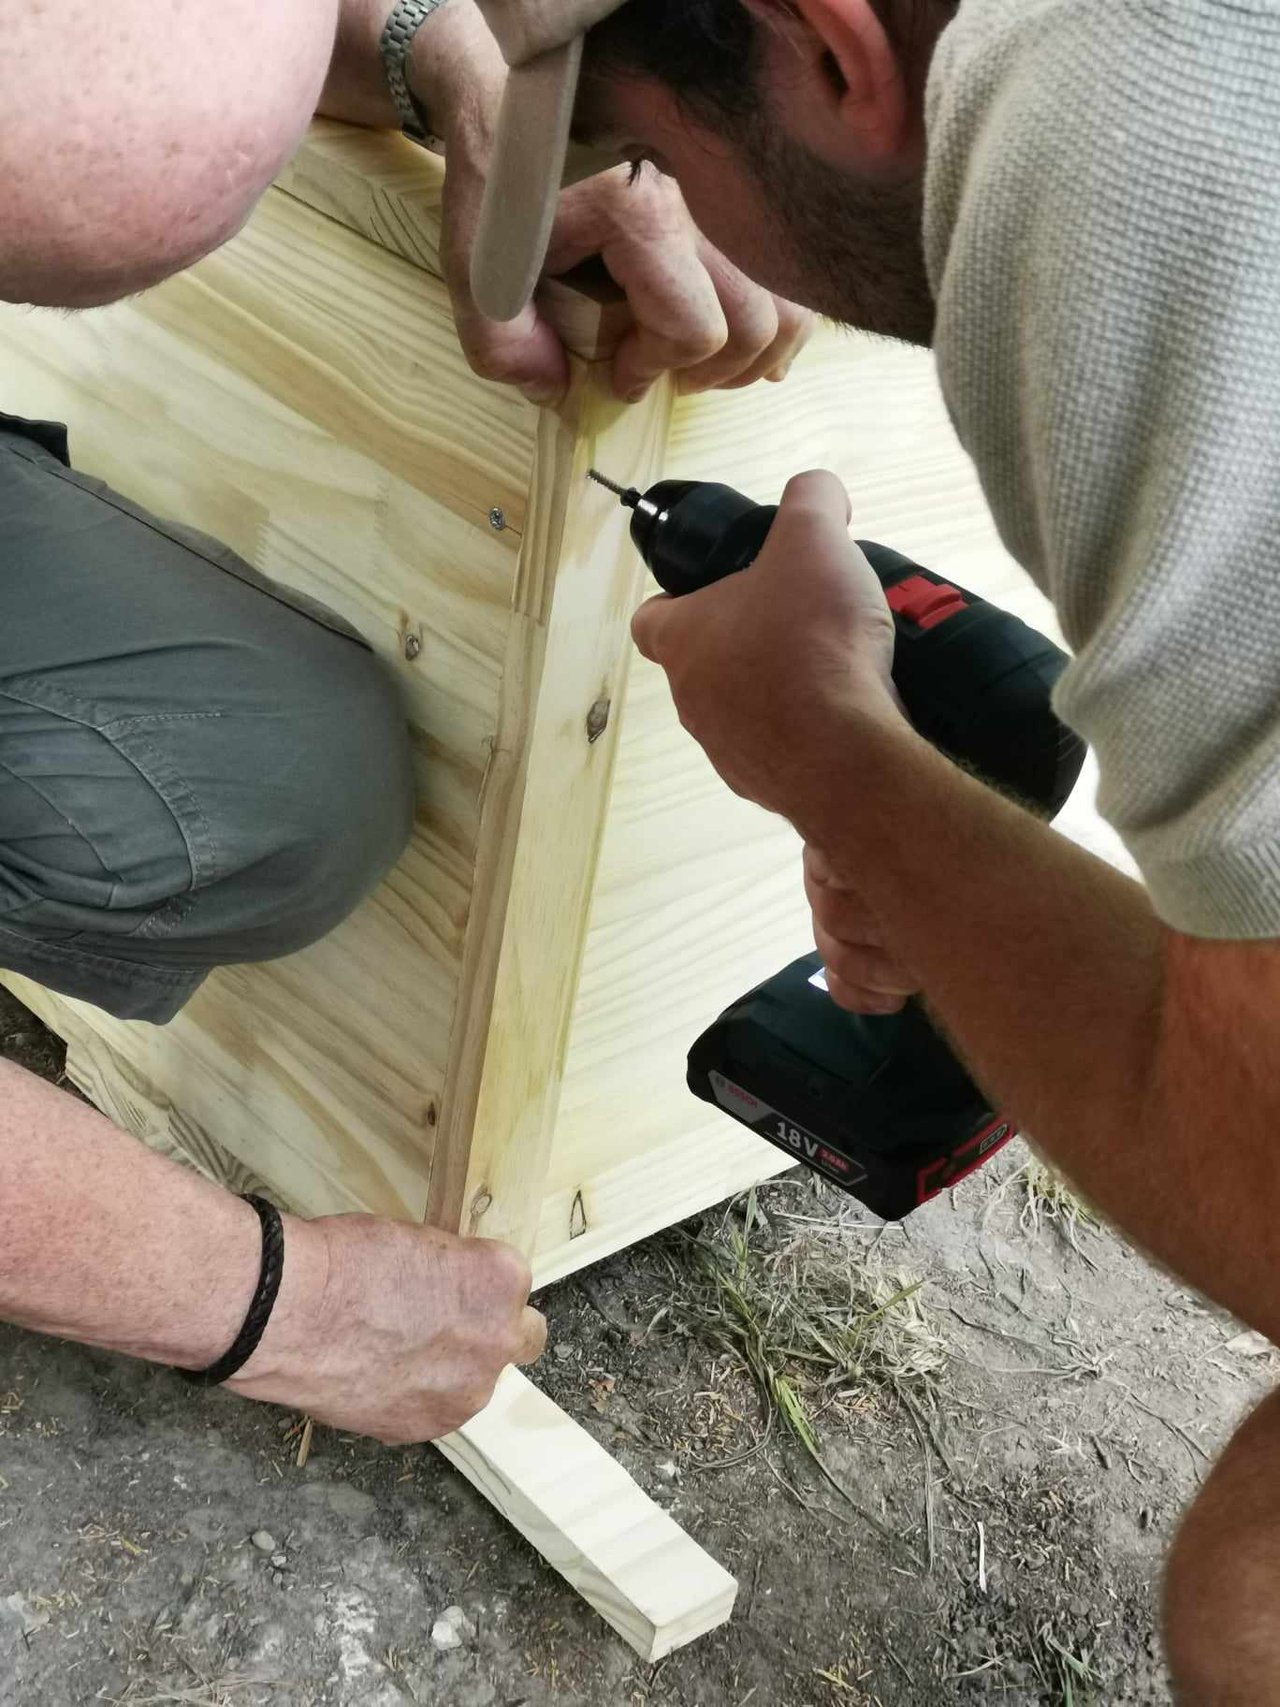
We started by securing the front face with a square. Then we placed long screws in several places to secure the two faces together.
After that, we fixed the other side: with angle brackets and long screws.
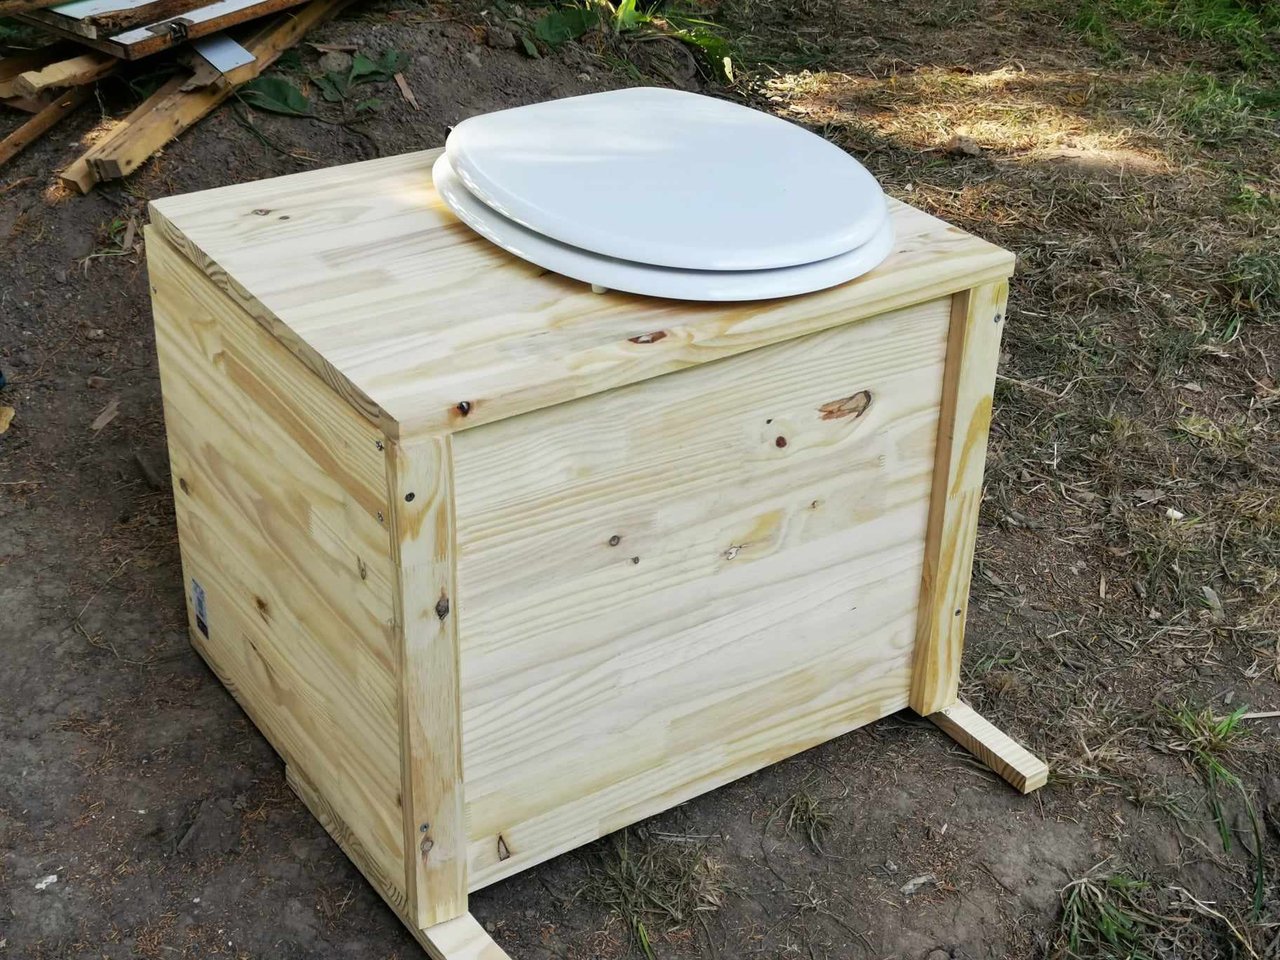
It's taking shape!
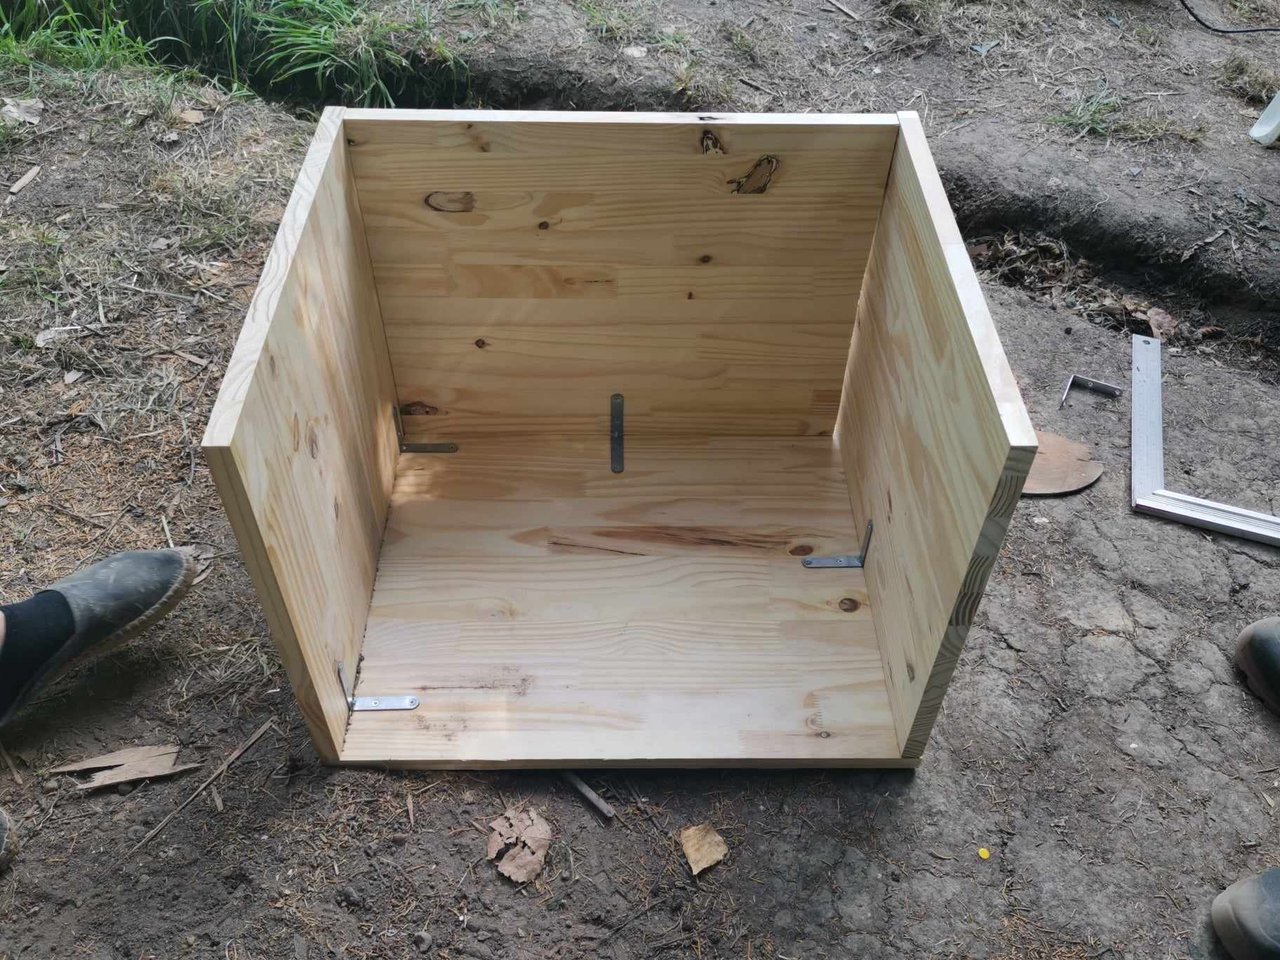
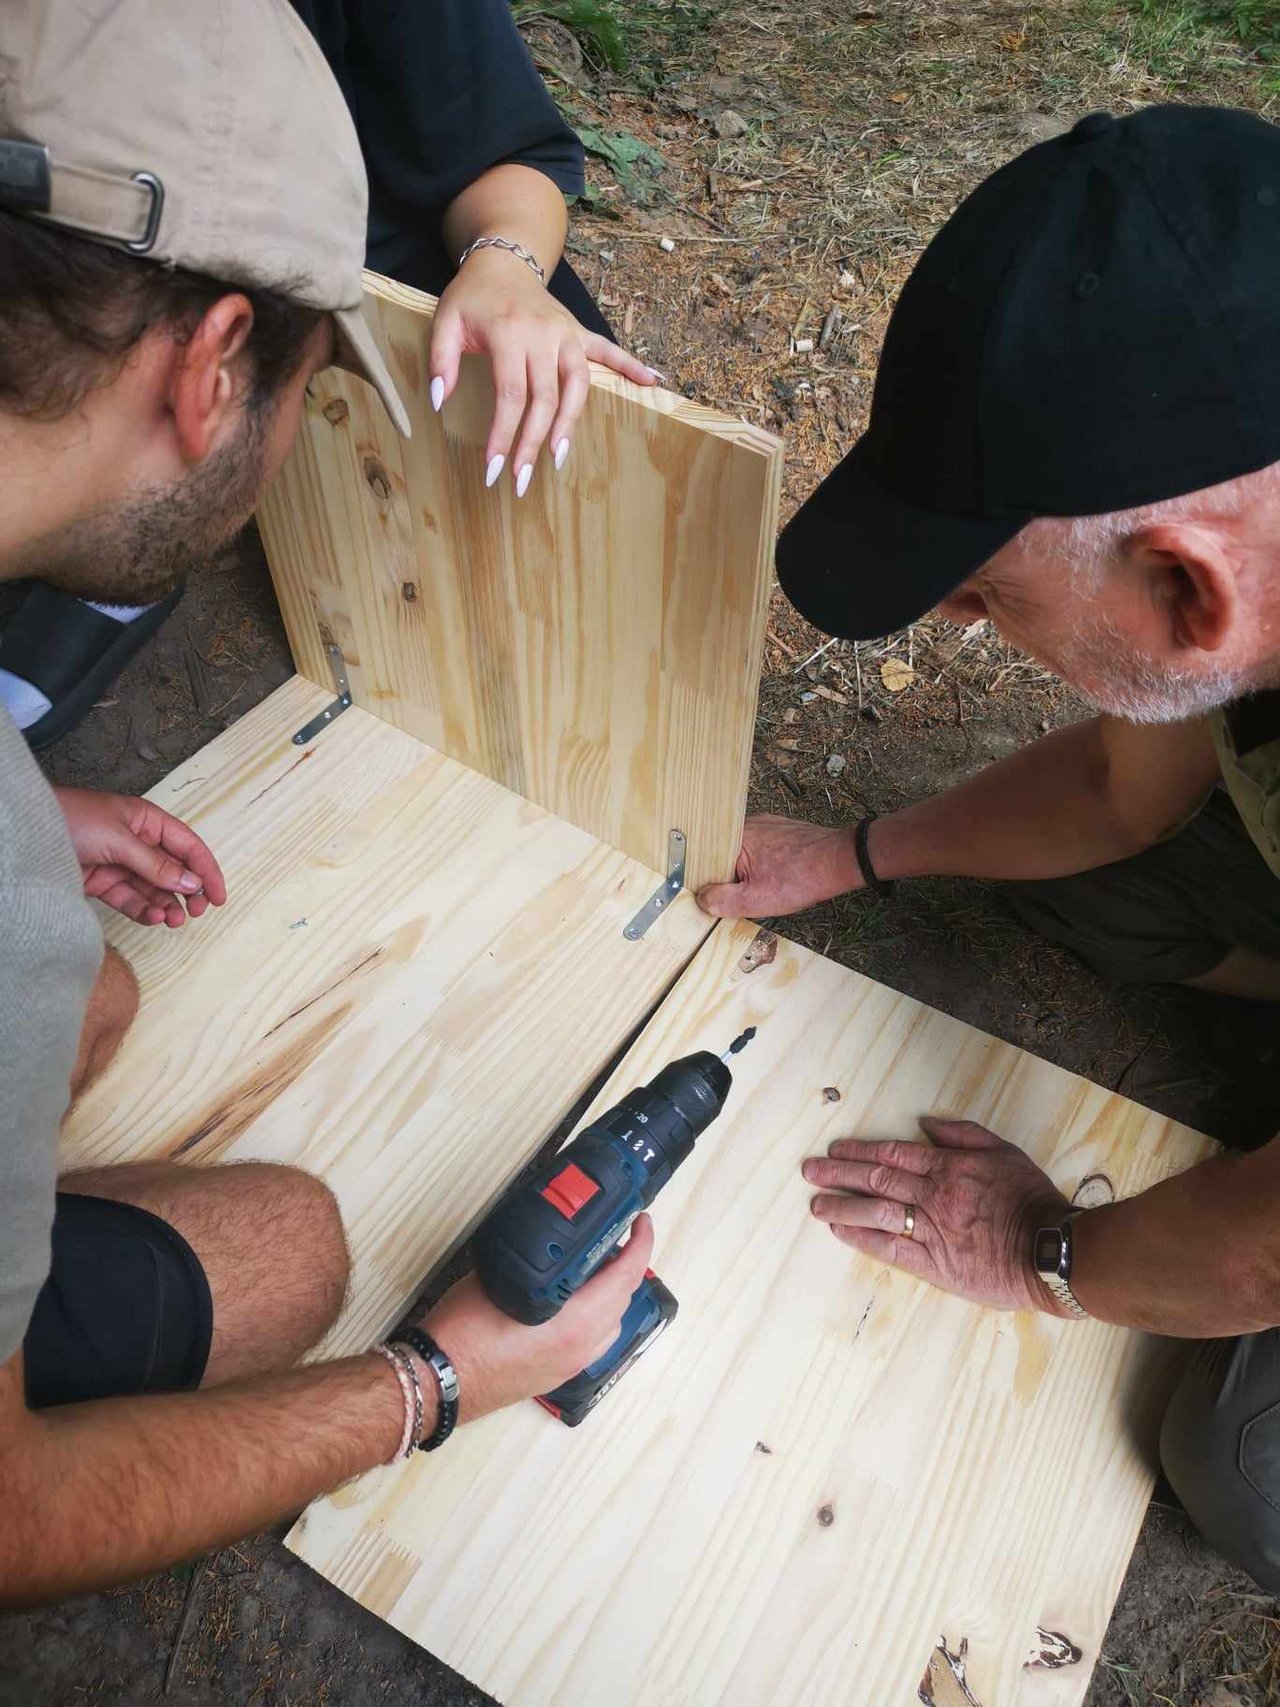
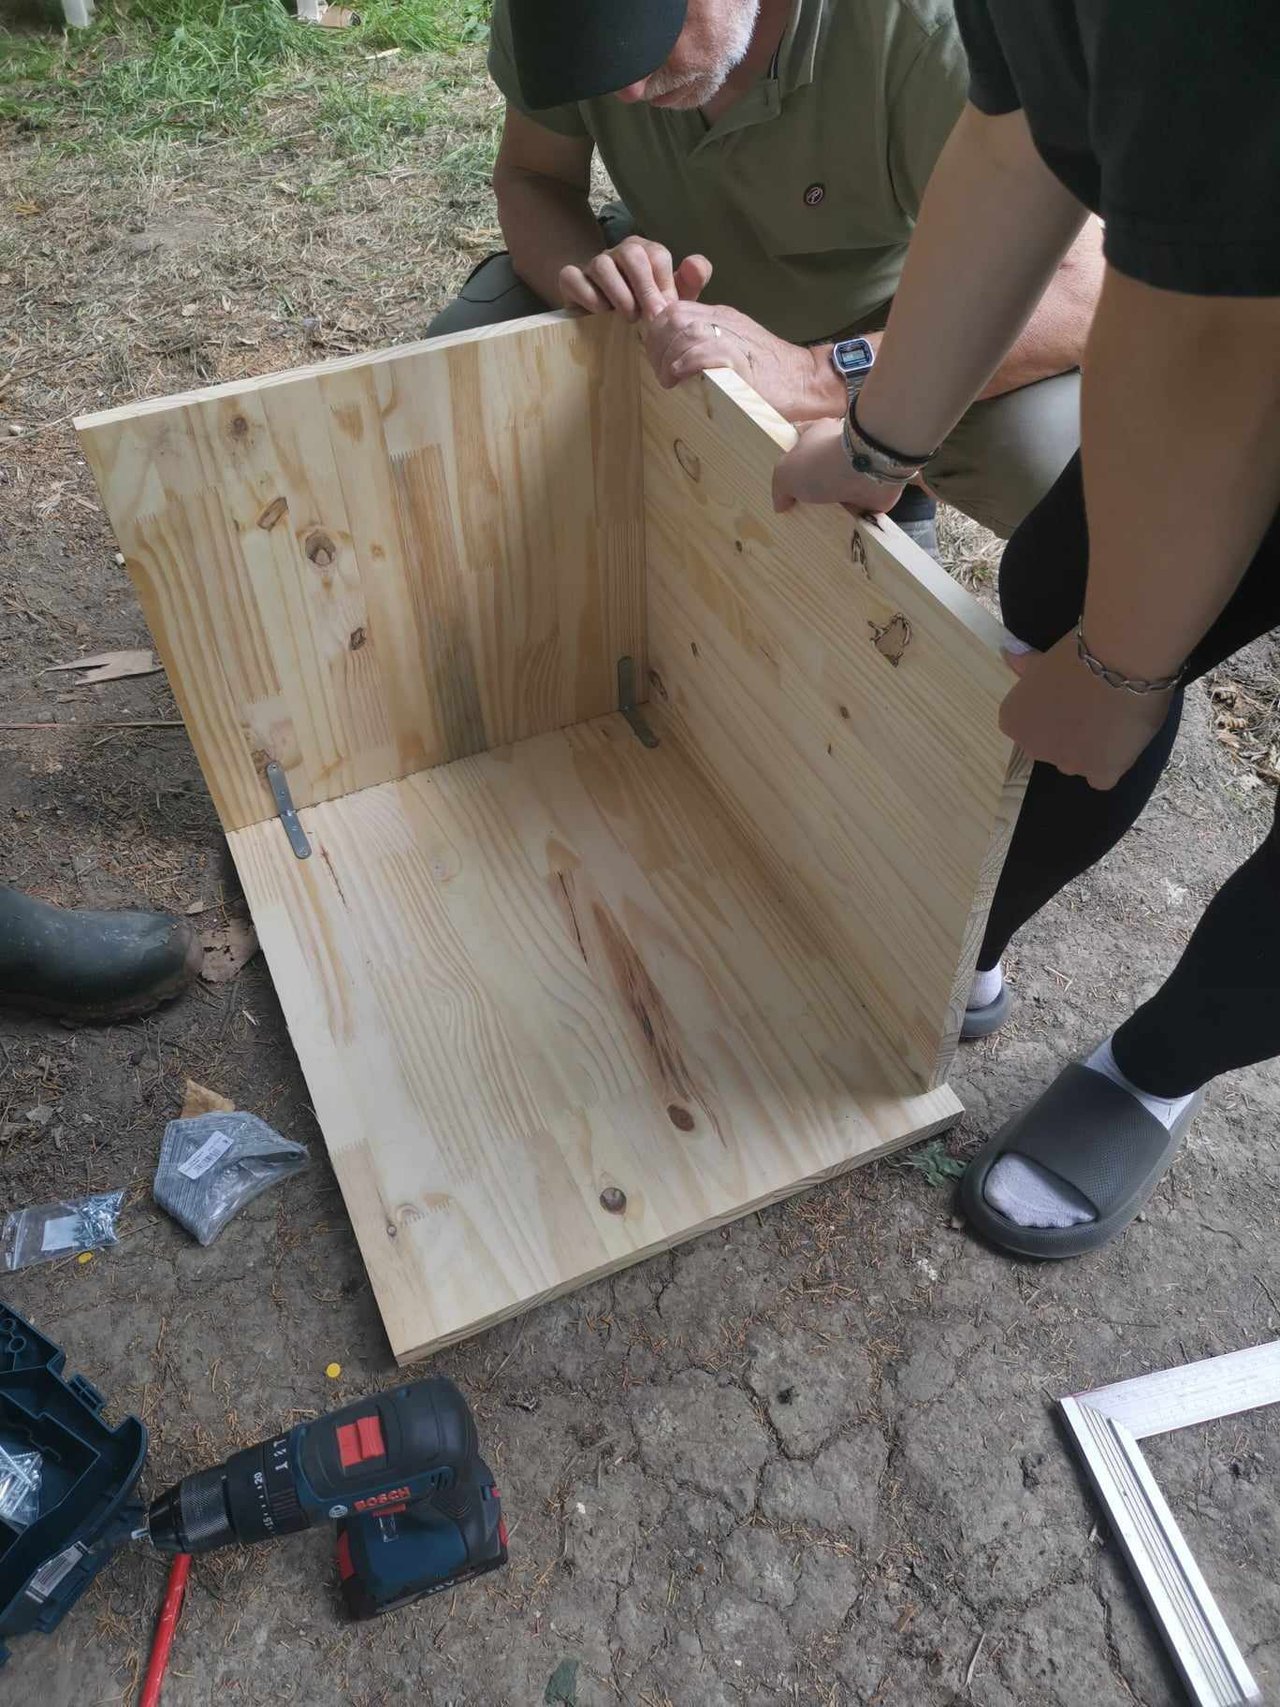
For the last face, the rear, we fixed it in the same way as the others: brackets and long screws.

And we were finally able to get on with the rest: placing the top face, which will be fixed with hinges to form a lid that can be opened and closed, cutting a hole to then fix the toilet seat, placing the divider board (between the bucket and the toilet paper compartment).
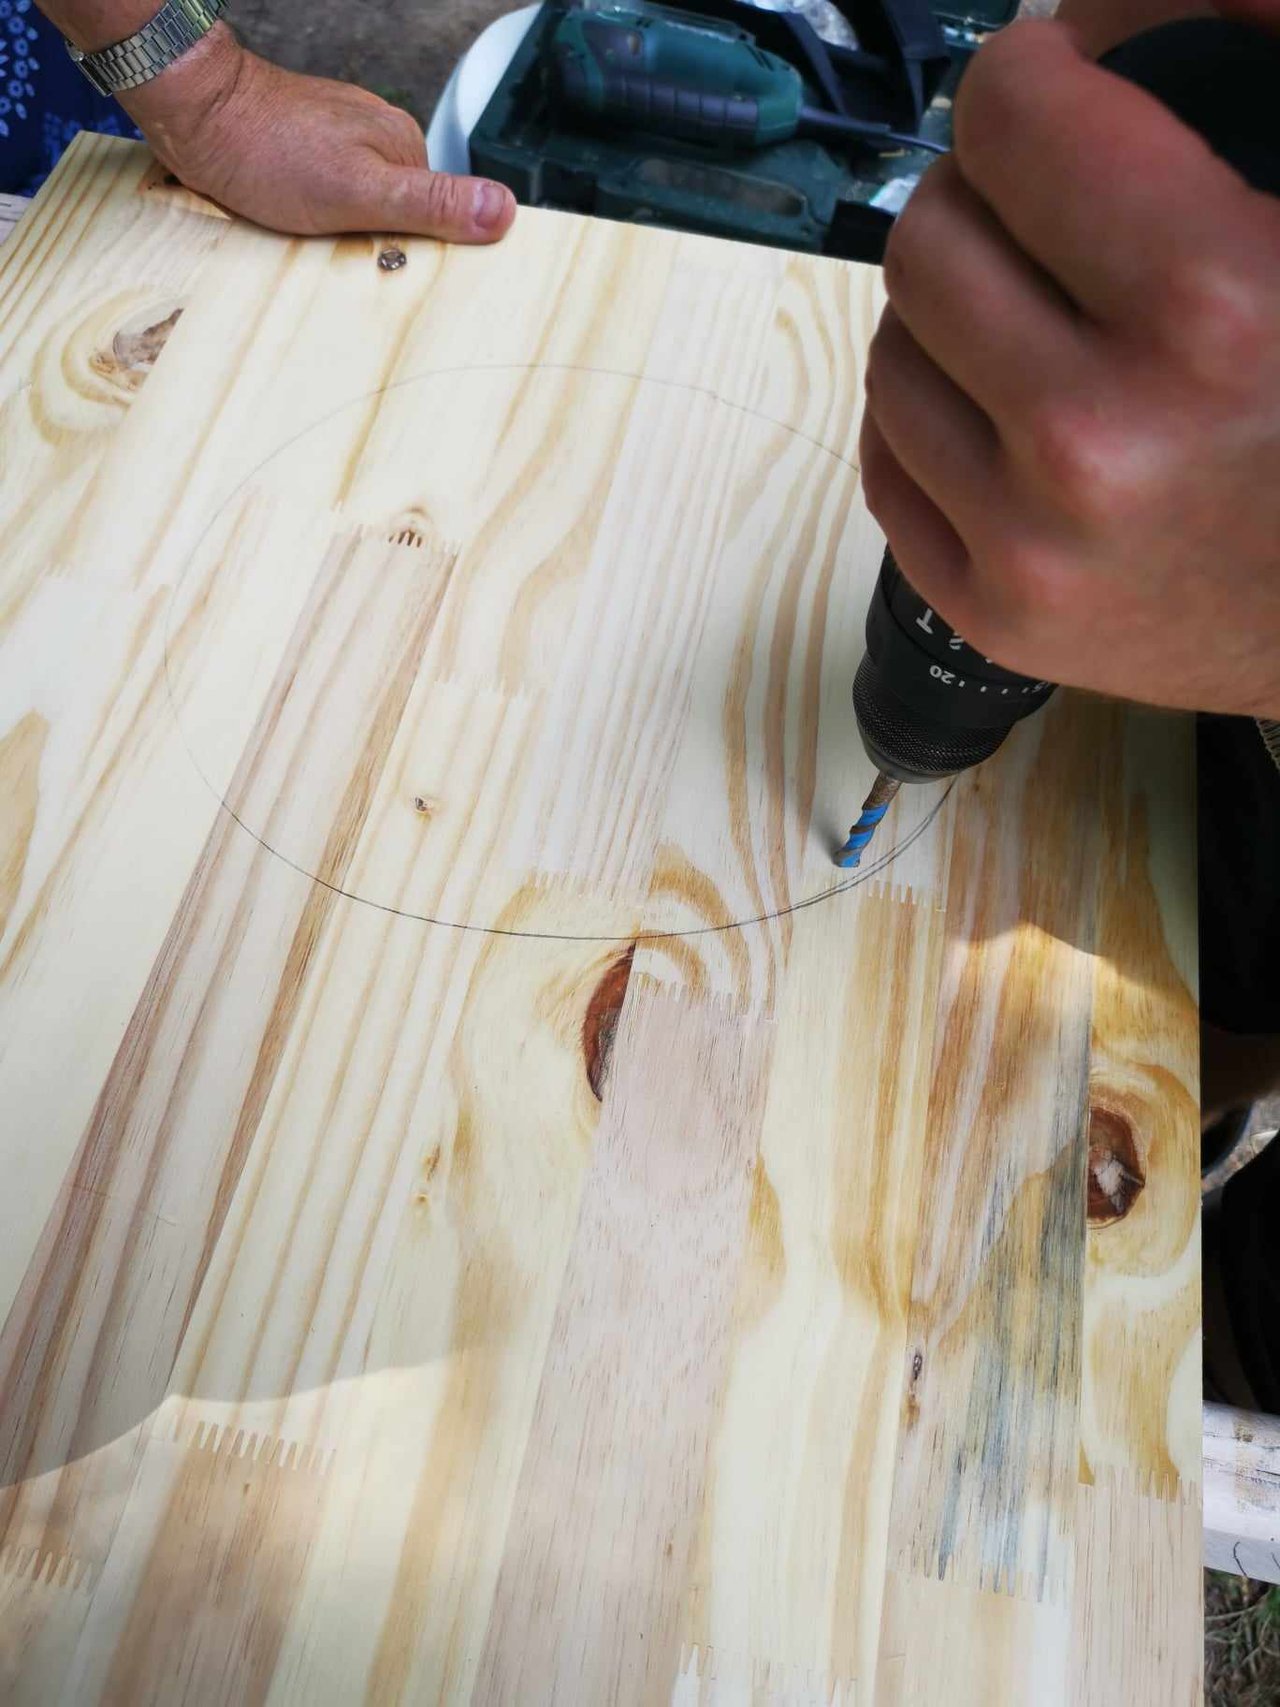
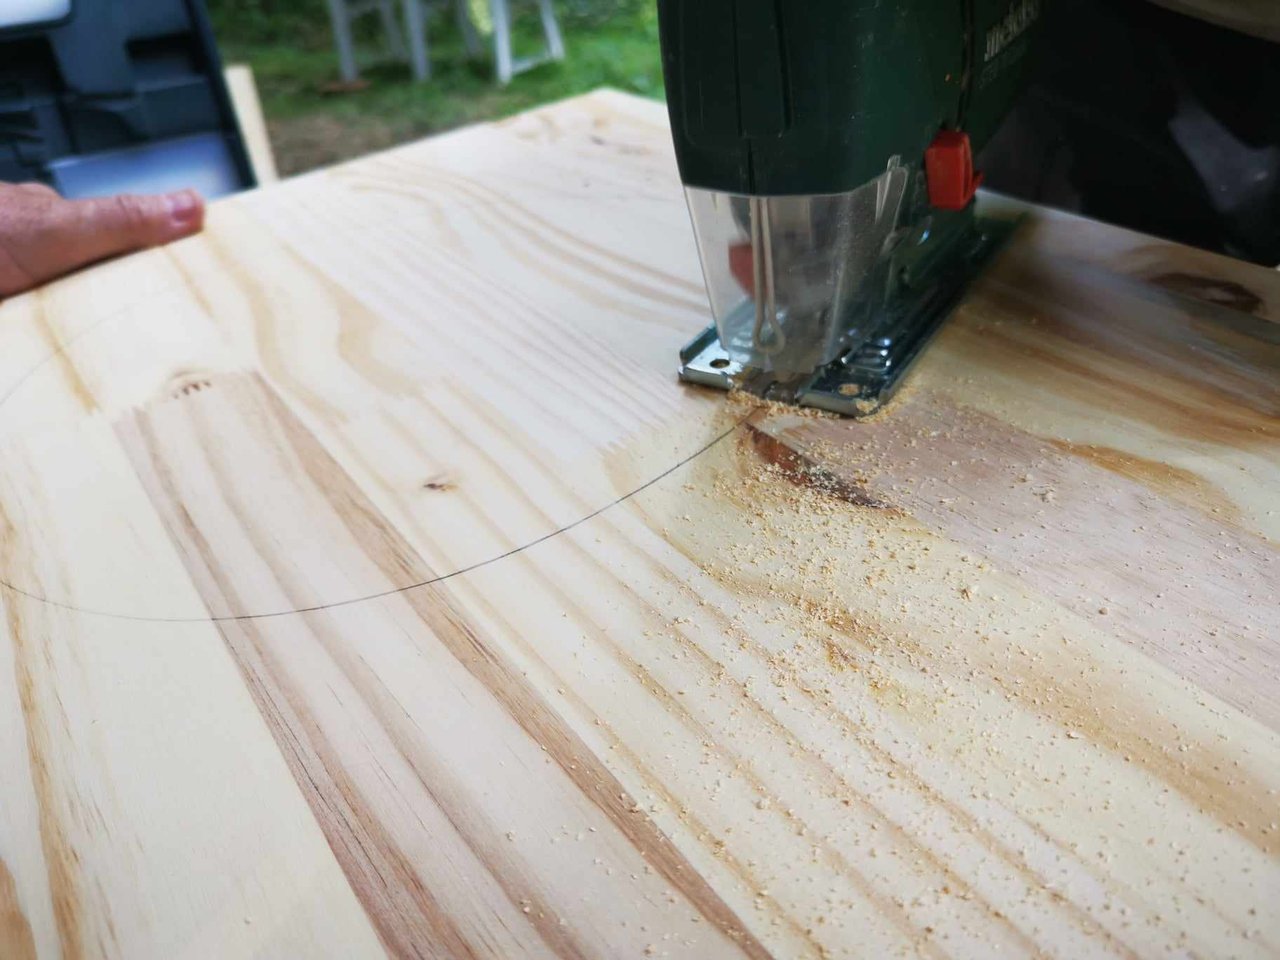
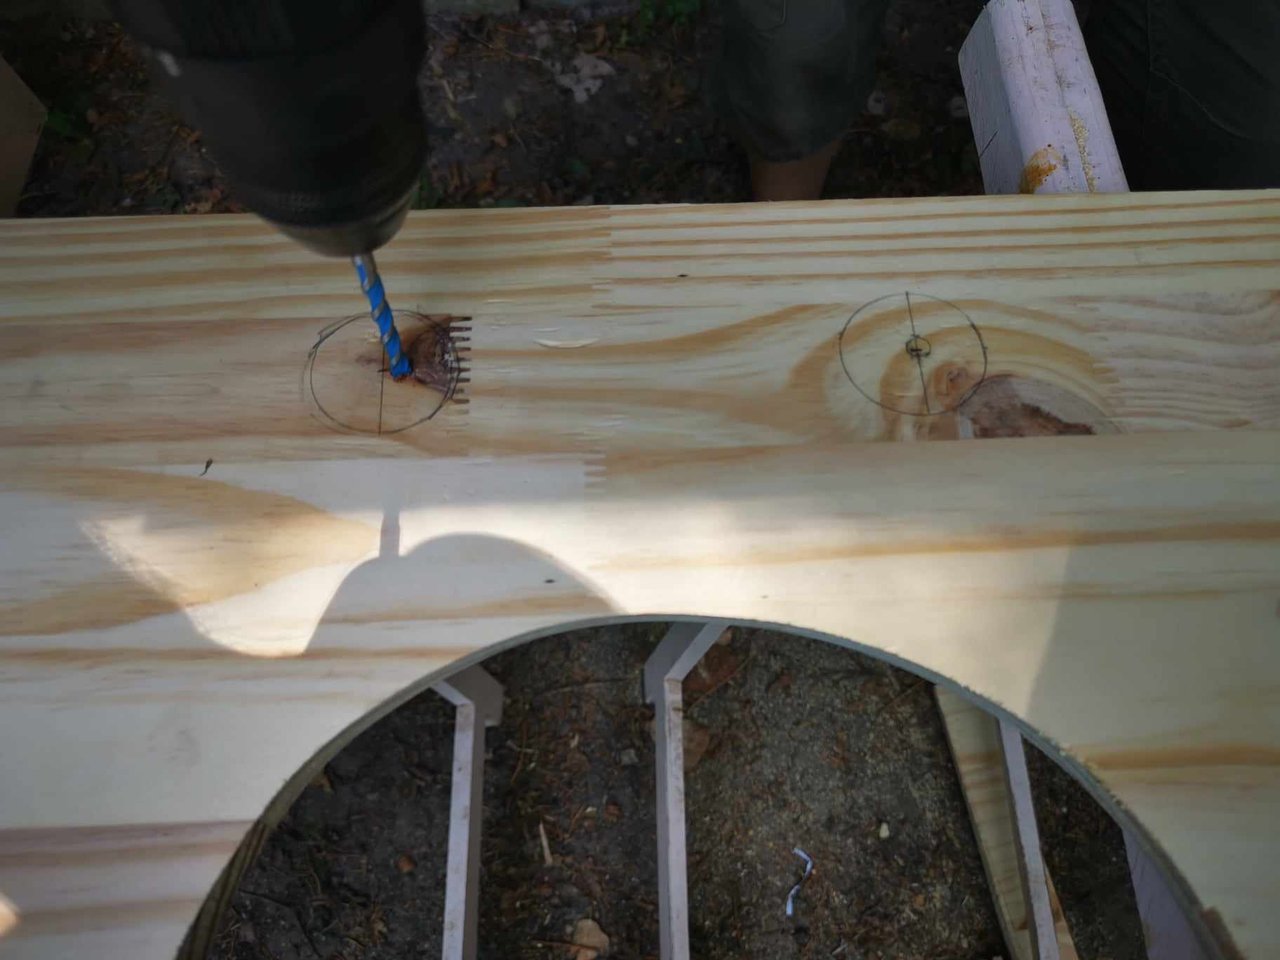
After temporarily positioning the top panel, we were able to determine the location of the toilet hole. To do this, we took the toilet seat, placed it as desired and drew a line inside the seat.
Here, we were trying to determine how much space to leave for the toilet paper compartment.
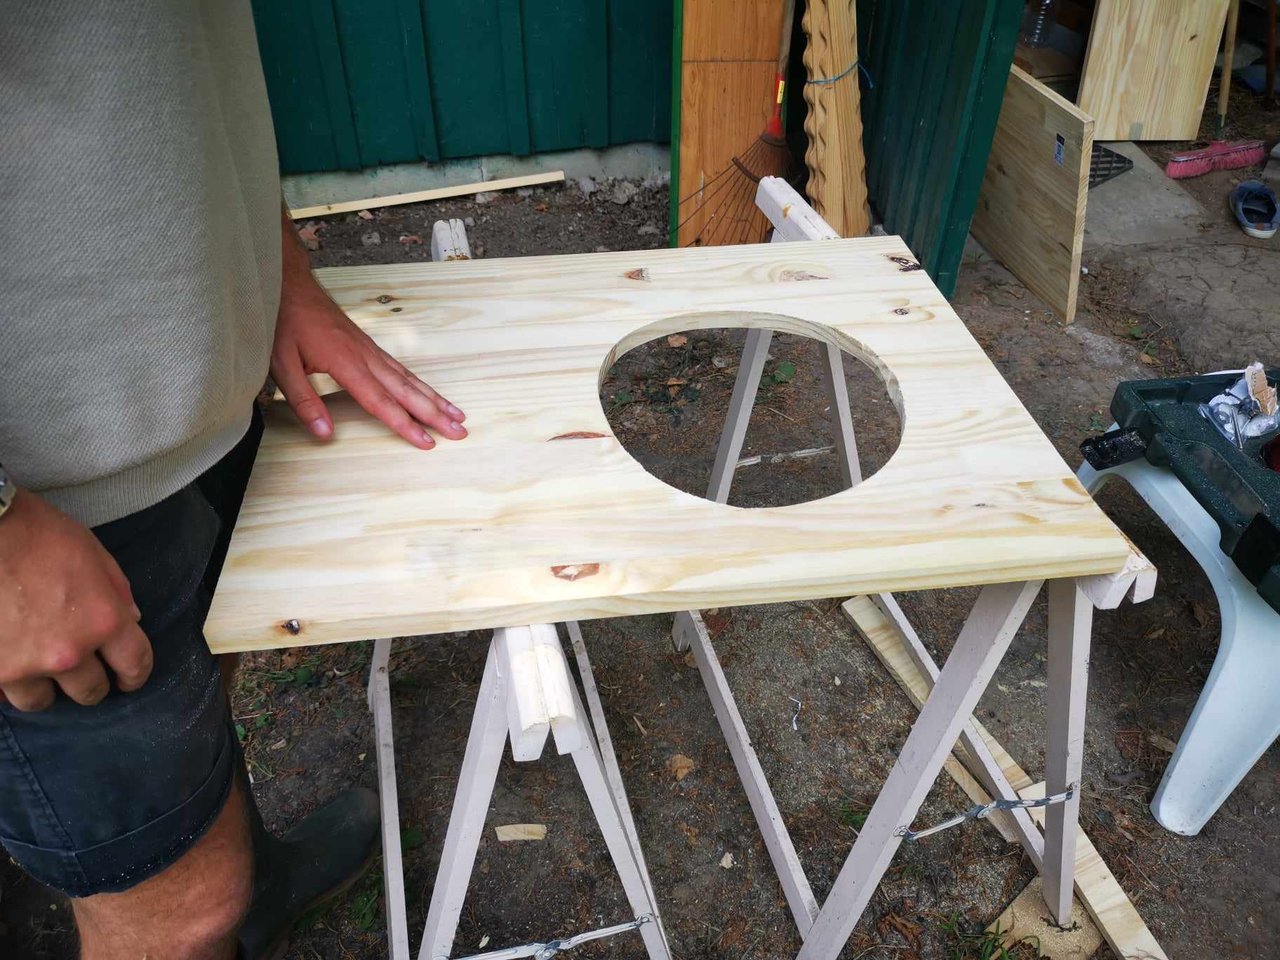
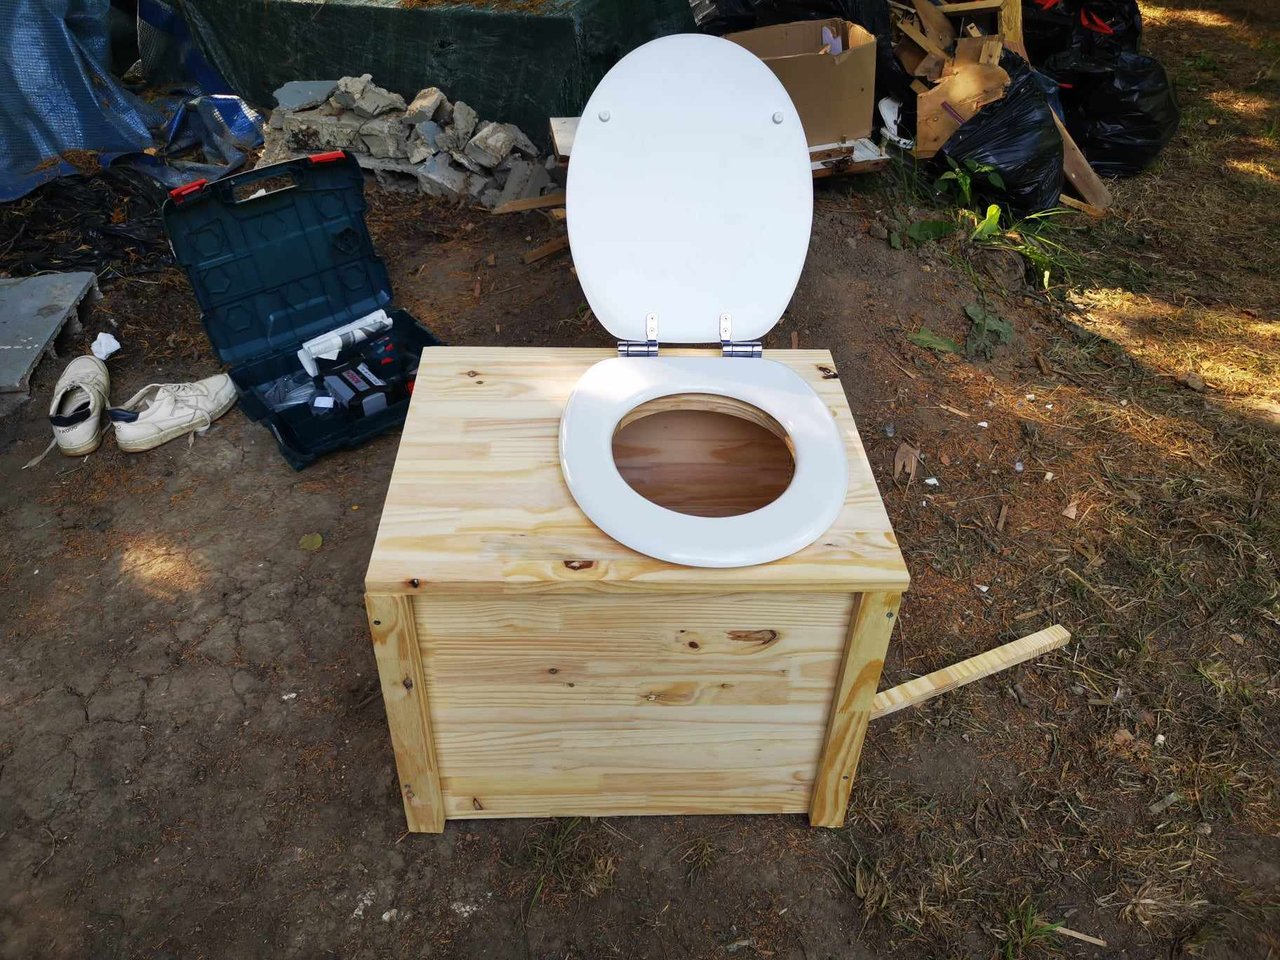
Anyway, to cut the toilet hole, we then drilled several holes with the drill and a large bit. Then we placed the jigsaw blade in the large hole formed by the small holes. Then we simply cut away, trying to make something clean.
And there you have it:
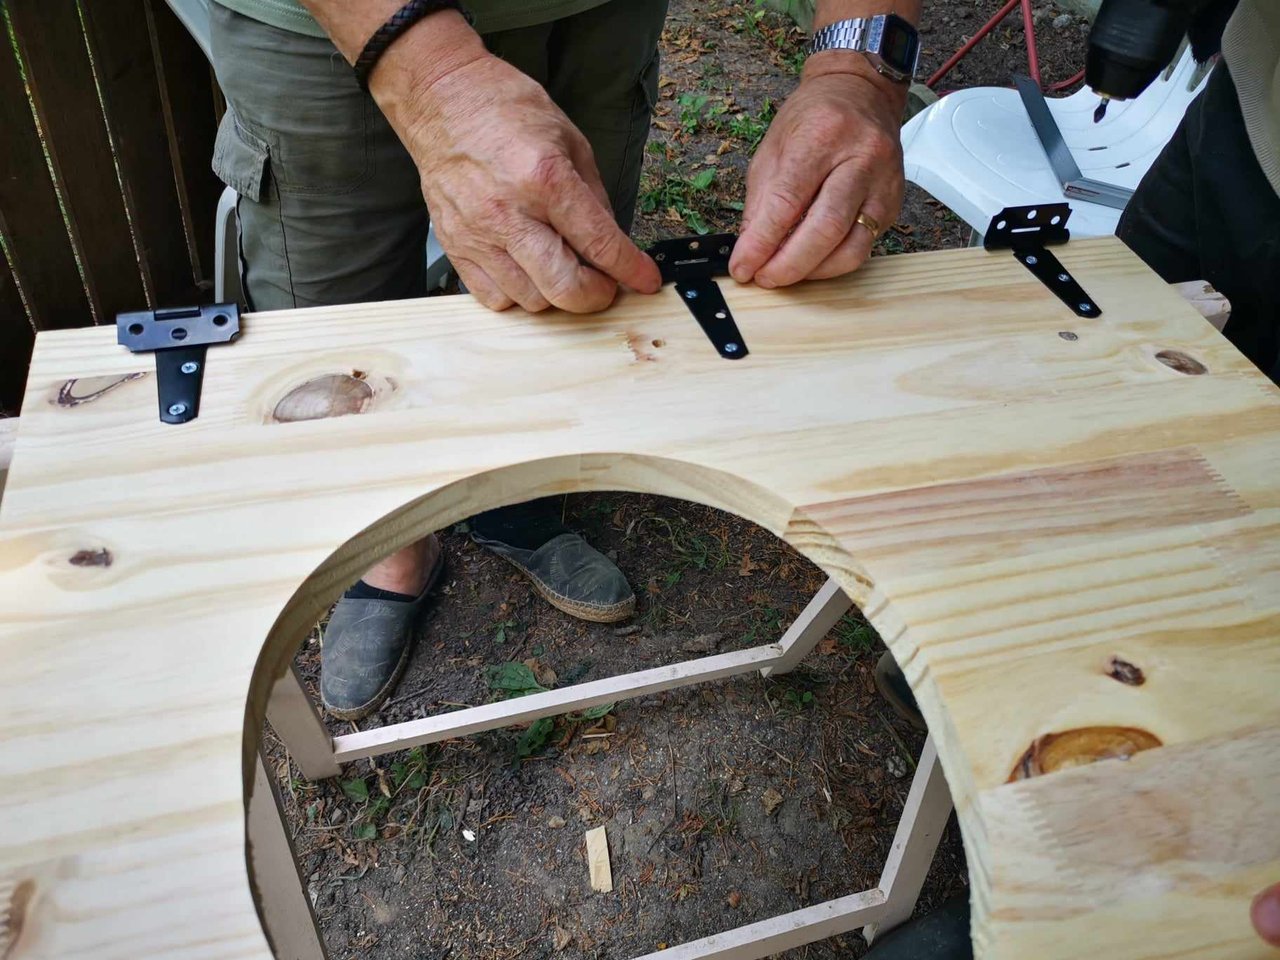
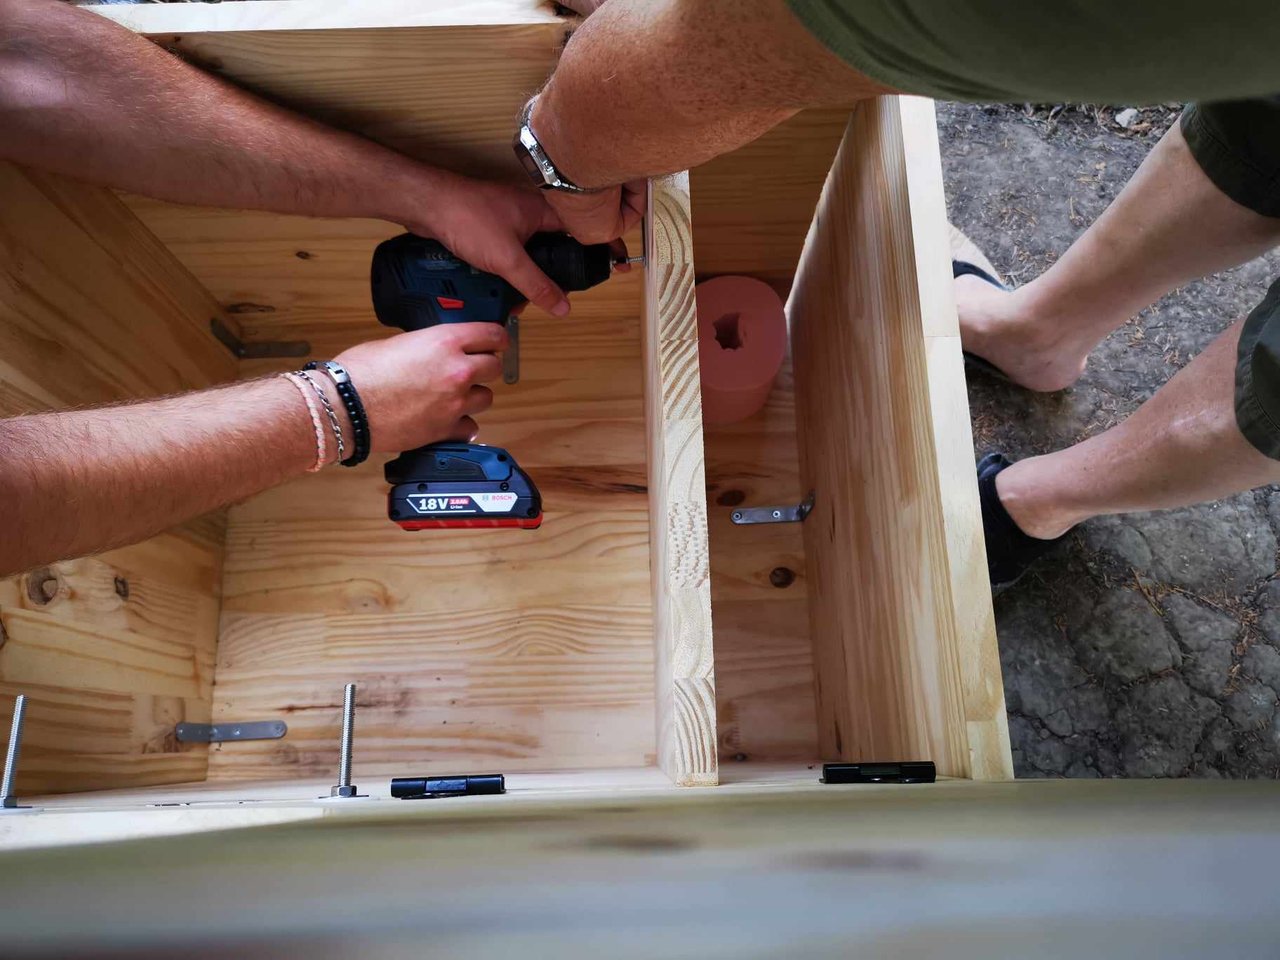
Next, we had to figure out where we were going to put the flap screws and drill the holes.
Then, finally, we were able to attach the hinges. Incidentally, we hesitated for a long time over how we were going to place them: inside or outside? top or bottom?
In the end, we decided to place them on the inside. And we started by attaching them to the face above. This seemed the simplest solution at the time.
Then we fixed the hinges to the inside of the toilet.
Here's how it looks:
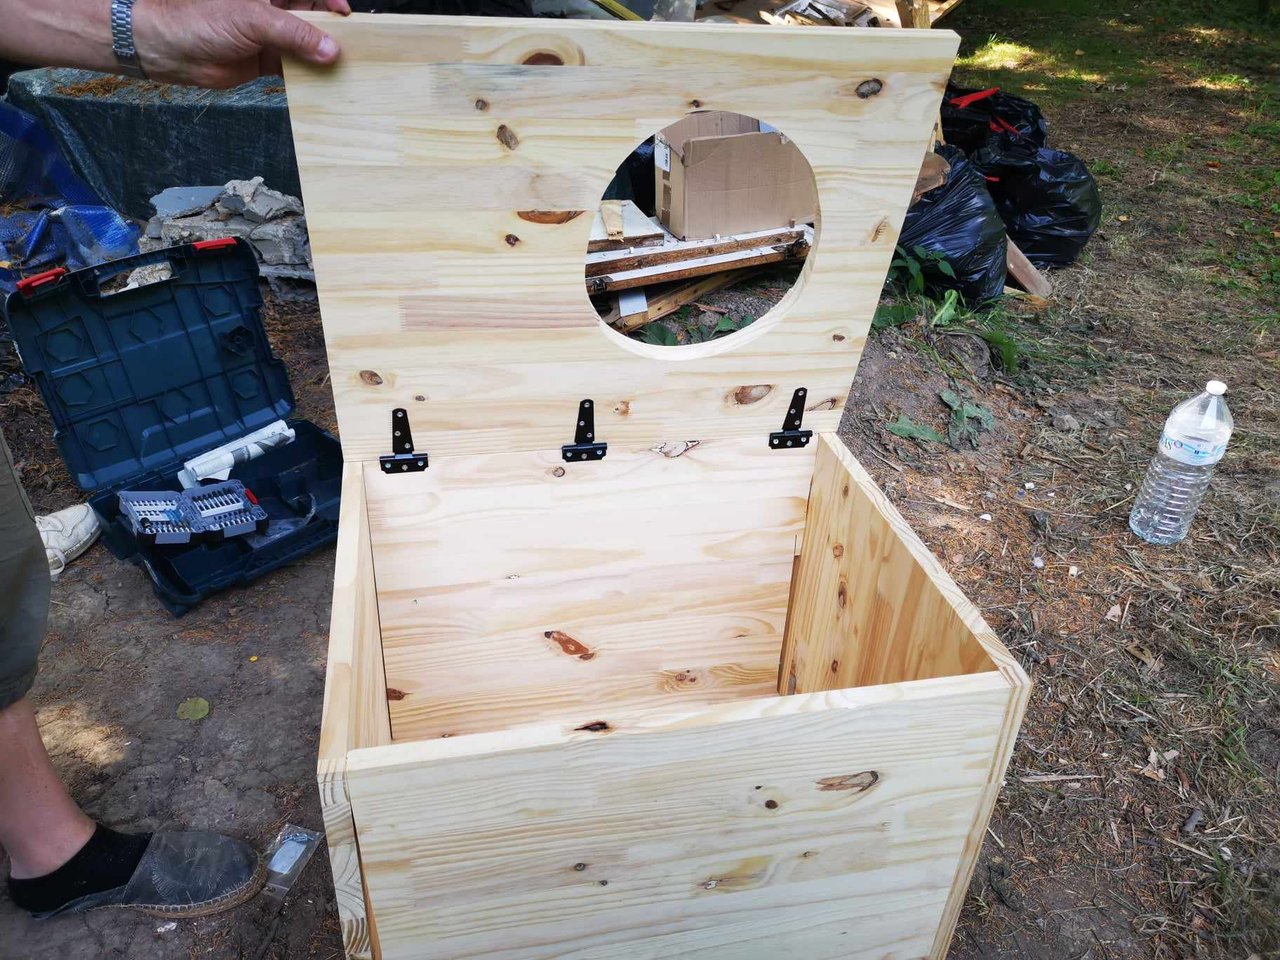
Next, we fixed the toilet seat, as well as the dividing space between the toilet compartment and the compartment for the toilet paper supply.
Now that the toilet is practically finished, we can move on to the finishing touches.
As I mentioned earlier in this post, we had to recut the front and back panels due to a miscalculation. And unfortunately, our cut-outs aren't straight at all, thanks to the jigsaw blade...
A photo is more telling:
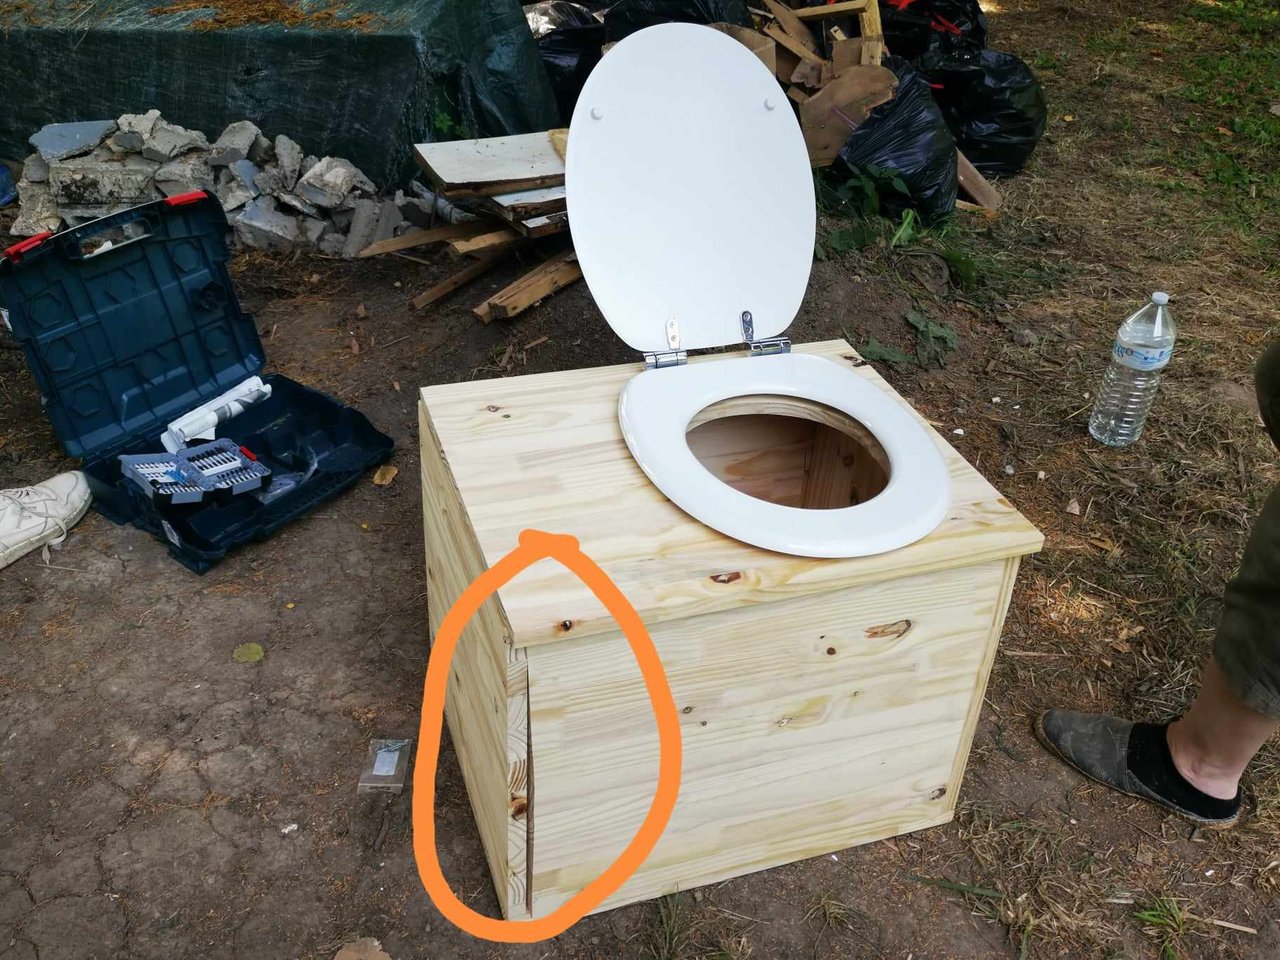
For me, it really wasn't possible to leave it like that. Visually, it was really ugly.
But my dad had a very good idea: to use scrap wood to make two strips that we'd glue to each side.
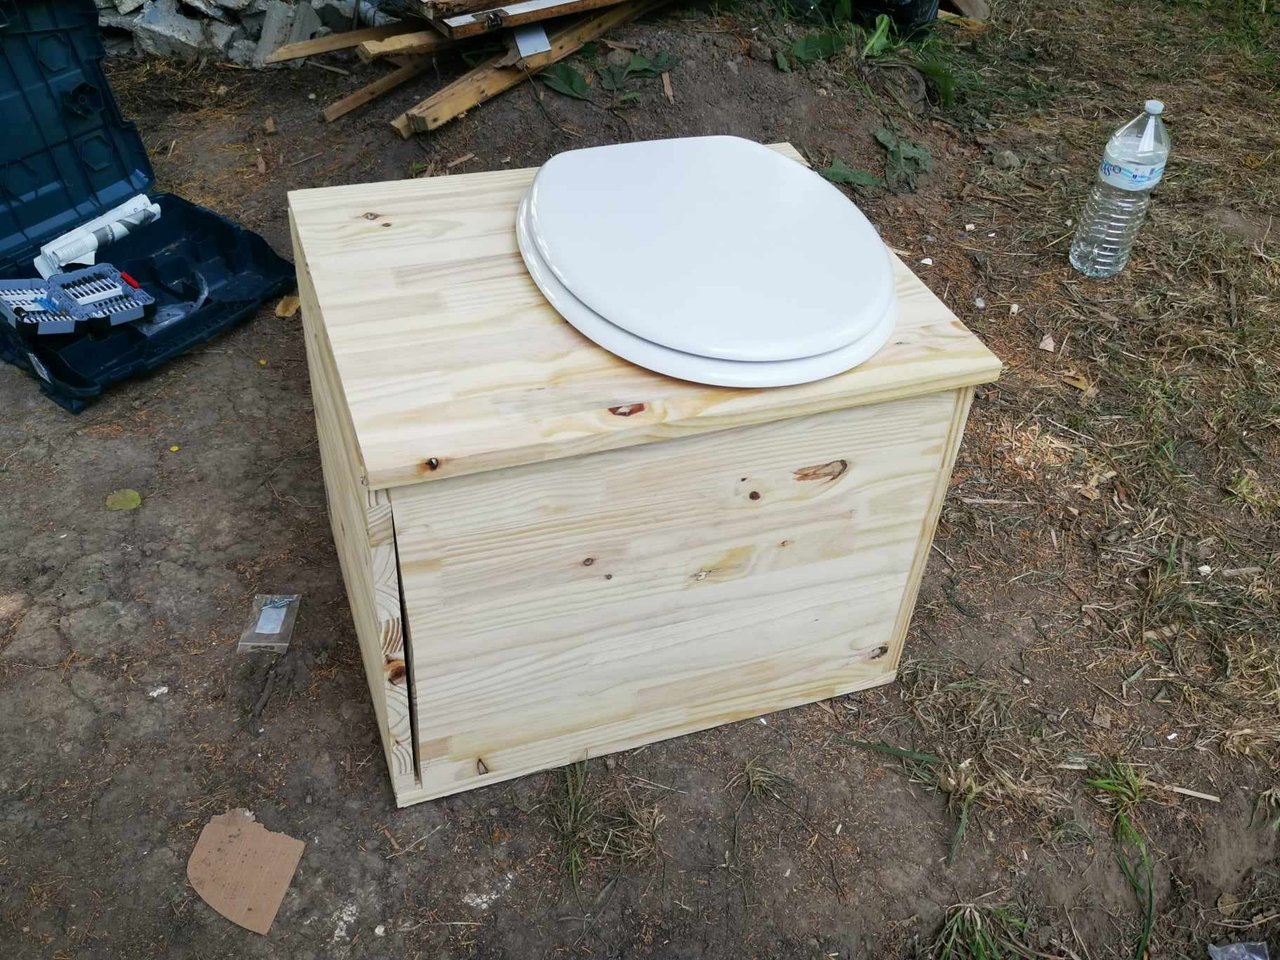
In the end, that's what we did, and we're really pleased with the result. (The pieces of wood on the floor are simply wedges - they're not part of the toilet).
Anyway, here's our dry toilet:
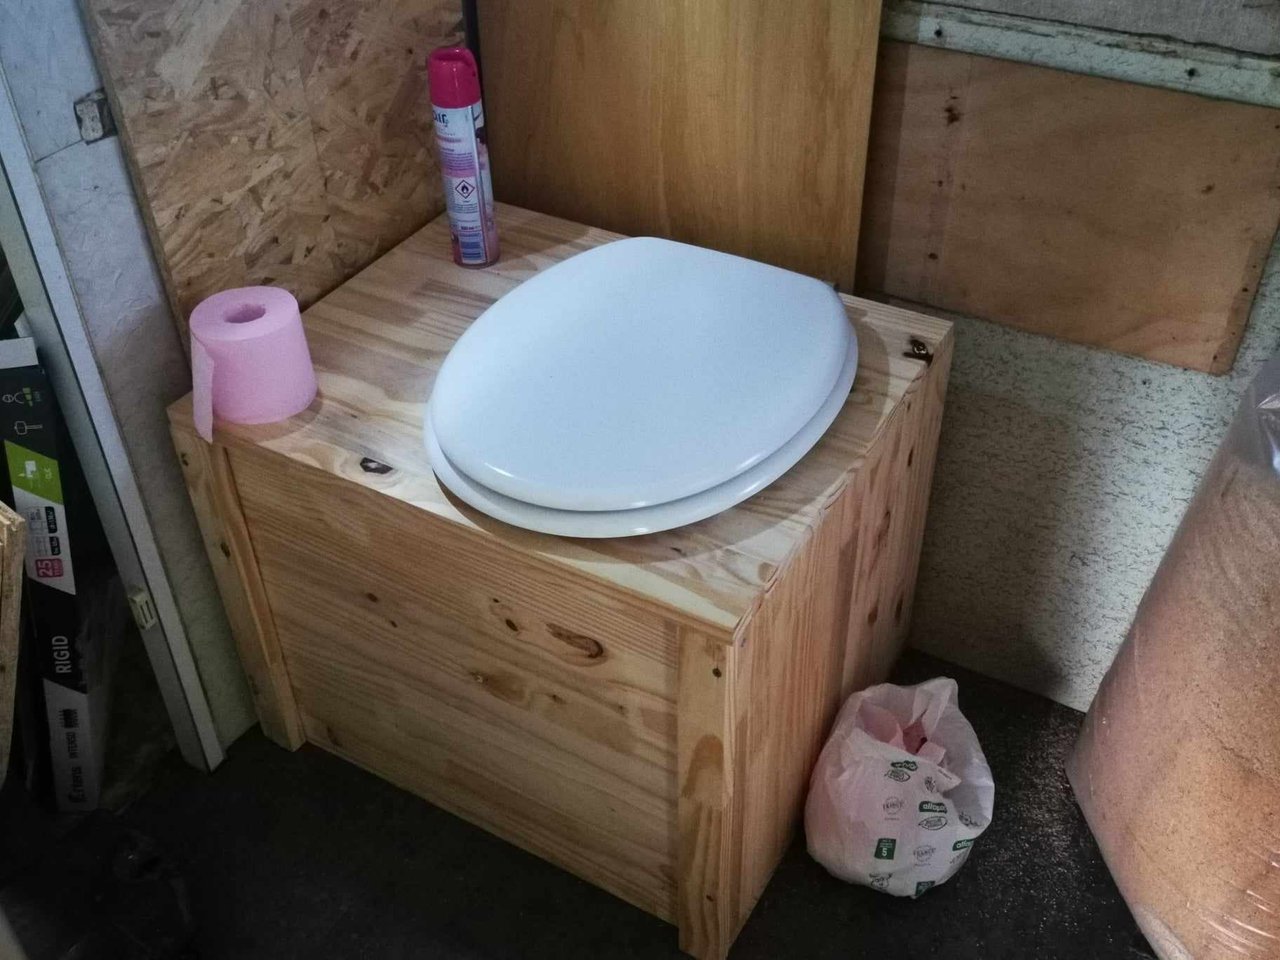
Disregard the absolutely atrocious walls in our bathroom, we'll be redoing them soon.
I hope you've enjoyed this little step-by-step DIY and that it'll give you some ideas for your interior designs.
Please let us know what you think of our new dry toilets.
See you soon,
Johanna
PS: I used Deepl to translate the english part.
Hello les amis et les DIYlovers !
Aujourd’hui, je souhaite partager avec vous la construction de nouvelles toilettes sèches pour notre tiny house.
En fait, pour les débuts, nous (@genesisledger et moi) avons choisi d'utiliser les toilettes sèches de notre van. Mais celles-ci ne sont pas vraiment adaptées à notre tiny house et elles ne sont pas très confortables.
Nous nous sommes donc lancé le défi d’en construire des nouvelles : plus hautes, plus confortables et surtout, plus adaptées à notre future salle de bain.
D’ailleurs, comme mes parents sont venus passer quelques jours chez nous, ils ont pu nous aider. Et cela leur a fait très plaisir de participer à l’aménagement de notre petite maison.
Étape 1 : Faire un plan
Comme je suis assez nulle en dessin, je n’ai pas pris le temps de dessiner de plan. Mais j’ai préféré schématiser par écrit.
J’ai regardé tout un tas de vidéos sur Youtube, puis j’ai combiné un peu le tout pour déterminer la forme et les dimensions.
Voici un aperçu des dimensions que j’avais à la fin de ma phase de réflexion :
Un grand cube de 62 cm de long sur 50 cm de large et 45 cm de hauteur.
Avec :
2 panneaux de 62 cm x 50 cm : 1 pour le dessus, 1 pour le dessous ;
2 panneaux de 62 cm x 45 cm : 1 pour le côté avant, 1 pour le côté arrière ;
2 panneaux de 50 cm x 45 cm : 1 pour le côté droit, 1 pour le côté gauche ;
1 planche de 45,8 cm x 45 cm : pour séparation intérieure.
Aujourd’hui, je souhaite partager avec vous la construction de nouvelles toilettes sèches pour notre tiny house.
En fait, pour les débuts, nous (@genesisledger et moi) avons choisi d'utiliser les toilettes sèches de notre van. Mais celles-ci ne sont pas vraiment adaptées à notre tiny house et elles ne sont pas très confortables.
Les toilettes sèches du van dans notre tiny house Nous nous sommes donc lancé le défi d’en construire des nouvelles : plus hautes, plus confortables et surtout, plus adaptées à notre future salle de bain.
D’ailleurs, comme mes parents sont venus passer quelques jours chez nous, ils ont pu nous aider. Et cela leur a fait très plaisir de participer à l’aménagement de notre petite maison.
Étape 1 : Faire un plan
Comme je suis assez nulle en dessin, je n’ai pas pris le temps de dessiner de plan. Mais j’ai préféré schématiser par écrit.
J’ai regardé tout un tas de vidéos sur Youtube, puis j’ai combiné un peu le tout pour déterminer la forme et les dimensions.
Voici un aperçu des dimensions que j’avais à la fin de ma phase de réflexion :
Un grand cube de 62 cm de long sur 50 cm de large et 45 cm de hauteur.
Avec :
- 2 panneaux de 62 cm x 50 cm : 1 pour le dessus, 1 pour le dessous ;
- 2 panneaux de 62 cm x 45 cm : 1 pour le côté avant, 1 pour le côté arrière ;
- 2 panneaux de 50 cm x 45 cm : 1 pour le côté droit, 1 pour le côté gauche ;
- 1 planche de 45,8 cm x 45 cm : pour séparation intérieure.
Étape 2 : Acheter les matériaux
Voici la liste des matériaux pour construire ces toilettes sèches :
- 2 panneaux de bois de 62 cm x 50 cm ;
- 2 panneaux de bois de 62 cm x 45 cm ;
- 2 panneaux de bois de 50 cm x 45 cm ;
- 1 panneau de bois de 45,8 cm x 45 cm ;
- Des équerres ;
- 3 charnières ;
- Des vis ;
- Un abattant de toilettes.
Pour acheter tous ces matériaux, nous sommes allés au magasin de bricolage le plus proche de chez nous. Ce magasin dispose d’un atelier bois et propose la découpe. Nous avons donc fait découper nos panneaux directement dans le magasin. Comme ça, il ne nous restait qu’à assembler.
Mais finalement, vous allez voir, nous avons dû modifier légèrement les dimensions.
D’ailleurs, si j’avais pris le temps de dessiner un plan, je me serais rendu compte avant que mes mesures n’étaient pas les bonnes. Mais bon, comme on dit : c’est en faisant des erreurs qu’on apprend.
Pour le bois, nous avons choisi de prendre du sapin, car c’est un bois relativement accessible en termes de prix, qu’il est plutôt résistant et qu’il est très esthétique.
Nous avons choisi des panneaux de 21 mm d’épaisseur.
Étape 3 : Assembler
Pour l’assemblage, nous avons commencé par prendre un des panneaux de 62 cm x 50 cm, celui du dessous. Et nous avons pris également un des panneaux de 50 cm x 45 cm pour fixer un des côtés des toilettes avec les équerres.
Une fois qu’on a défini où mettre les équerres, nous avons commencé par les fixer : d’abord sur la face du dessous, puis sur la face du côté.
Ensuite, nous avons pris la face avant pour la placer à l’endroit où elle devra être fixée. Et c’est là qu’on s’est rendu compte de mon erreur : je n’ai pas pris en compte l’épaisseur des panneaux lorsque j’ai défini les mesures.
Bref, nous avons dû recouper la face avant et la face arrière.
Et nous n’avions pas la bonne lame dans la scie sauteuse donc la découpe n’est pas droite. (Mais mon papa a trouvé une solution pour que cela ne se voie pas, je vous en parle un peu plus loin).
Donc, après avoir recoupé ces deux faces, on a pu continuer l’assemblage.
Nous avons commencé par fixer la face avant à l’aide d’une équerre. Puis, nous avons placé de longues vis à plusieurs endroits pour fixer les deux faces entre elles.
Après cela, nous avons fixé l’autre face du côté : avec des équerres et des longues vis.
Cela prend forme !
Pour la dernière face, la face arrière, nous l’avons fixée de la même manière que les autres : équerres et longues vis.
Et on a enfin pu passer à la suite : placement de la face supérieure qui sera fixée avec des charnières pour former un couvercle qu’on peut ouvrir et fermer, découpe d’un trou pour ensuite y fixer l’abattant de toilettes, placement de la planche de séparation (entre le sceau et le compartiment pour le papier toilette).
Après avoir placé temporairement la face du dessus, nous avons pu déterminer l’emplacement du trou des toilettes. Pour cela, nous avons pris l’abattant, placé comme on le souhaitait et on a tracé un trait à l’intérieur de l’abattant.
Ici, on essayait de déterminer quelle place laisser au compartiment pour papier toilette.
Bref, pour découper le trou des toilettes, on a ensuite percé plusieurs trous avec la perceuse et une grosse mèche. Puis on a placé la lame de scie sauteuse dans le gros trou formé par les petits trous. Et on a simplement découpé en essayant de faire un truc propre.
Et voilà un super trou :
Ensuite, nous avons dû déterminer où on allait mettre les vis de l’abattant et percer les trous.
Puis, nous avons enfin pu fixer les charnières. D’ailleurs, nous avons longuement hésité sur la manière dont on allait les placer : intérieur ou extérieur ? haut ou bas ?
Bref, nous avons choisi de les placer à l’intérieur. Et nous avons commencé par les fixer sur la face du dessus. C’est la solution qui nous a paru la plus simple sur le coup.
Et ensuite, nous avons pu fixer les charnières à l’intérieur des toilettes.
Voici ce que ça donne :
Ensuite, on a fixé l’abattant de toilette, ainsi que la place de séparation entre le compartiment toilette et le compartiment pour la réserve de papier toilette.
Maintenant que les toilettes sont pratiquement terminées, nous pouvons passer aux finitions.
Comme je vous l’ai dit un peu plus haut dans ce post, nous avons dû recouper la face avant et la face arrière à cause d’une erreur de calcul. Et malheureusement, nos découpes ne sont pas du tout droite, à cause de la lame de la scie sauteuse…
Une photo, c’est plus parlant :
Pour moi, ce n’était vraiment pas possible de laisser cela comme ça. Visuellement, c’était vraiment moche.
Mais mon papa a eu une très bonne idée : utiliser des chutes de bois pour fabriquer deux tasseaux qu’on viendrait coller de chaque côté.
Finalement, c’est ce que nous avons fait et nous sommes franchement très contents du résultat. (les morceaux de bois au sol sont simplement des cales, elles ne font pas partie des toilettes).
Bref, voici nos toilettes sèches :
Ne tenez pas compte des murs absolument atroces de notre salle de bain, nous allons bientôt les refaire.
J’espère que ce petit DIY pas à pas vous a plu et qu’il vous donnera des idées pour vos aménagements intérieurs.
N’hésitez pas à nous dire ce que vous pensez de nos nouvelles toilettes sèches.
À bientôt,
Johanna
PS : J’ai utilisé Deepl pour traduire la partie en anglais.
Comments